Building and compilation
LyciaStudio offers several ways in which the resources in the Workbench can be built or compiled. Building and compilation operate on the resources that have changed since the last build or compilation. You can use the clean tool or the rebuild tool, if you want to rebuild the resources which have already been built before.
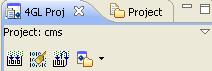
The tools used for building and compilation can be found:


Building tools
There are several tools which are used to build or compile the resources:


-
To build a complete project, press the Build ( ) button on the 4GL Project View toolbar, or select the Project -> Build Project option from the main menu.
-
To build all the projects present in the workbench, press the Build All ( ) button on the main toolbar or select the Project -> Build All option. All the projects will be built, if this option is activated. The order in which the projects get built can be set in the Preferences -> General -> Workspace -> Build Order preferences page. For more details see the "Preferences Menu" chapter.
If a project contains many source files, it may take Lycia some time to build them all. You can observe the progress in the "Progress" View which can be opened by pressing its icon in the bottom right –hand corner of the Workbench:

Here you can interrupt the building by pressing the red "stop" button ( ). This view also reflects the progress of cleaning operations.
If you use the Build All option, Build Working Set option or any other option which builds several projects together, you will be presented with a Build dialog which shows the progress of the building and what project is now being built:

Press the Run in Background button to hide the dialog. When the dialog is hidden you can observe the build progress in the "Progress" View. You can select the "Always run in background" option to hide this dialog every time a build of multiple projects is performed. This dialog also reflects the progress of cleaning operations.
Building a working set
A number of projects united in one group that can be manipulated simultaneously are called a working set. To build a working set select the Project -> Build Working Set option and choose the working set you want to build.
If no working set is currently available, you can create one by the following method:
-
Select the Project -> Build Working Set ->Select Working Set menu option:

-
You will be presented with the dialog that is used to manage working sets:

-
Press the New button to create a new working set, select the "Resource" option in the dialog that will appear and press the Next button:

-
In the next dialog, you can select the projects you wish to be included into the working set. Enter the name for the working set in the corresponding field:

A working set does not necessarily include complete projects; it can include separate folders or source files which you want to be compiled together. To select the files and folders, unfold the project tree by pressing the plus button.
-
Press the Finish button after you have selected the resources to be included into the working set.
-
You will go back to the working set selection dialog. Select the newly created working set in the list and press the Finish button:

-
The building of the selected resources will start immediately.
-
Now you can compile all the resources included into the working set at any time by using the Project -> Build Working Set option and selecting the working set from the list of the available working sets:

Cleaning and rebuilding
When a resource is cleaned, the compilation markers of both successful and unsuccessful compilations are removed from within the 4GL Project View, and the files resulting from the compilation are removed from the output folder of the corresponding project.
-
To clean the whole project, press the Clean button ( ) on the 4GL Project View toolbar.
-
To open a Clean dialog which allows you to adjust the cleaning procedure and specify which projects should be cleaned, select the Project -> Clean… option:
-
A Clean dialog will be opened as shown below:

-
By default, all the projects in the Workbench will be cleaned. Select the "Clean projects selected below" option and select the projects you want to clean, if you do not wish to clean all the projects:

-
By default, a build is started automatically after the projects are cleaned with the help of the Clean dialog. You can choose whether all the projects in the workspace should be built after the cleaning or just the selected ones:

If you do not want the projects to be built after cleaning, deselect the "Start a build immediately" option.
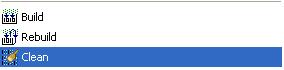
The cleaning may be required, if you want to build a project once more and do not want the compiler to skip the previously compiled source files. However, you can use the rebuilding instead of cleaning a project and then building it again.
The rebuild option combines the build and clean options: first it cleans the resources and then builds them again.
-
To rebuild a program right-click it in the 4GL Project View and select the Rebuild option from the context menu.
-
To rebuild the whole project press the Rebuild button ( ) on the 4GL Project View toolbar.
Building automatically
LyciaStudio offers a tool for performing build automatically each time a source file is saved, cleaned, or imported into the workspace. All the source files in the Workbench that require building are built immediately after the Build Automatically option is activated.
Building of a project can be set to be automatic by selecting Project->Build Automatically.

It can be also enabled by pressing the Build Automatically ( ) button on the main toolbar.
The resources are built automatically when they are saved, if the "Build Automatically" option is activated. To save the source files automatically before each manual build use the Preferences ->General -> Workspace preferences page to select the "Save automatically before build" option. This option is selected by default.
Building results and compile-time errors
There are two results of building process: it can be either successful, or unsuccessful due to compile-time errors.
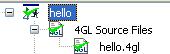
A successful build results in the green check mark on the resource in the 4GL Project View:
In the "Console" View, the messages indicating the successful build will appear:

If a compile-time error occurs, the building is unsuccessful and a red cross appears on the resource in the 4GL Project View:

The corresponding messages will appear in the "Console" View:

To see what sort of error has prevented a file or a program form being compiled, open the "Problems" View:

Here you can see the source file which contains the error and the exact location of the error and the cause of the error. By default, all the errors and problems present in the Studio are displayed in this view. You can filter the errors using the drop-down menu in the top right corner of the view, where you can select the content to be displayed in the view:

-
All Errors option displays all errors and warnings present in the workspace
-
Warnings on Selection displays only warnings for the selected resource (file or program)
-
Errors/Warnings on Selection displays both warnings and errors only for the selected resource (file or program)
-
Errors/Warnings on Project displays all warnings and errors for the project selected in the Project Explorer view
You can also group the errors by severity or type or sort them by the description, type, location, etc. The Configure Contents… option allows you to adjust the view even more. For example you can adjust the view so that it would display only errors which have certain characters or words in their description. Here you can also change the scope of the displayed errors more freely.
To jump to the error, double-click the error in the errors list. The file with the error will be opened and brought to the top. The line with the error will be highlighted as shown below:

If you hover the cursor over the error marker on the vertical ruler, you will also see a pop-up message that contains the description of the error.
The build typically fails and a program has a red cross on it if at least one .4gl source file fails to compile. However if a form file fails to compile, a program may still have a green check mark on it and it will be possible to launch said program. However, the runtime errors will occur when 4GL tries to open the form files which are not compiled and the program can crash.

If a form file contained in a library fails to compile, the library will have an exclamation mark in the 4GL Project View as in the picture above. It will be possible to run the program to which such library is linked, but runtime errors will occur if the program tries to address the form files of the library which are not compiled. A compile-time error in any .4gl source file either in a linked library or in the program will make it impossible to launch a program.