Lycia Installation, Update, and Removal
Installing Lycia and its Components
Lycia Upgrade: Getting Started
Installing Lycia and its Components
Before downloading installation package, please check whether both your hardware and software meet Lycia system requirements.
Installing Lycia With QPM GUI (on Windows)
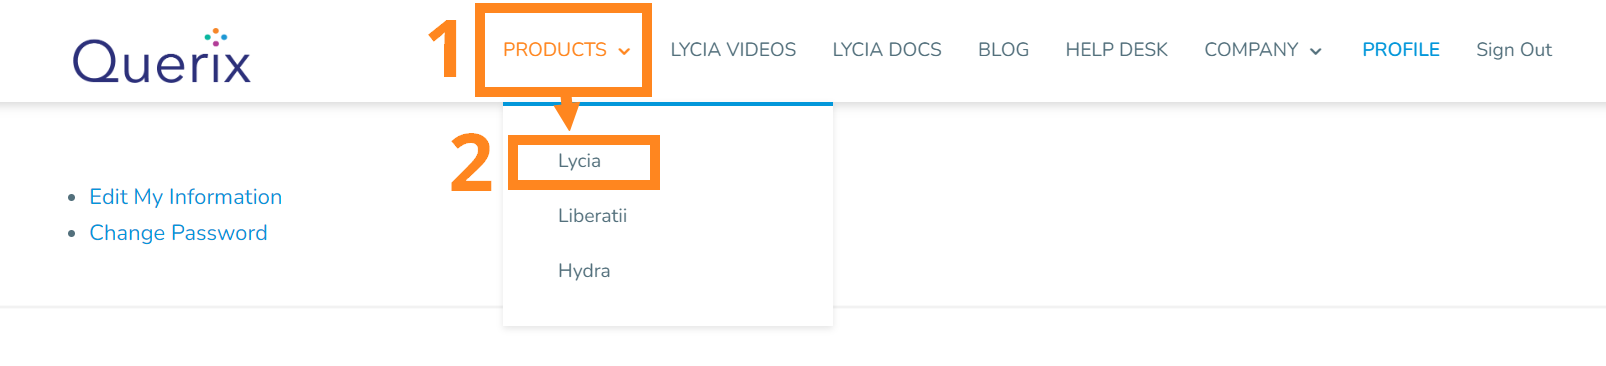
Image 1: Finding Lycia
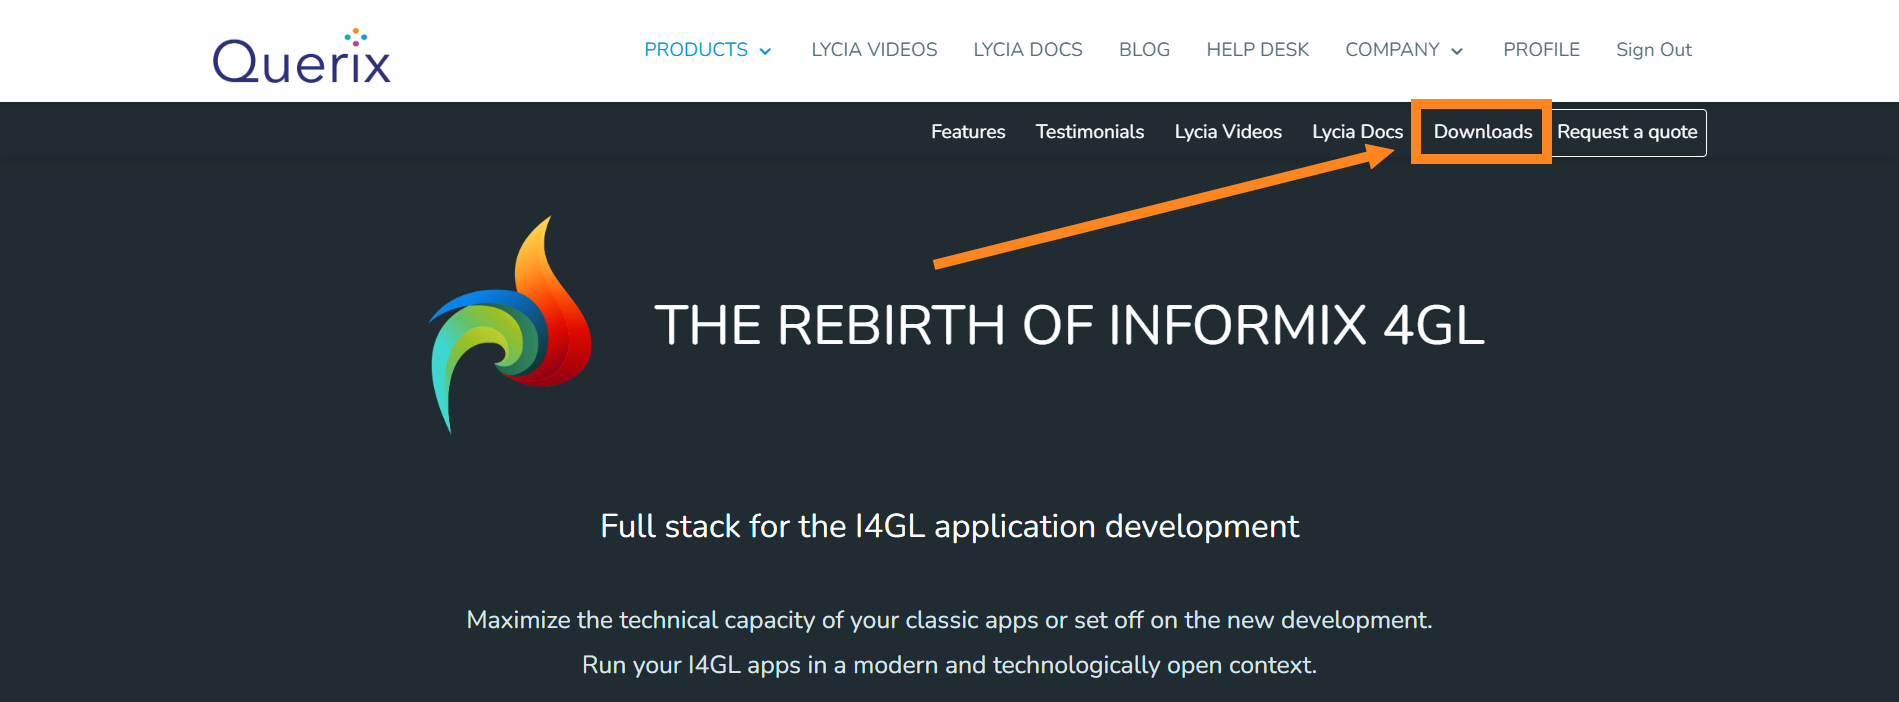
Image 2: Finding Lycia downloads
Choose the package for your system.
visit the official Java downloads page, download your Java package, and proceed with the installation.
- Review Lycia system requirements;
- Learn about the available Lycia presets and components and select which of them you want to install;
- Run Querix Package Manager;
- Check the necessary Lycia components and click Proceed. QPM will start the installation of Lycia components.
Installing Lycia via Command Line
Image 3: Finding Lycia
Image 4: Finding Lycia downloads
Choose the package for your system.
Update Java on Linux:
Install / update Java on Windows: visit the official Java downloads page, download your Java package, and proceed with the installation.
Attention: To install Lycia on Linux, you must have git and git LFS installed on your machine. Otherwise, any installation attempt will fail.
Review Lycia system requirements
Learn about the available Lycia presets and components and select which of them you want to install.
Here is the sequence of commands you must perform to install Lycia on Linux:
The process of installation is logged to the console.
After the successful installation, you will get this message:
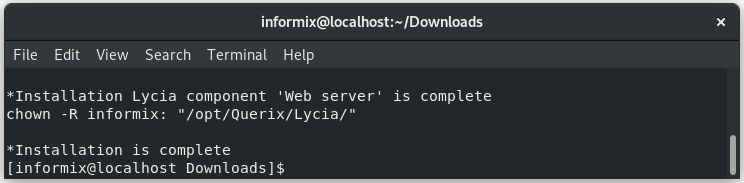
Image 5: 'Installation complete' console messages
Querix provides two types of Lycia licenses – trial and commercial.
Installing and activating trial licenses
Installing and activating commercial licenses
You can find more information about Lycia licensing here and here.
Once installed, Lycia is ready to use.
To learn about program and project creation in Lycia VS Code Extension, proceed to the Create page of LVSCE documentation.
Updating Lycia Components
With QPM, you can update any Lycia component or several at once. However, you must remember that some Lycia components are completely independent, and some depend on other Lycia components and need them to work properly .
Updating Lycia Components on Windows
Step 0. Download Lycia package manager from querix.com.
With QPM GUI
- Review Lycia system requirements
- Choose what Lycia components you want to update.
- Run Querix Package Manager.
- Check the boxes of the necessary Lycia components and click Proceed.
With QPM command line tool
Execute the command:
In this case, your current Lycia setup will be updated.
Step 2. Test your updated component(s).
Updating Lycia Components on Linux
Step 0. Download Lycia package manager from querix.com.
Attention: To install Lycia on Linux, you must have git and git LFS installed on your machine.
Otherwise, any installation attempt will fail.
Review Lycia system requirements
After the successful update, you will receive the following message:
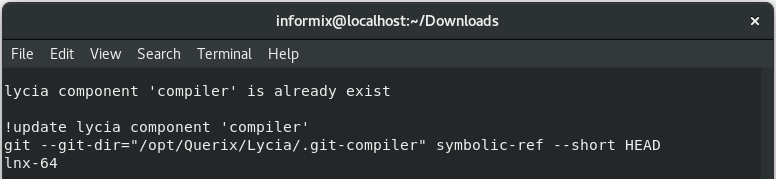
Image 6: Lycia update console messages
Step 2. Test your updated component(s).
Lycia Upgrade: Getting Started
Lycia version 7.2-3492 and newer requires Java of version 17 or newer (but not higher than version 23). Here you can find the steps to upgrade Lycia from version 7.2-3434 and older versions.
Upgrading Lycia on Linux
Step 0. Get the latest version of Lycia installer for Linux from the Downloads page of our website querix.com, as shown in the Installing Lycia section of this page (you must be registered and logged in to access the Downloads page).
Step 1. Stop the qx-web service:
Step 2. Depending on the system type, remove or rename the service file:
or
Step 3. If you have Jetty configurations in the /opt/Querix/Lycia/jetty/webapps/public.xml file, or any other static context defined with XML config:
- Change Jetty 9's property name resourceBase to Jetty 12's baseResourceAsString;
- Change Jetty 9's property name directoriesListed to Jetty 12's dirAllowed.
Step 4. Install Java of a version 17 or later:
Step 5. Run the qpm installer.
Step 6. Start the qx-web service:
Upgrading Lycia on Windows
Step 0. Get the latest version of Lycia installer for Windows from the Downloads page of our website querix.com, as shown in the Installing Lycia section of this page (you must be registered and logged in to access the Downloads page).
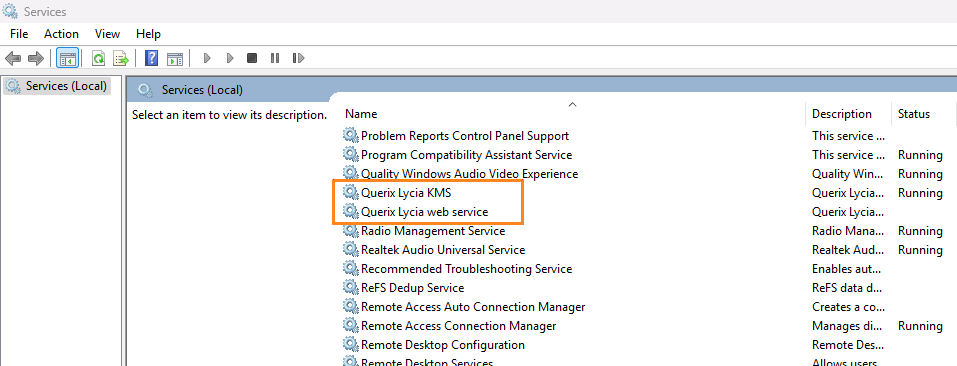
Step 1. In the Services manager of your system, find and stop Querix Lycia web service and Querix Lycia KMS:
Step 2. If you have Jetty configurations in the C:\Program Files\Querix\Lycia\jetty\webapps\public.xml file, or any other static context defined with an XML config:
- Change Jetty 9's property name resourceBase to Jetty 12's baseResourceAsString;
- Change Jetty 9's property name directoriesListed to Jetty 12's dirAllowed.
Step 3. Install / update Java: visit the official Java downloads page, download your Java package (version 17 or later), and proceed with the installation.
Step 4. Run the qpm_gui installer and select the Lycia components you need. Click the Proceed button to finish your update.
Downgrading Lycia on Linux
Step 1. Stop the qx-web service:
Step 2. Lycia version 7.2-3434 and older runs on Java 8. If Java 8 is already installed in your system, switch to it like follows:
If you don't have Java 8, perform the installation:
In your system is RHEL / Fedora, the command is the following:
Step 3. Depending on the system type, remove or rename the service file:
or
Step 4. If you have Jetty configurations in the /opt/Querix/Lycia/jetty/webapps/public.xml file, or any other static context defined with XML config:
- Change Jetty 12's baseResourceAsString to Jetty 9's property name resourceBase;
- Change Jetty 12's dirAllowed property name to Jetty 9's directoriesListed.
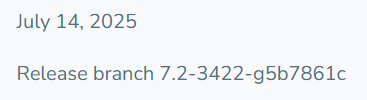
Step 5. Run the QPM and use the -b parameter with Lycia version as a branch name in the following format: 7.2-3422-g5b7861c. You can pick the version name from the Release Notes page:
Step 6. Start the qx-web service:
Downgrading Lycia on Windows
Step 1. Visit the Java archive downloads page, download a Java 1.8 package, and proceed with the installation.
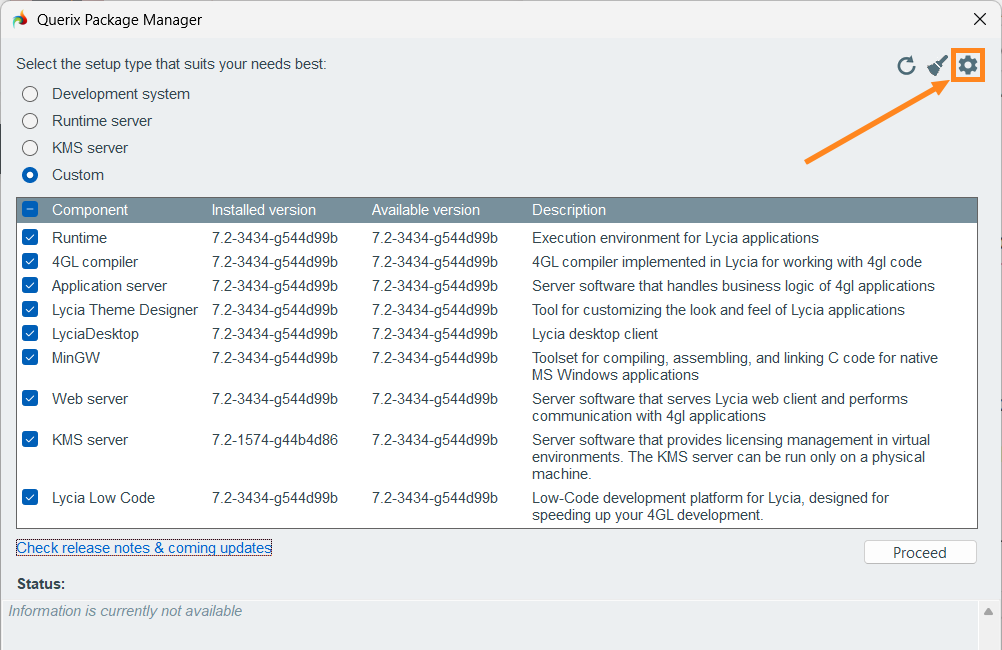
Step 2. Run the QPM GUI installer. To acquire one of the older Lycia versions, do the following:
- Click the gear-shaped Preferences icon (
 )in the upper-right corner of the QPM window:
- In the Branch field of the dialog window that opens, specify the version of Lycia you need (you can pick the version name from the Release Notes page):
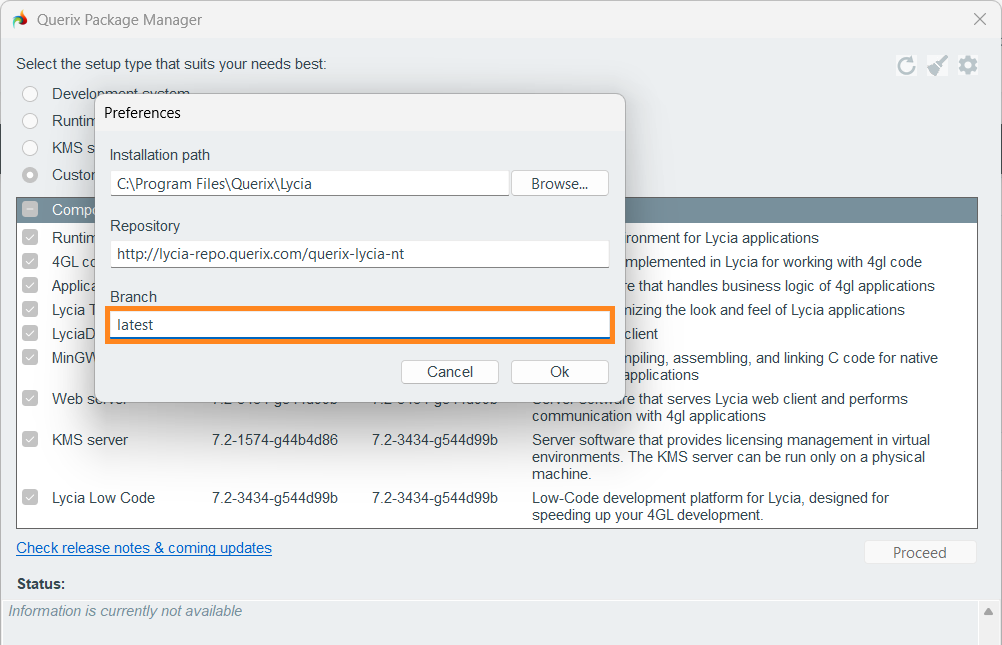
- Click the Ok button (the dialog will close), and then the Proceed button in the main QPM window.
Alternatively, run the QPM CLI and use the -b parameter with Lycia version as a branch name in the following format: 7.2-3422-g5b7861c. You can pick the version name from the Release Notes page:
Switching Between the Java Versions (on Windows)
Step 1. Remove all PATH entries pointing to any JDK. For example:
Step 2. Remove all PATH entries pointing to javapath. For example:
Step 3. Set environment variable JAVA_HOME pointing to the required JDK. For example:
Use either the Environment variables applet in Windows Settings, or the command line:
Example:
Step 4. Prepend the PATH entry for the version 1.8 of Java with %JAVA_HOME%\bin.
Removing Lycia Components
To remove one or more Lycia components, you must
- uncheck them in QPM GUI or
-
execute the command remove in QPM command line tool:
For example, this command
sudo ./qpm remove app-server
will remove the app-server Lycia component,
and this command
sudo ./qpm remove development
will remove the development preset.
To uninstall Lycia completely, you must
- uncheck all the components in QPM GUI or
-
execute qpm remove all without parameters in QPM command line tool:
qpm remove allsudo ./qpm remove all