It is rather quick and easy to install LyciaDesktop for both UNIX/Linux and Windows.
|

|
The procedure of the desktop client installation for Windows OS is simple and familiar to anybody who has the previous experience in a software installation on a PC.
To install Lycia desktop client, simply download its latest version from our website and follow the instructions given below.
|
|
Step 1
|
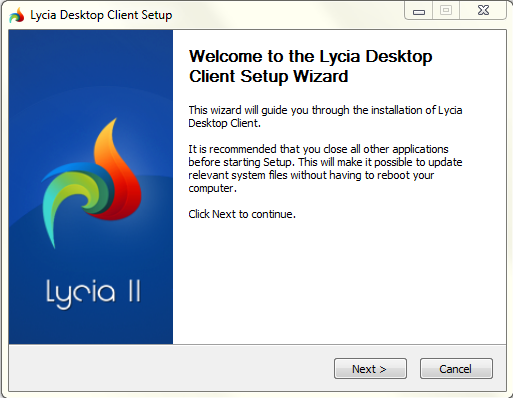
Double-click the installation lycia-desktop.exe file to run it. On this, Lycia DC the Welcome dialog window is displayed.
Click Next to continue.

|
|
Step 2
|
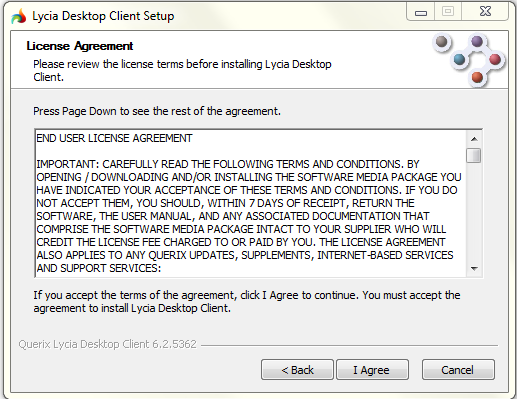
Lycia Desktop Client End User License Agreement (EULA) window is displayed. Study the terms and conditions laid out in it.
Click I Accept to accept and continue.

|
|
Step 3
|
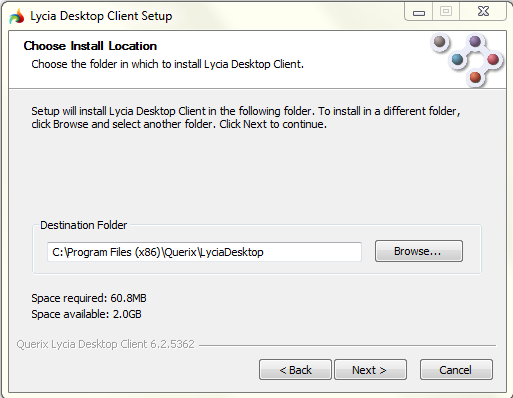
The Select Installation Folder dialog window is displayed.
Proceed with the default direction or specify another location to which Lycia DC should be installed (click Browse and select the required folder on your file system).
Click Next to continue.

|
|
Step 4
|
To confirm the installation click Next in the Confirm Installation dialog window.
During the installation the currently executed actions will be reported. When the installation finishes, click Next.
|
|
Step 5
|
A window is displayed with the message ‘Lycia DC has been installed on your computer.’ Click Finish to finish the installation.
|
![]()


