Add
Adding an Existing Program or Library to the Project
Adding an Existing File to the Program
Adding Files Using Folders Menu
Adding an Existing Library to the Program
Adding a File to Program’s Folders in the Workspace
Adding an Existing Program or Library to the Project
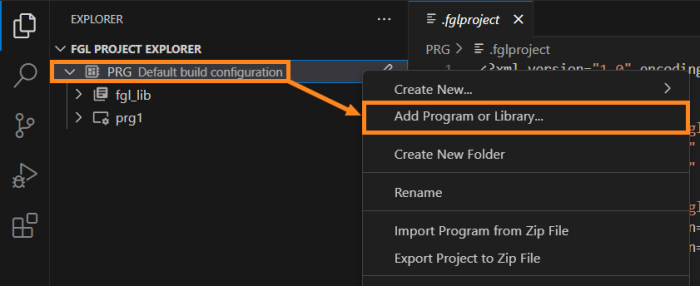
Step 1. Go to FGL Project Explorer and right-click the project to which you need to add the programs and libraries. From the context menu, select Add Program or Library:
LVSCE will open a dialog for you to select items to add by browsing the Workspace folders in remote VS Code instance or opening OS File Explorer from local VS Code instance:
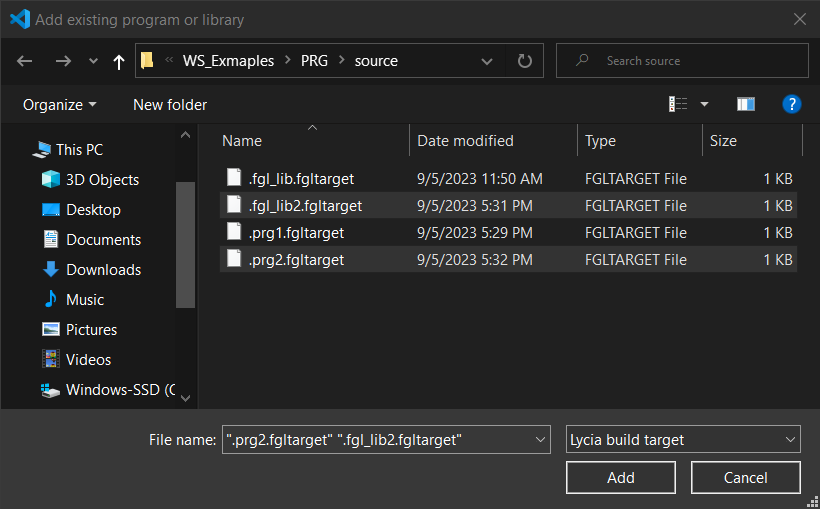
Step 2. Pick the item you need to add (for multi-selection, hold the CTRL or SHIFT keyboard button) and click the Add button:

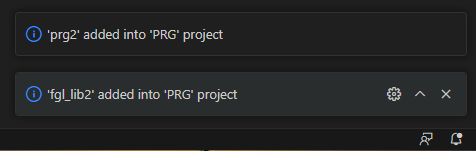
VS Code will notify you about successful files and libraries addition in lower-right corner of its window:
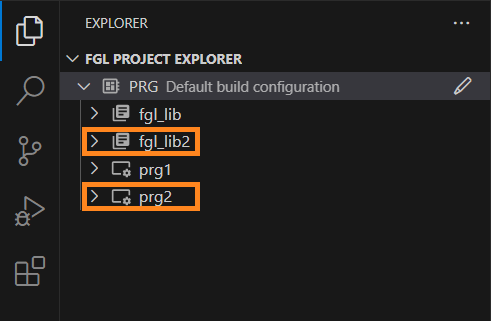
New program and new library will be added to the project (in our example, prg2 and fgl_lib2):
Adding an Existing File to the Program
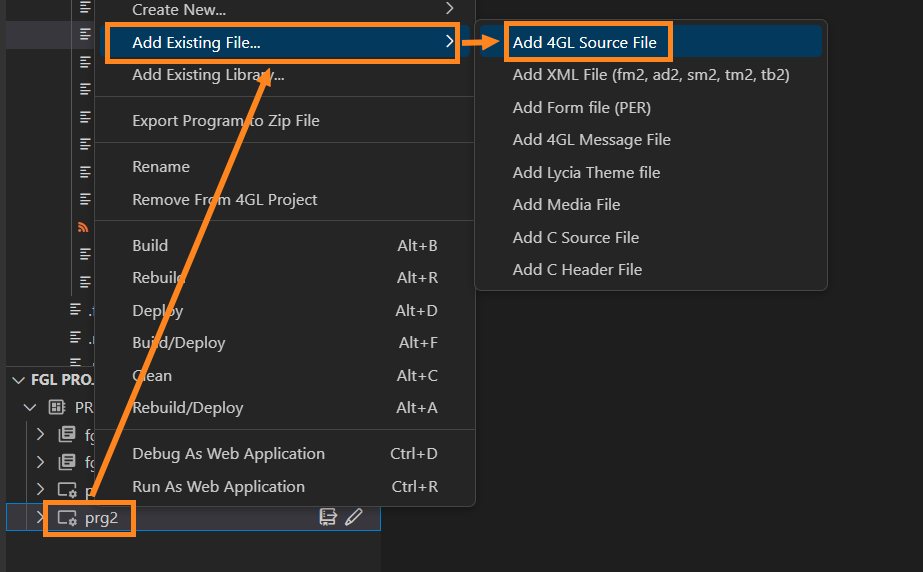
Step 1. Go to FGL Project Explorer and right-click the program you want to add the file to. From the context menu, select Add Existing File, and then - the type of the file you want to add:
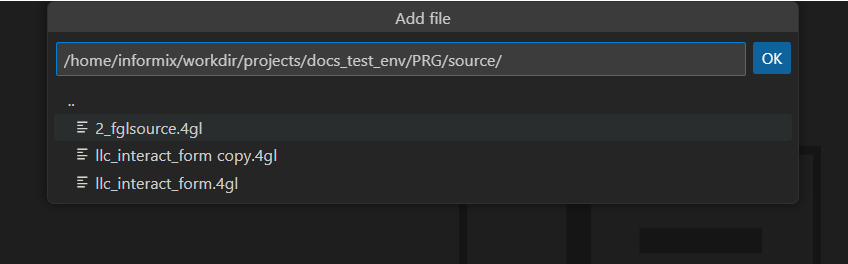
For remote VS Code instance, LVSCE will open a dialog in the top of main VS Code window:
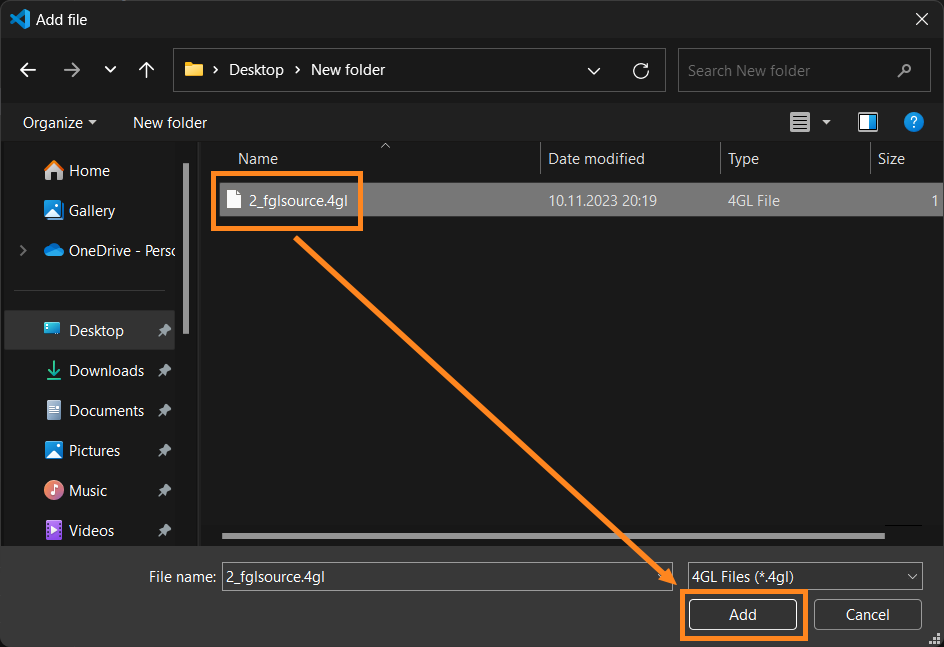
For local VS Code instance, LVSCE will open your OS File Explorer:

Step 2. In remote VS Code, provide a path and click a file to select. In local instance, pick a file (or several files using SHIFT or CTRL buttons) and click the Add button:
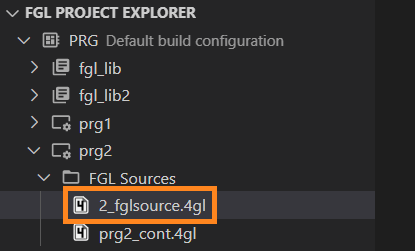
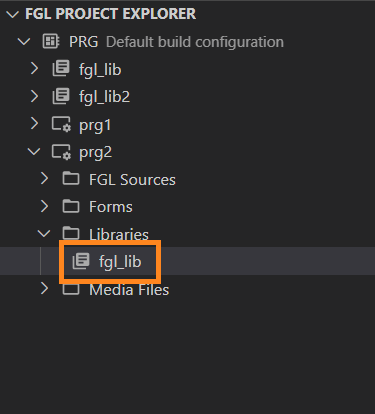
The file(s) will be added to the corresponding folder in the program, and you will find your addition(s) in FGL Project Explorer:
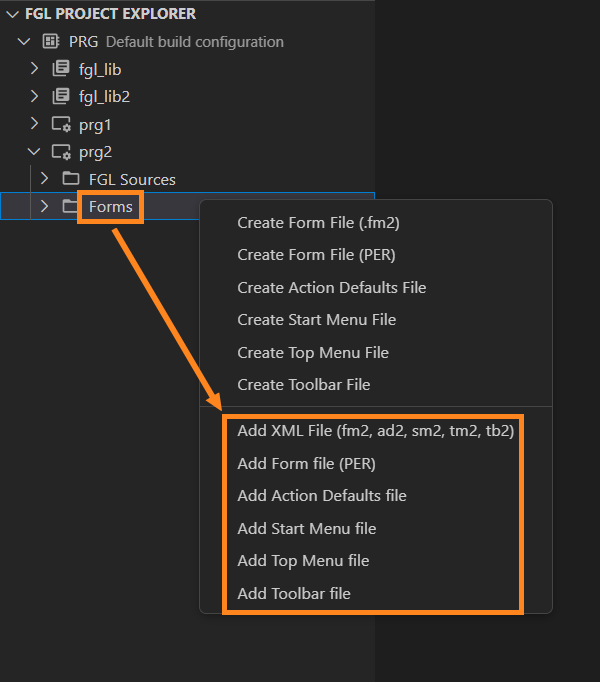
Adding Files Using Folders Menu
You can also add files by right-clicking the specific folder in the program’s structure in FGL Project Explorer. In the context menu, select the type of the file and proceed in the following file choice dialog. For example, the options of the FGL Sources folder context menu will offer you to add 4GL source file; you also can create 4GL source file from that same menu:

For Forms folder, the options will include adding:
- .fm2 XML form file
- .per classic PER file
- Action Defaults file
- Start Menu file
- Top Menu file
- Toolbar file
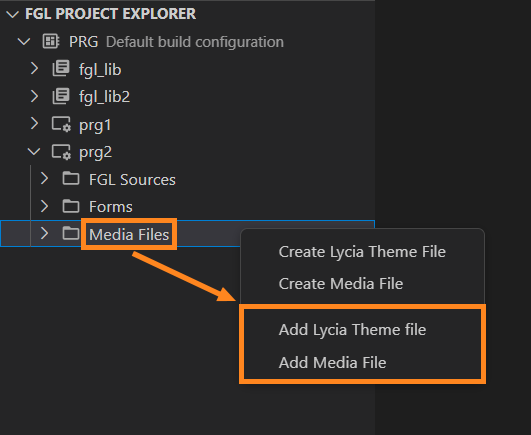
With the context menu of the Media Files folder, you currently can add Lycia Theme files (.qxtheme) and Media files (including .css files):
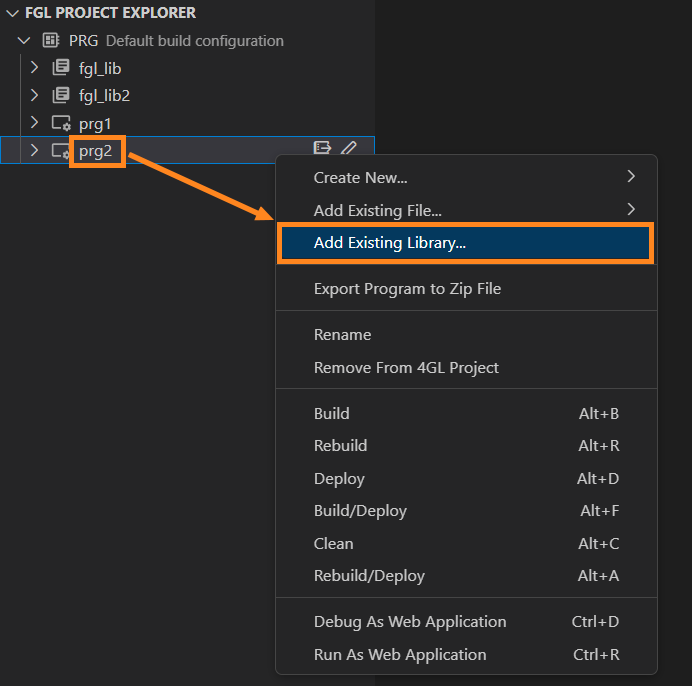
Adding an Existing Library to the Program
Step 1. Right-click the program in FGL Project Explorer and select Add Existing Library:
Step 2. From the dropdown list in the top of VS Code’s window, mark the library files you need to add to the program, and click OK:
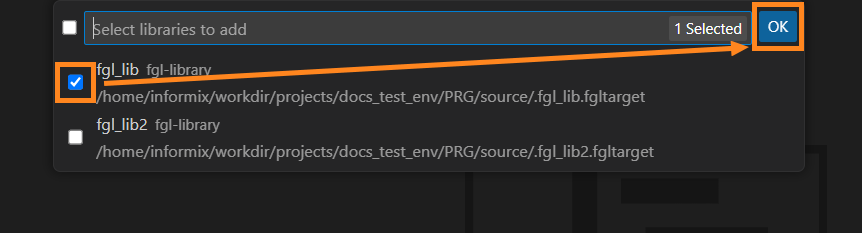
The library will be added to your program, you will be able to operate with it in FGL Project Explorer:
Adding a File to Program’s Folders in the Workspace
When you add a file in this way, it will appear in the Workspace folder that you add it to. Yet, this file will not be linked within projects or certain programs until you add it to your projects and programs with FGL Project Explorer (as described in the sections above) or reference it using the IMPORT FGL statement.
Adding a File From OS File Explorer
You can add a file to program’s folder in VS Code by drag-and-dropping it into desired location from your OS File Explorer, independently from whether it’s a local VS Code instance or a remote one:
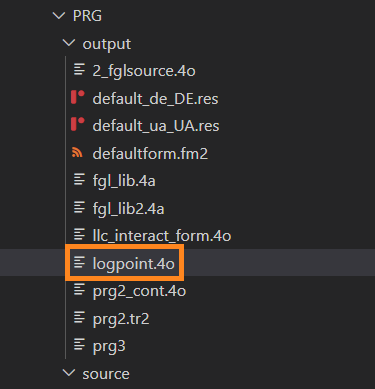
Then you’ll find that file in the destined folder in your Workspace:
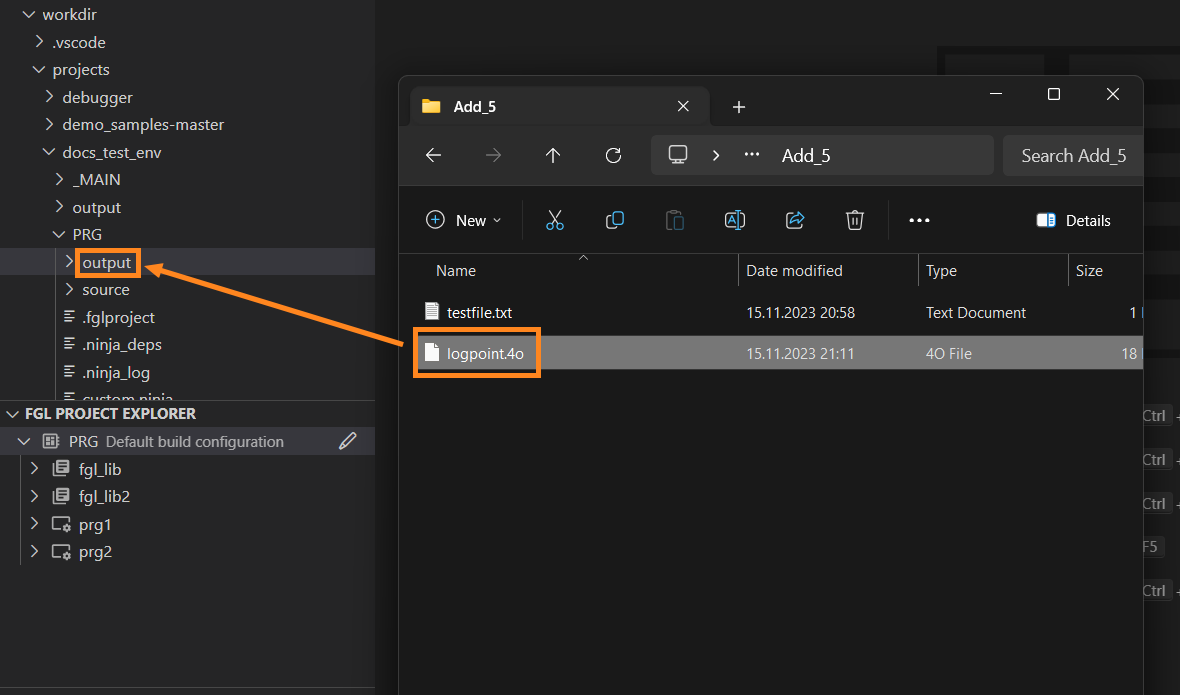
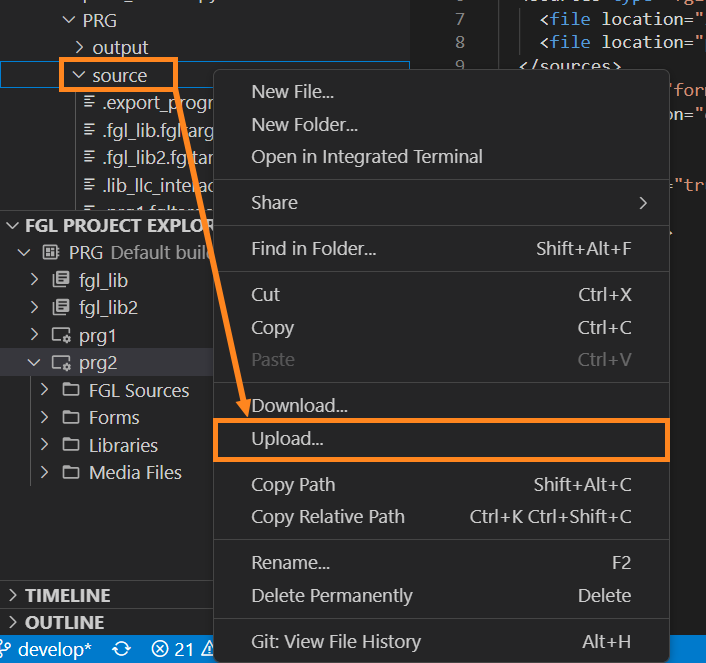
Alternatively, you can use the Upload option for that in remote instances. To invoke the display of the OS File Explorer, right-click the Workspace folder you aim to add files to, and select the Upload option:
After that, the file choice dialog will open, and you can proceed with file selection.
Adding a File From the Workspace of Remote Instance
To add a copy of the file, located anywhere in the Workspace, to certain program’s folder, right-click the file and select the Copy option:

Then, right-click the folder you want to place a file into, and select Paste:

See next: Convert Form Files