Palette
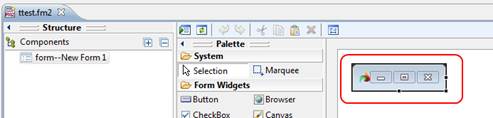
The Palette is a tool containing the list of the form elements that can be added to the graphical form. By default, the Palette is placed to the left from the Editor window. You can hide it by clicking the arrow icon at the right part of the palette header. The Palette contains the folder with system tools (Select and Marquee), and the Form Widgets and form Containers folders:
You can hide the content of a folder by pressing the folder icon at the folder title line.
The Containers folder lists a set of containers - form areas, to which the form widgets are placed. The type of container influences the child widgets arrangement. It is possible to place one container within another one, if necessary.
To use the palette, the developer simply clicks on the needed widget once, then clicks where they would like the widget positioned upon the form. They are then free to customise the widget as required: change the size of a widget, its position etc. Each of these widgets will be explained in detail in the sections below.
To create more than one widget of the same type select the widget and hold the Shift key. In such case each time you click within the form editor area, a new widget of the selected type is created. To be able to change the properties of a widget, you need to switch to the Select tool. If the widget button is not stuck, the cursor will automatically change to the Select tool after a single widget of the selected type is placed onto the form.
Widgets on the palette make up the majority of the contents of a form file, and allow user interaction with data using a variety of layouts and looks when text input is not appropriate. Whilst having their own properties, they also have common properties, which will be listed afterwards.
The Form has two main types of objects - containers and widgets. A container is an area that nests the form widgets. Different containers have different widgets layout and manipulation behavior.
A new form is created without any container inside.
To add a root container, you should select one from the Containers folder and drop it to the form area. When the container is added, the form extends automatically:

To change the form size, select the form in the Editor view and drag its edges till the form gets the desired size and shape:

All the other form elements should be placed within the root container.
The Widgets folder contains all the widgets that can be added to the form and used for data input or display.
To add a widget or a container to a form, select it in the Palette and then click on the place on the form in the Editor area, at which the top left corner of the object should be placed. You can specify a non-default size and shape for the new object. To do it, click in the Editor area, hold the left mouse button clicked and drag the cursor so that the widget edges are displayed. Then drag the mouse cursor with the left mouse button pressed until you get the desired object shape and size. On the screenshot, you can see the edges of a text field during its placement on the form and the field itself after the left mouse button is relieved:

The form widgets can be placed only within one of the containers.

