Step 1
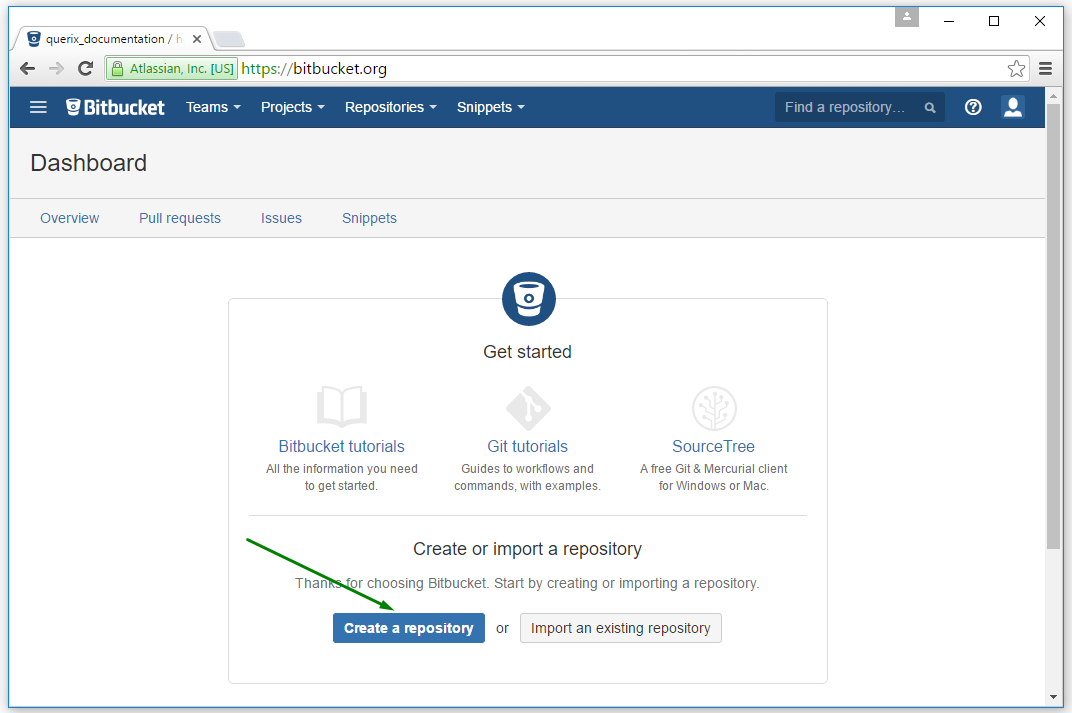
Choose the GIT hosting you are going to work with and create an account there.
You can take one of these - 1, 2, 3, 4, 5 - or choose any other convenient variant.
![]() In this page, we shall consider the procedure of creating a server repository on BitBucket. However, you can find all the necessary information if refer to the documentation provided by your chosen GIT hosting.
In this page, we shall consider the procedure of creating a server repository on BitBucket. However, you can find all the necessary information if refer to the documentation provided by your chosen GIT hosting.

Step 2
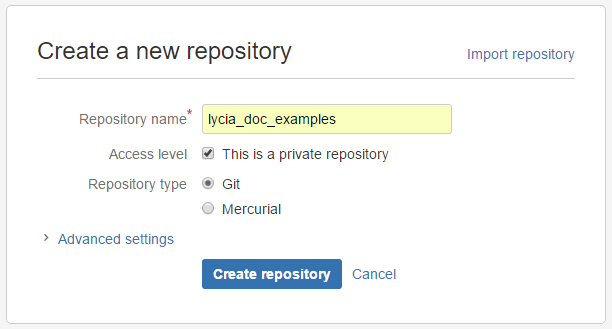
Specify all the necessary information like the repository name, type, and access level:

Step 3
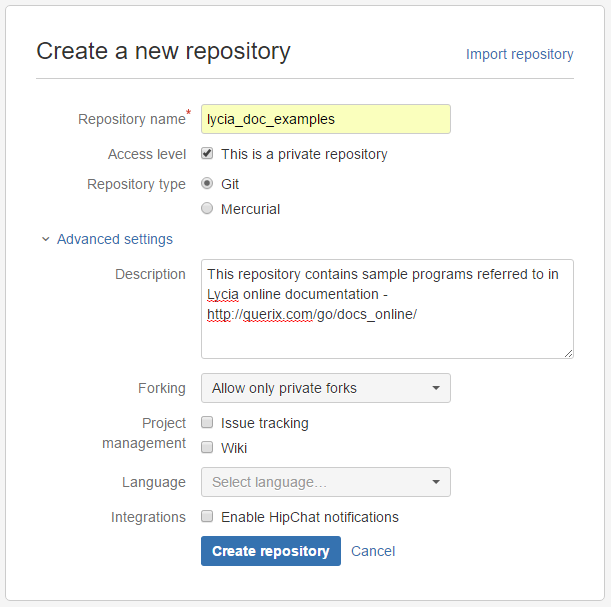
Consider all the necessary details of your repository and choose the necessary options:

With BitBucket,
-
description can be provided for the sake of easier search and better communication with customers and colleagues,
-
forking allows you to create a completely separate copy of the project and work on it,
-
project management enables tracking issues and creating wikis as a separate repository to keep documentation there,
-
language allows you to specify the language or languages you generally use to write your programs (4gl is out of the list),
-
integrations are used to enable notifications.
![]() The list of advanced options/settings depends on the GIT hosting.
The list of advanced options/settings depends on the GIT hosting.
Step 4
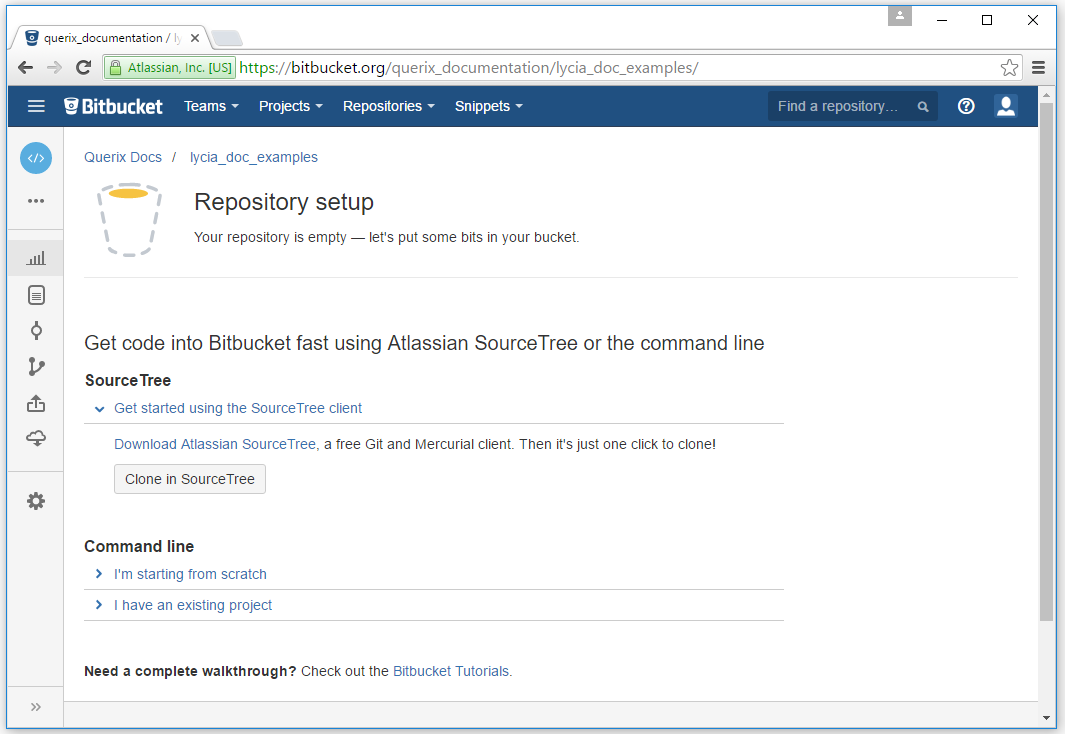
Press Create repository and get your new GIT repository:
