Creating Local Repositories
To be able to store your projects, you need to create both remote and local GIT repositories.
Here we deal with creating a local repository. Here you can learn how to create a remote one.
Before you start
GIT repositories are intended to secure a successful team work.
To be able to trace any commits to their authors, you have to set the user's name on every working station.
|
Step 1
|
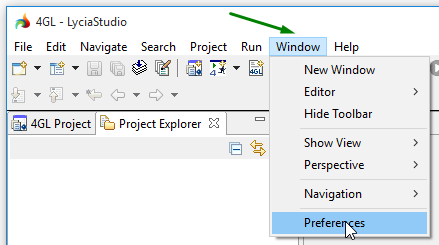
Choose the Window menu group of the LyciaStudio menu bar and go to Preferences:
|
|
Step 2
|
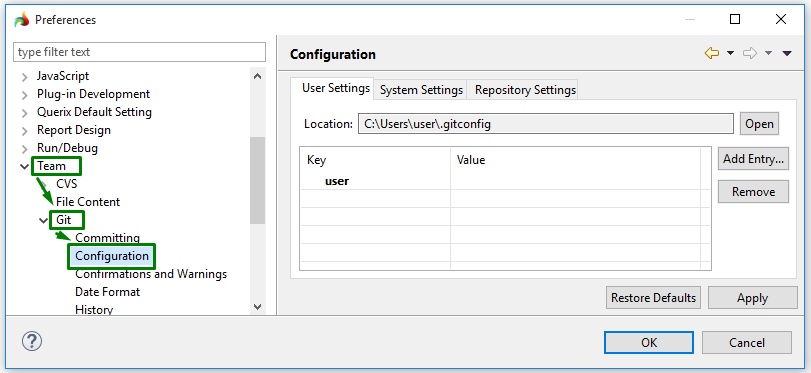
Go to Team → Git → Configuration in the opened window:
|
|
Step 3
|
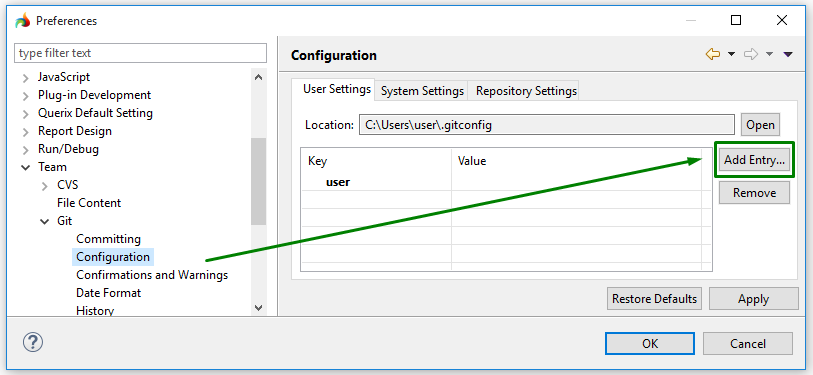
Press Add Entry ... to add user's name and email:
|
|
Step 4
|
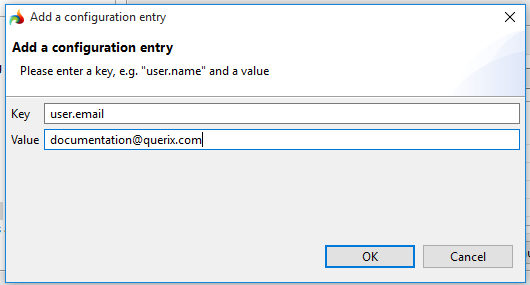
Add the configuration entry by specifying necessary keys and setting values:
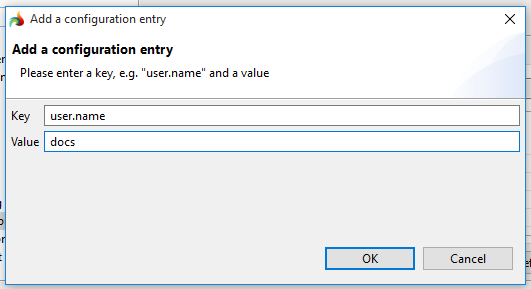
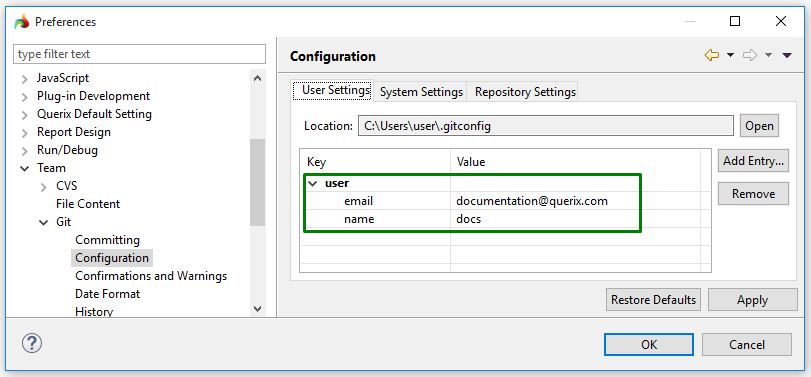
After the entry was added, you'll see the user's name and email in the GIT user settings tab:
|
|
Step 5
|
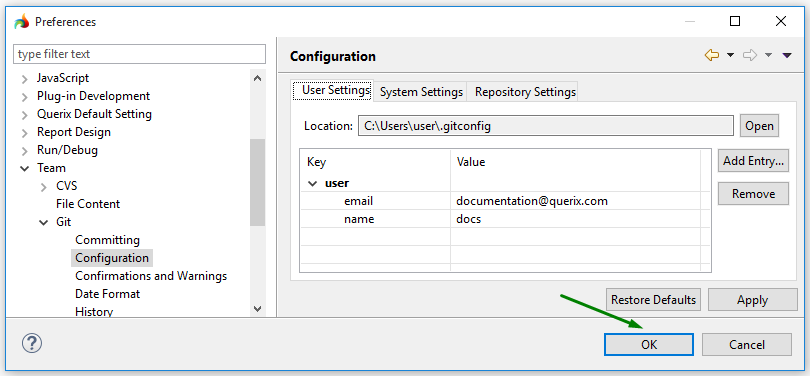
Press Ok to finish GIT configuration at this step:
|
GIT user settings are saved to the .gitconfig file stored in your repository folder.
Local GIT repositories can be created in two ways - from the 4gl perspective and from the GIT perspective.
Method 1. Creating a local repository from the 4gl perspective
Creating the repository folder
To create a local GIT repository from the 4gl perspective, choose a 4gl project which will serve as a temporary anchor for your local GIT repository.
 Even though all the actions described below seem to be conducted on and for a definite project, they end up in creating the local repository but not committing to it.
To learn how to commit to your local repository, refer here.
|
Step 1
|
Right-click the 4gl project and go to Team → Share project:
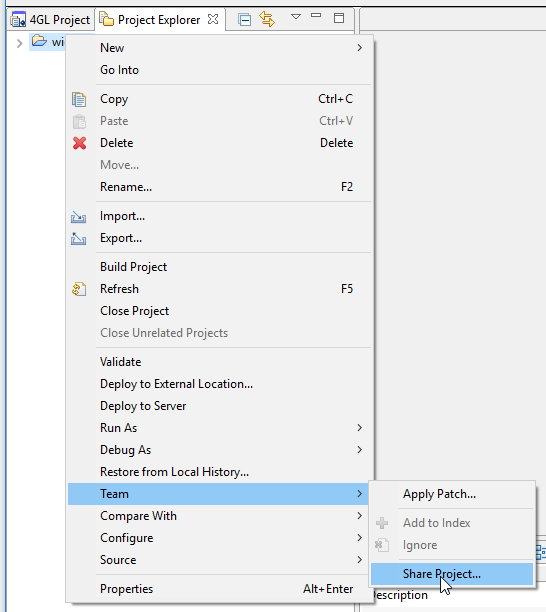
 The project you use here must be disconnected from any other repository. The project you use here must be disconnected from any other repository.
|
|
Step 2
|
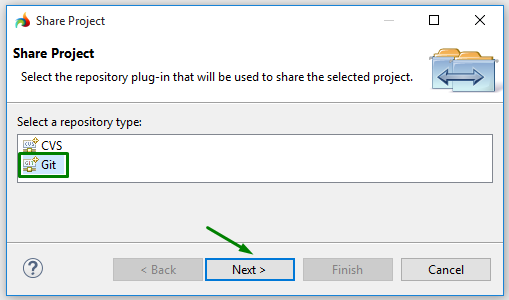
Choose Git among the available plug-ins and press Next:
|
|
Step 3
|
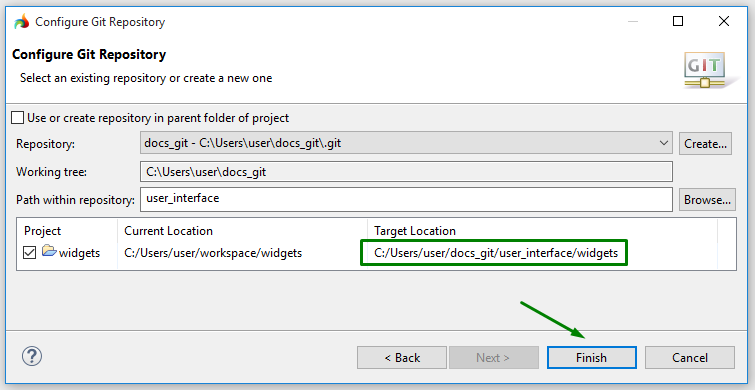
Configure the future repository (see details below):

After you finished configuring the repository, you get the added folder shown in the table as a Target Location:
|
|
Step 4
|
When you press Finish, your local GIT repository is created (you can see it in the project explorer):

|
At Step 3, you have to configure your future repository.

|
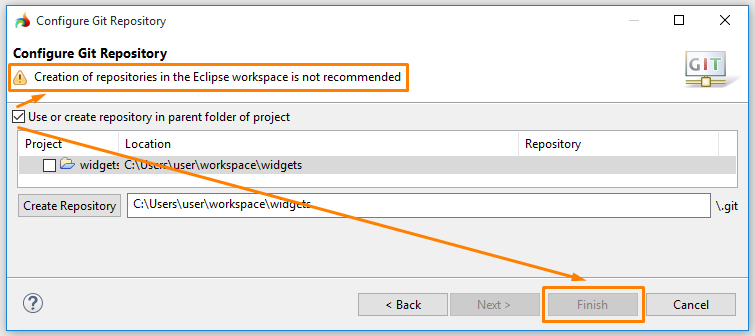
A. Choose whether to create the new repository in the project folder:

Theoretically, your local repository can be created in any folder including the workspace.
However, with Eclipse it is forbidden to create repositories in the workspace so, when checking the checkbox, you get the corresponding warning:
|
|
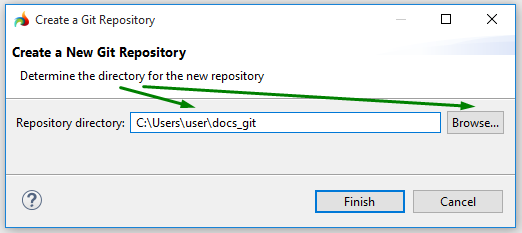
B. Choose or create a folder which will serve as your local repository:

To choose or create the folder, you click Create and determine the directory by direct typing or browsing:

|
|
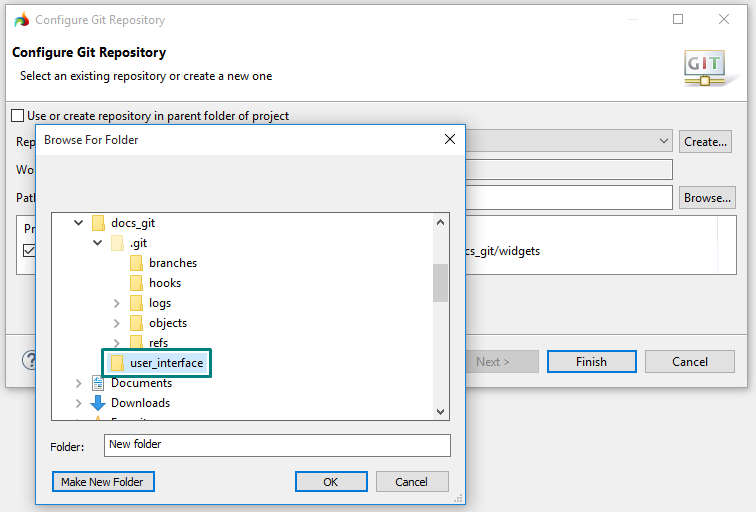
C. Specify the path to your new repository:

After the repository folder was created, you can add sub-folders to it:

|
Initializing the repository structure
To be able to work with your local GIT repository, you have to initialize its structure.
|
Step 1
|
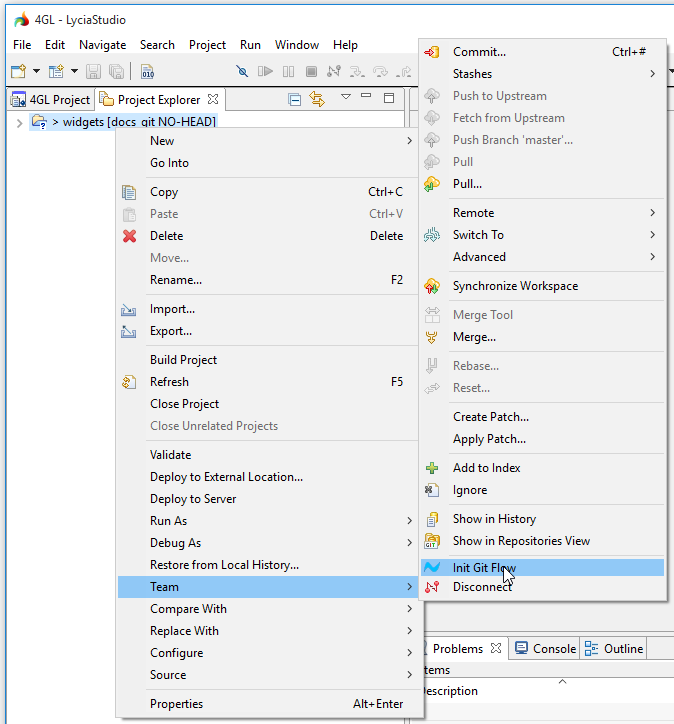
Right-click the 4gl project and go to Team → Init Git Flow:
|
|
Step 2
|
Press Yes in the message window that opens in order to initialize the repository:

|
|
Step 3
|
Choose the names for the branches of your local repository:
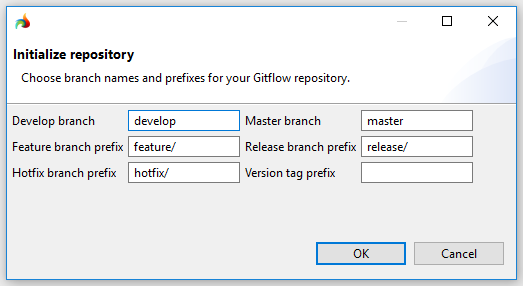
In this documentation, we use the default structure for our example local repository:
-
develop branch is used to store the latest development changes;
-
feature branch is used to develop new features for the upcoming or a distant-future release;
-
hotfix branch is used to introduce immediate fixes to a live production version;
-
master branch is used to store your production-ready source code;
-
release branch is used for minor bug fixes and preparing metadata for the next release.
You can keep on with this structure as well or create you own structure which will better suit your development tasks and teamwork needs.
|
|
Step 4
|
When you press Ok, the structure of your local GIT repository is initialized (you can see it in the project explorer):

|
Now your local GIT repository was created and its structure was initialized, you can start committing your projects to it.
 Please, do not forget that after you have performed these steps, your repository is still empty and the project you have used as a temporary anchor is not added to it.
Here is what you get after initializing the repository structure:

Here is what you get when the 4gl project was added to the repository:

Method 2. Creating a local repository from the GIT perspective
You can also create a new local GIT repository from the GIT perspective:

Creating the repository folder
To create a new local GIT repository, follow these steps.
|
Step 1
|
Open the GIT perspective as described here.
|
|
Step 2
|
Press the  Create a new GIT repository button of the GIT repository toolbar: Create a new GIT repository button of the GIT repository toolbar:

|
|
Step 3
|
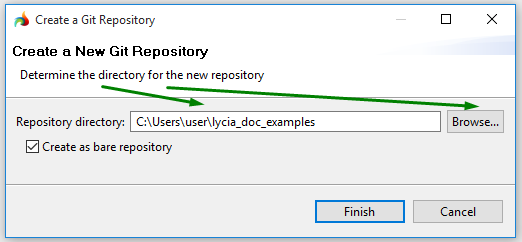
To create a folder which will serve as your local repository, you click Create and determine the directory by direct typing or browsing:
|
|
Step 4
|
When you press Finish, your local GIT repository is created (you can see it in the repositories explorer):

|
Initializing the repository structure
To initialize the repository structure, follow these steps.
|
Step 1
|
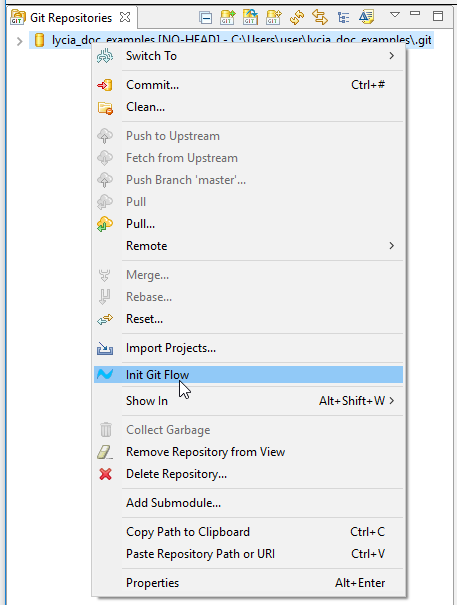
Right-click the necessary repository and go to Init Git Flow:
|
|
Step 2
|
Press Yes in the message window that opens in order to initialize the repository:

|
|
Step 3
|
Choose the names for the branches of your local repository:

Some explanations for the default GIT structure were provided above ↑ .
|
|
Step 4
|
When you press Ok, the structure of your local GIT repository is initialized (you can see it in the repositories explorer):

|


