Table 
Table container is designed to provide you with the ability to create tables for data input and display.
A form table has a hierarchical structure, in which the Table container is the main Parent object.
Each widget placed inside a Table container will appear under a separate Table column in the Structure view.
Table identifier is linked to the identifier of the screen record nesting the table column fields. Therefore, editing one of these IDs automatically changes the other.
Most commonly used Theme and Form Properties:
 Currently, cornerRadius cannot be set for Table columns and rows but only to the Table container as a whole.
TableColumn does not support horizontal or vertical alignment for its child element.
Associated methods

Associated functions
-
getContainer()
-
setContainer()
Form XML Code
<rootcontainer type="table" identifier="rootContainer" fieldType="FORM_ONLY" fieldTable="formonly" enable="true" visible="true">
<minsize width="1" height="1"/>
</rootcontainer>
Applying Table container at Runtime
Defining table columns
The only required clause of the CREATE TABLE statement is the column definition clause. Here you must specify the names and the data types of the columns you want to include into the table. Each table must contain at least one column. You can optionally place some constraints on a table column and/or specify the default value, but the minimum required are the column name and its data type. This statement has the following syntax:
column_name data_type [DEFAULT clause] [column_constraint]
The column name must be unique among the other columns of the same table; it needs not to be quoted, but it cannot contain white spaces. The data type is assigned to a column in the same way as to any 4GL variable, you can specify the precision and scale for the corresponding variables.
CREATE TABLE my_table(
first_name CHAR(15),
last_name CHAR(30),
age INT
)
Adding a table container to a form using the graphical form editor
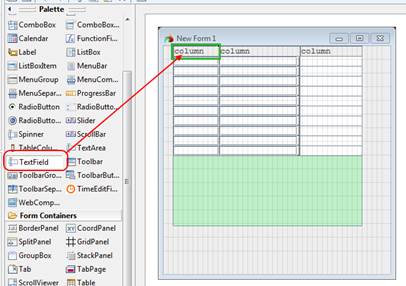
Select the table container from the Form Containers palette and place it to the required location on the form. Each widget placed inside a Table container will appear under a separate Table column in the Structure view.
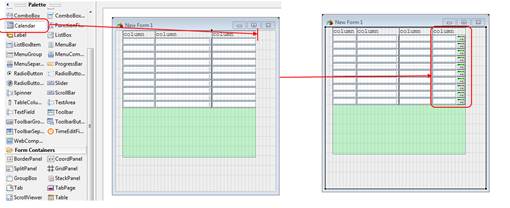
When you add other columns, they automatically fill the table width.

When the necessary number of columns is added, you can manually change their width by dragging the right and left edges of their headers.
Each column should contain only one field. To add a field to the column, select the necessary item from the palette and drop it to the target column header.
It is also possible to add a column together with a field in it. To do it, select a field of the necessary type and put in the headers area, to the place, where the field should be added to:
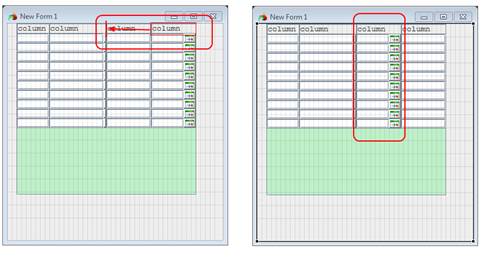
You can rearrange the columns order by dragging the columns headers and dropping them in the necessary places:
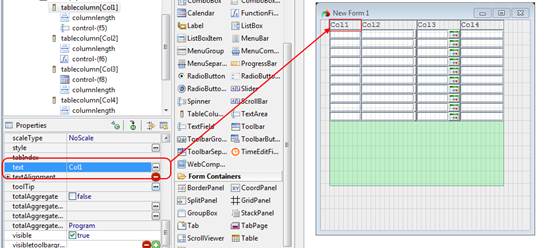
You can specify a column header by setting the Text property of the column:
Lycia window Builder automatically creates a screen record bound to the table, and adds there all the fields added to this table:
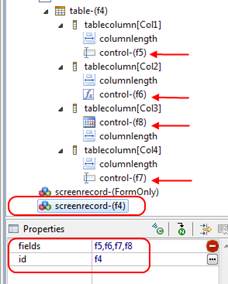
It is the screen record name that is to be referenced in 4GL to display or input arrays.
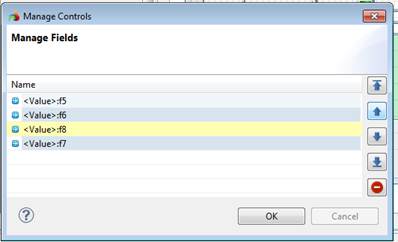
When you change the order of the table columns, the order of the column field names is not changed in the corresponding screen record. Therefore, after the columns are finally arranged, it may be necessary to re-arrange the screen record list. To do it, click on the "-" button to the right of the fields list. This will call a dialog window, in which the record fields can be moved or deleted.