Checking out existing branches
When working on a project, you may find it practical and helpful to use several branches of your GIT repository:
§ when working with a local repository, you can work on different changes in parallel by adding different changes to the corresponding branches and then switching between these branches;
§ when working with a remote repository, you can make your pushing, fetching, and pulling easier by configuring upstream.
New local branches are created via Create Branch dialog which can be started in three ways:
→ from the Team menu (in 4gl Perspective):

→ from GIT Repositories view:

or


To create a new branch, please follow these steps.
|
Step 1 |
Start the Create Branch dialog as described above:
|
|
Step 2 |
Enter the name of the local branch you want to create:
You can create a local branch that is based on some source branch (in this case, you have to click Select... and choose the necessary branch in the opened window):
Most developers use remote tracking branch as sources for their local ones but in theory, you can base your local branch on any branch or commit in the repository. However, it is better not to select local branches to be a source one if you work with a remote repository.
Local branches can be based not only on other branches but also on commits. To base a local branch on a commit, you need to start the Create Branch dialog in the History view ↑ by right-clicking the necessary commit:
In this case the Create Branch dialog is shorter as you have only to specify the name of the branch and choose whether to checkout it.
|
|
Step 3 |
Configure upstream for push and pull:
Upstream configuration is useful if you work with remote repositories, especially, for pulling.
Here three options are available: § if you leave the option unchecked (by default), then upstream will get no specific configuration for pulling. In this case, pull will use configurations set for the corresponding remote tracking branch if your new local branch is based on it or will try to use configurations of a default remote (a remote called origin) if it exists; § if you choose Merge upstream commits into local branch, changes will be fetch from upstream and the remote tracking branch will be updated when pulling. After this, your local branch will be merged with the new changes (this behavior is the default one for all local branches based on remote tracking branches but it can be overrriden by specific configurations of the corresponding repository); § if you choose Rebase commits of local branch onto upstream, changes will be fetch from upstream and the remote tracking branch will be updated when pulling. After this, your local branch will be rebased onto the updated remote tracking branch.
|
|
Step 4 |
Decide whether you want your new local branch to be checked out immediately:
|
|
Step 5 |
After your new branch is configured, press Finish to create it:
|
|
Step 6 |
Now your new local branch is created (as you can see it in the GIT Repositories view):
|
All local branches (both newly created and already existing ones) can be configured in order to track a corresponding remote branch for making pulling, pushing, and fetching simpler and easier.
You can configure your local branch when creating it ↑ or later by using Configure Branch dialog.
|
Step 1 |
Start the Configure Branch dialog by right-clicking the necessary branch from the GIT Repositories view and choosing Configure Branch... in the context menu:
|
|
Step 2 |
In the opened window, you
§ choose the necessary remote (. stands for the local GIT repository):
§ specify the remote tracking branch (the branch you want your local branch to track):
§ choose whether you want your local branch to rebase onto the arriving changes when pulling (if you leave the option unchecked, the new changes coming from the tracking branch will be merged):
|
|
Step 3 |
Press OK to finish configuration and apply it to your local branch:
|
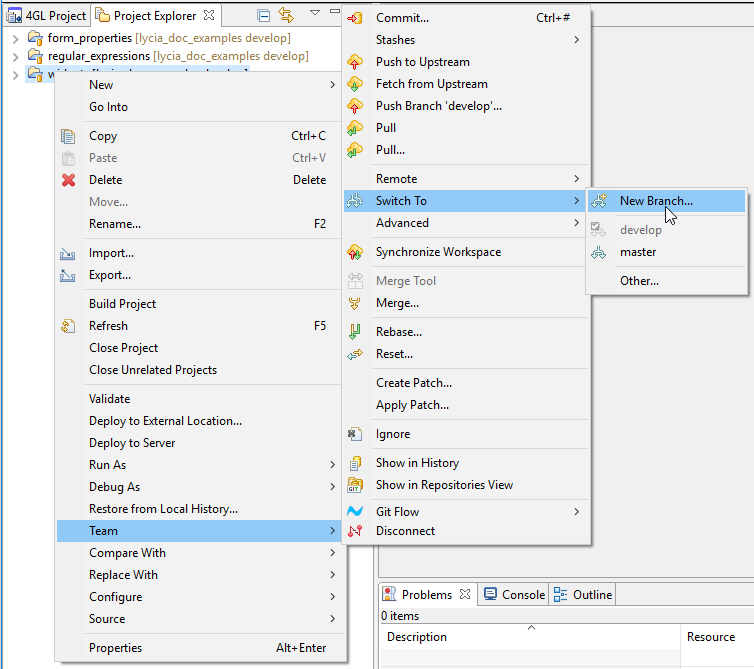
You can check out the necessary branch in three ways:
→ from the Team menu (in 4gl Perspective):

If there are too many branches in your repository, and some of them are not shown in the list, you can choose Other... to get to the full branch list.
→ from GIT Repositories view:


In this case, you have to choose the necessary branch in the opened window:

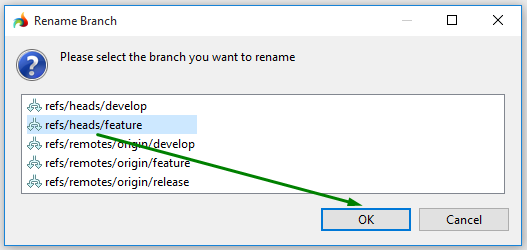
Local branches are renamed in three ways:
→ from the Team menu (in 4gl Perspective):

In this case, you have to choose the necessary branch in the opened window:

→ from GIT Repositories view:


In this case, you have to choose the necessary branch in the opened window:

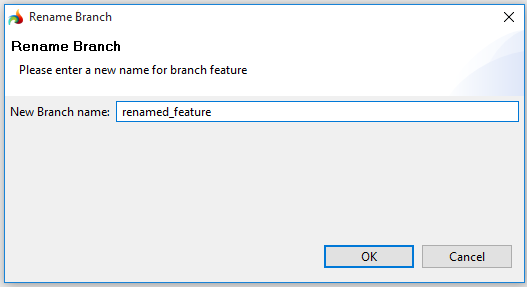
After you enter the new name to the opened window and press OK,

your branch will get its new name:

You can create and delete local branches depending on your development needs.
However, when deleting your local branch, please remember:
|
|
You cannot delete the currently checked-out branch:
|
|
|
|
|
|
|
|
You will need to confirm deletion if the plug-in decides that you will lose data after deleting the branch (the corresponding warning will appear in this case, e.g., the one shown in the screenshot):
|
|
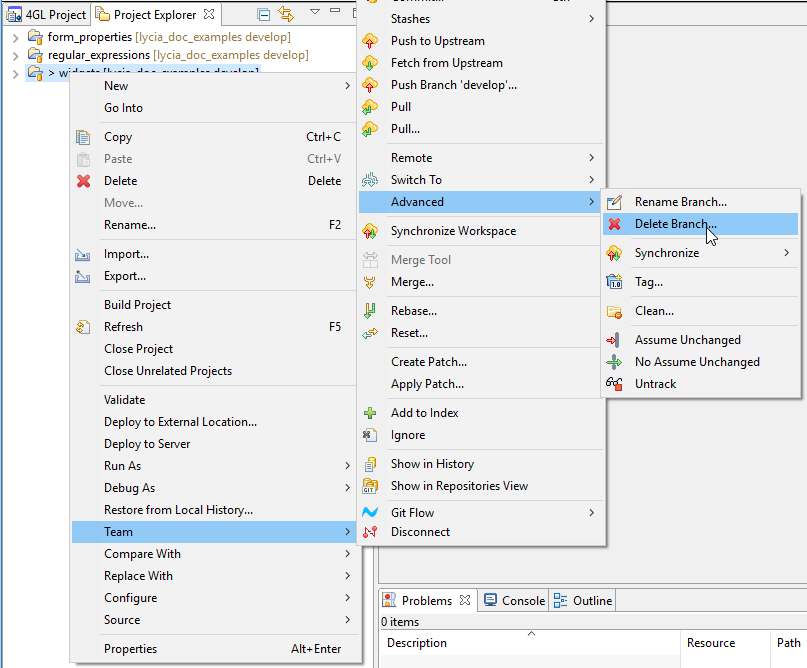
Local branches are deleted in three ways:
→ from the Team menu (in 4gl Perspective):

In this case, you have to choose the necessary branch in the opened window:

→ from GIT Repositories view:


In this case, you have to choose the necessary branch in the opened window:
