Create
Prerequisites
To begin working on your projects, you need to use a Workspace. Visit the Workspace view section of the Interface page to learn about the Workspaces functionality and how to create one.
Creating Projects
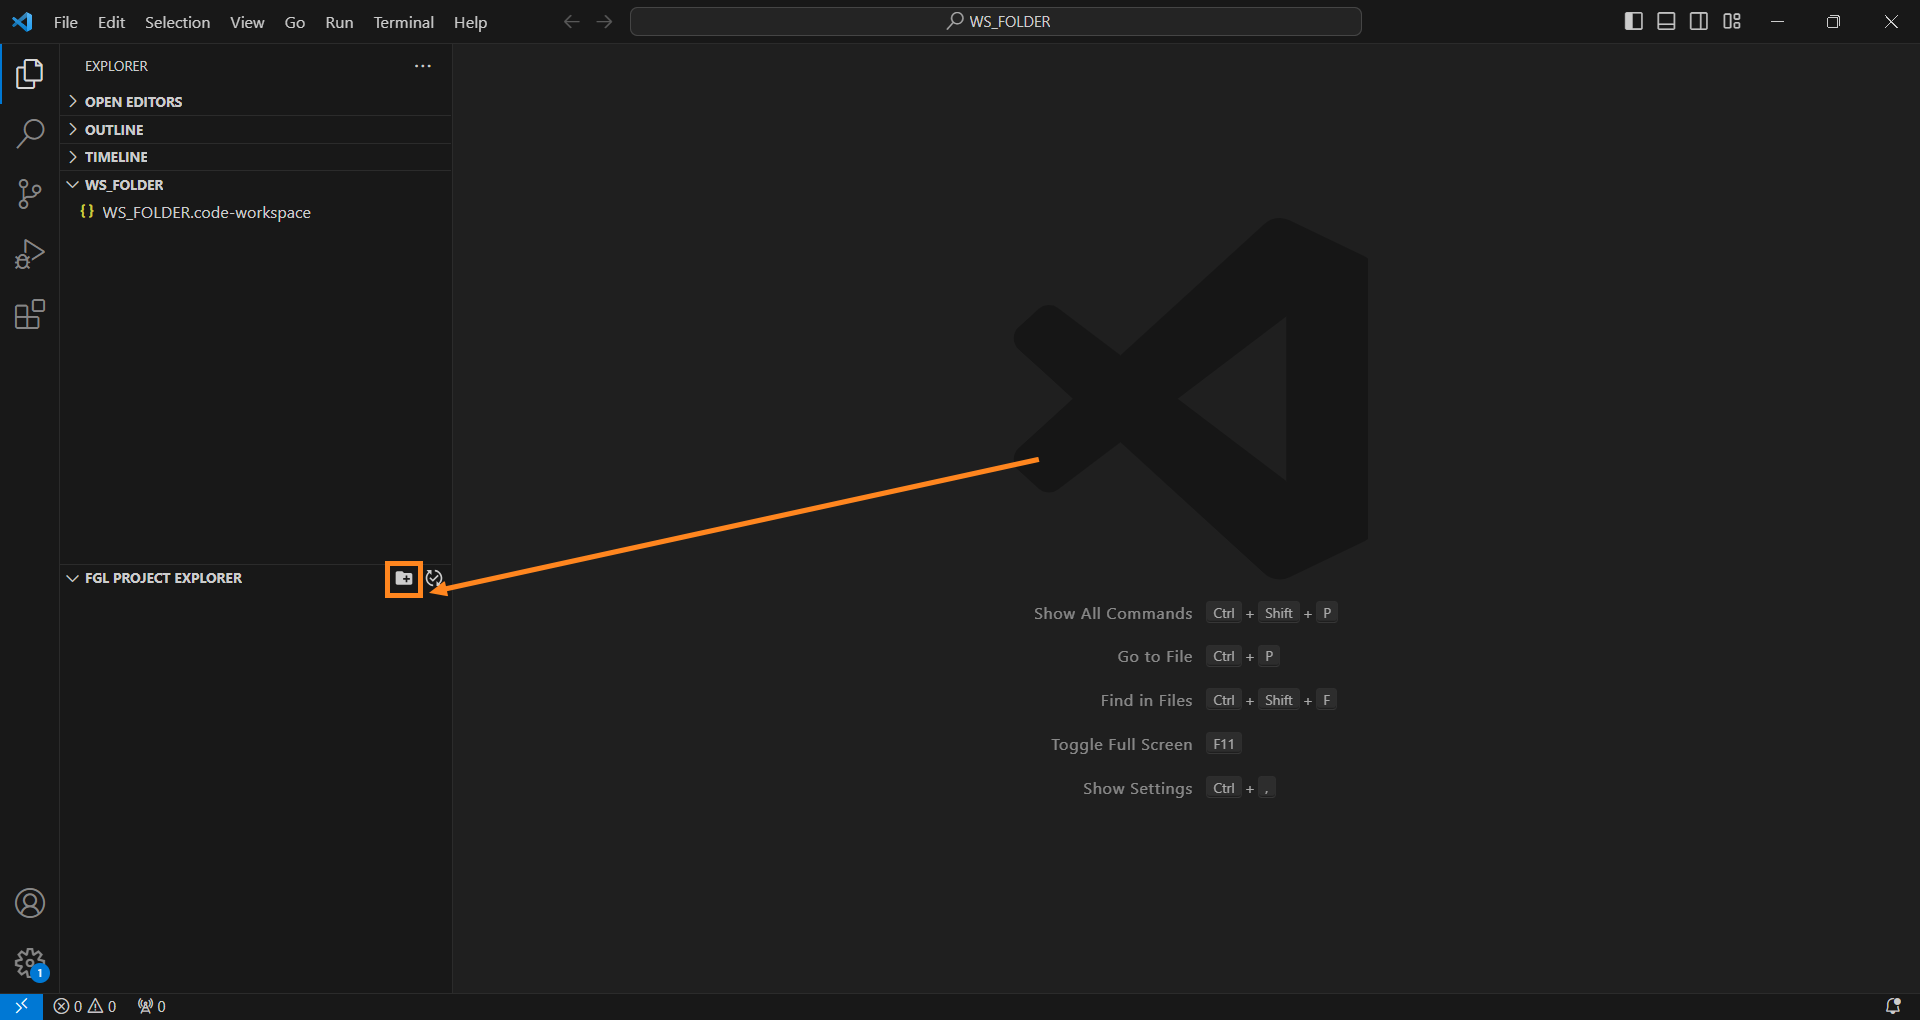
Step 1. Click the FGL Project Explorer to unfold it, and select the Create FGL Project button:
Step 2. Remote VS Code will display a dialog in the top of VS Code’s main window. Provide a name for your new project and press ENTER:

Step 3. Then you will be prompted to pick a location for your new project:
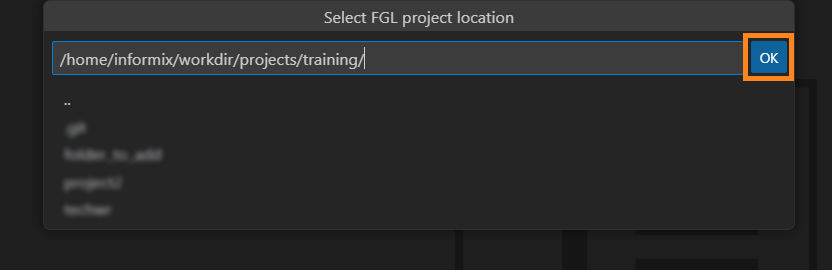
Select a folder and click the OK button.
For local instance of VS Code, on this step you will receive a File Explorer dialog window, provided by your OS. Pick a location for your new project, and click Select:

Then, if Switch To Created Project setting of the Extension is checked, VS Code will open a new Workspace with the project name as the Workspace folder (read more on this behaviour in the Notes column of the LVSCE Settings table):
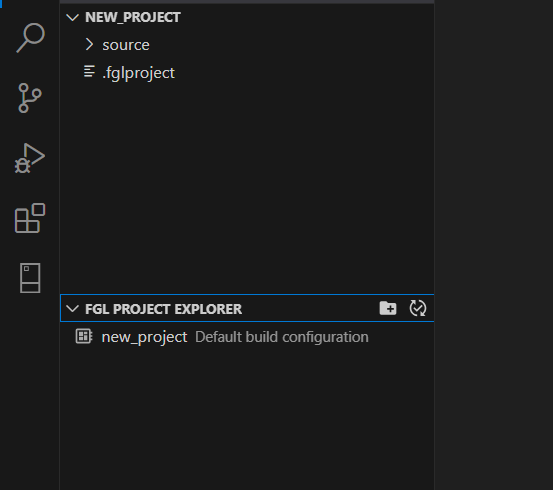
After that, you can start creating programs in your project - or import the existing ones.
Creating FGL Programs
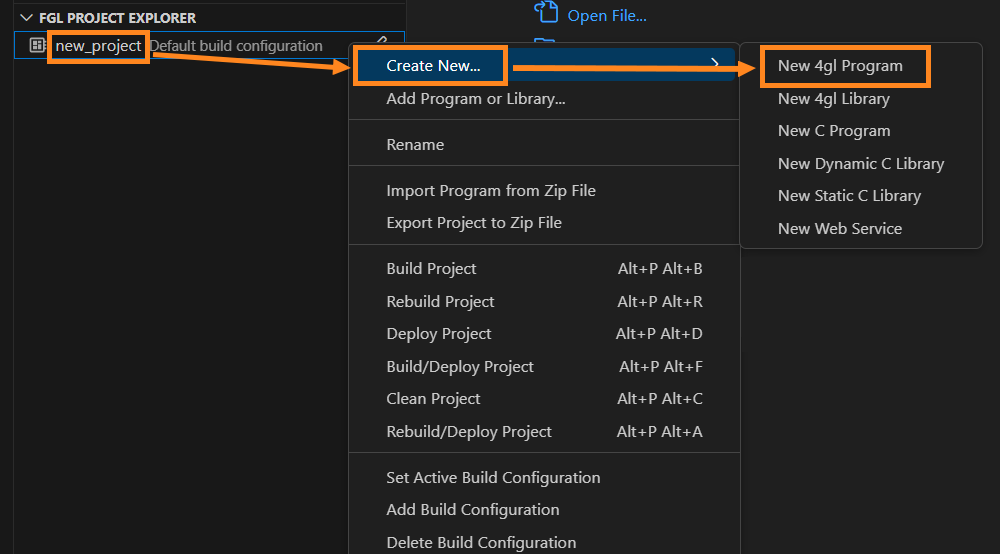
Step 1. Right-click the project and select Create New → New 4gl Program:
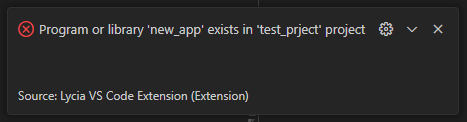
Attention: The name of the new program or library has to be unique within your 4GL project. If you try to create a new program or library with the name that already exists in that project, LVSCE will display an error like the following:
Step 2. In the dialog that opens, provide the name for your new program, and press ENTER:

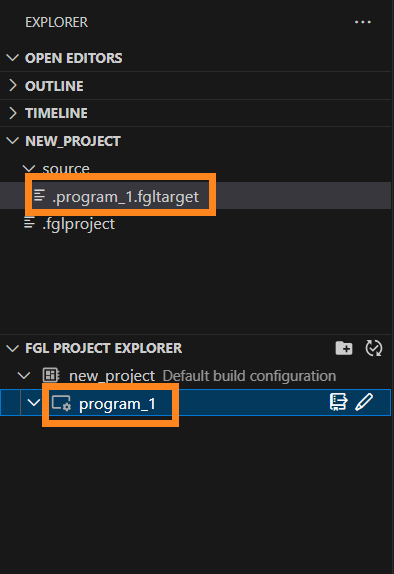
Your new program will appear in FGL Project Explorer and will have an automatically created .fgltarget file in program’s Source directory:
Creating Files
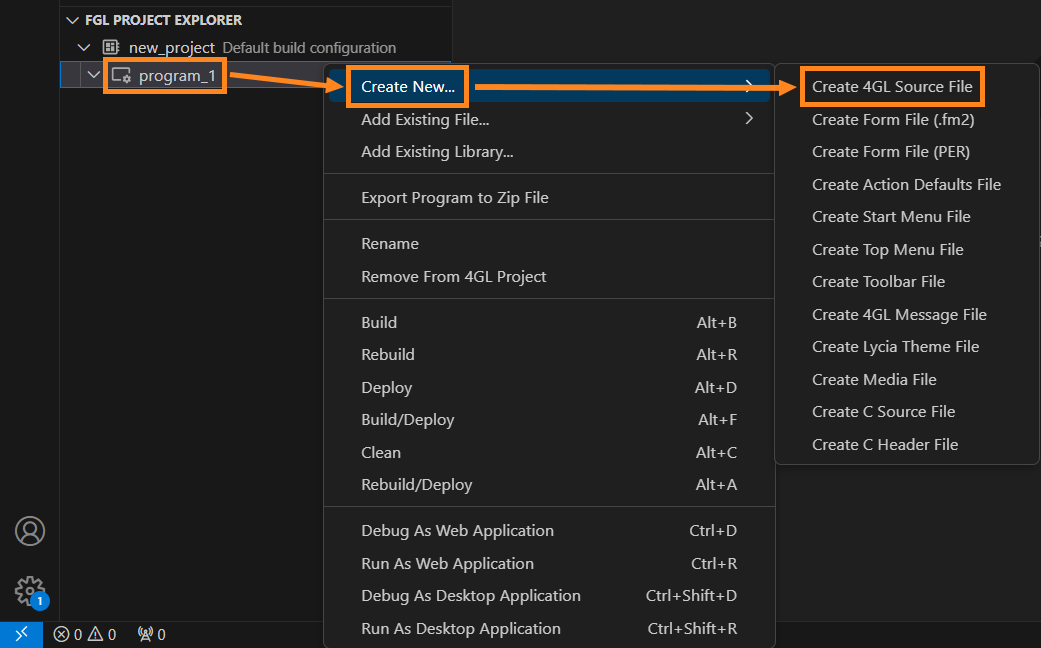
Step 1. Right-click your program, select Create New → Create 4GL Source File:
Then you will receive a prompt to name your new 4GL source file in the upper part of VS Code’s main window:
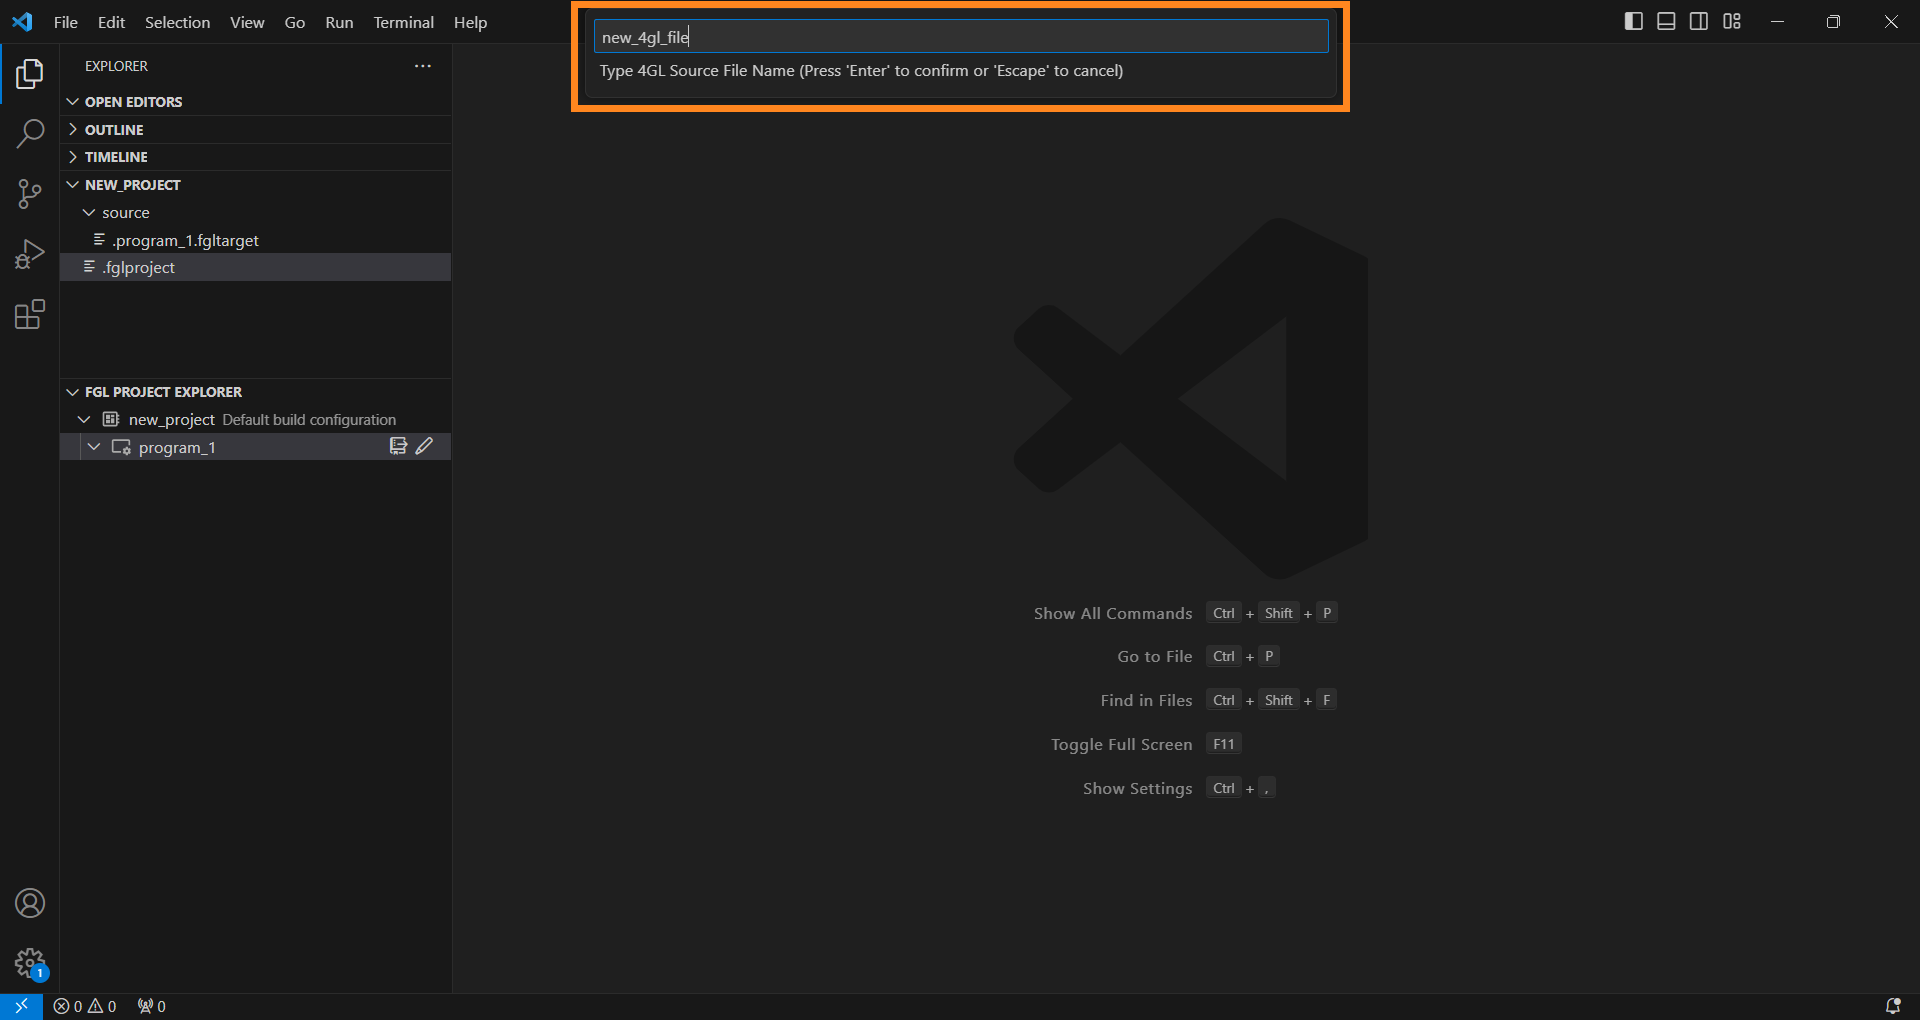
Step 2. Name the file and press ENTER.
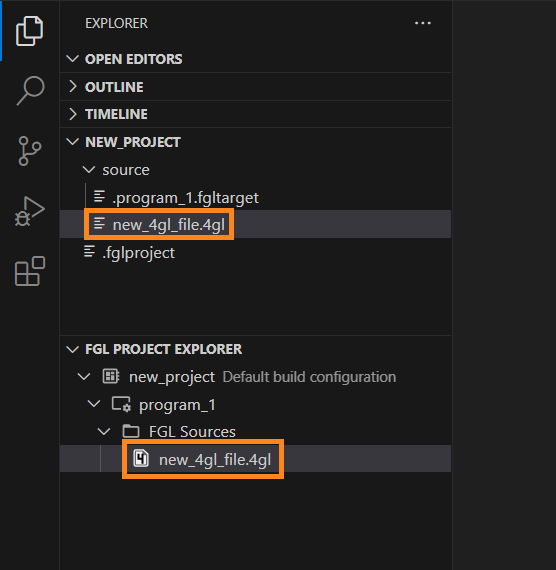
Your .4gl source file will appear in FGL Project Explorer and in Workspace view:
The Editor will open that file for you to add your 4GL code:

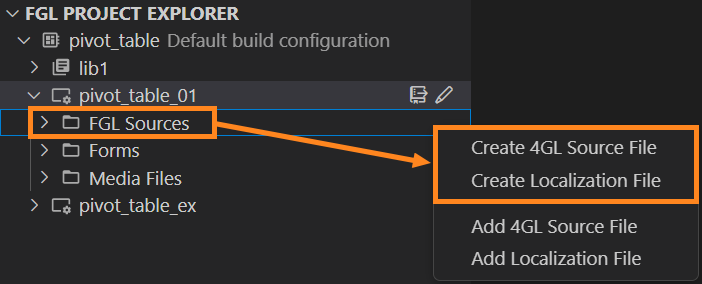
Note: In FGL Project Explorer, the files are grouped into folders according to their types. Once the file is created in the program, the appropriate folder is created as well. By right-clicking the folder and selecting a Create option, you can create any additional files - for instance, form files or media files. Specify file extension when creating media files!
Example:
Creating Form Files
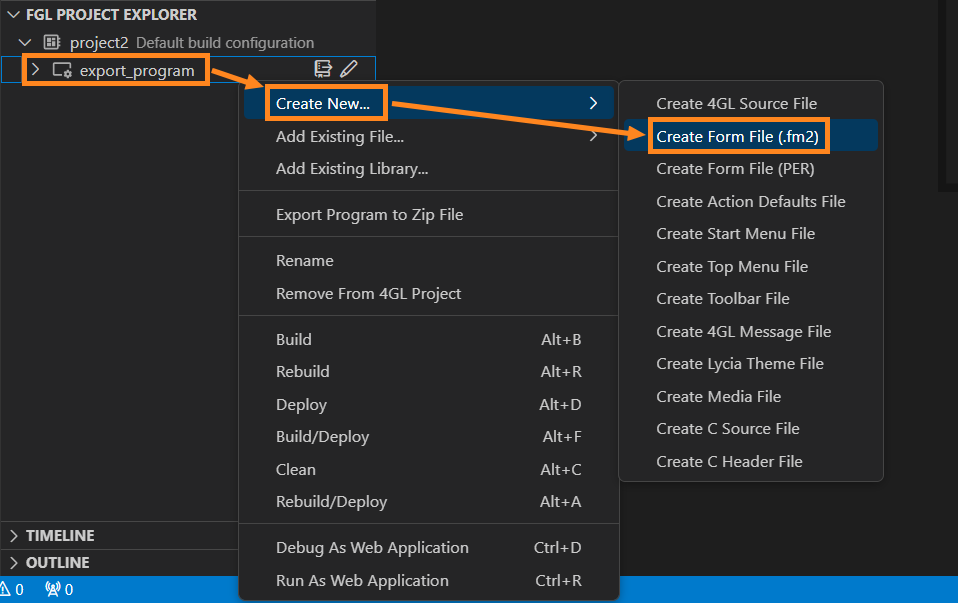
From the Program context menu, you can create a form file in .fm2 XML format. To do that, right-click the program name and select Create New → Create a Form File (.fm2):
Assign a name and press ENTER:

The new .fm2 form file will be placed into the Forms folder in FGL Project Explorer:

If that folder wasn't there in your program prior to the form creation or addition to the project (for example, if there were no forms in the program), FGL Project Explorer will create such folder when you create a form or add form to the program using Project and Program context menus.
After that, you will be able to edit your form’s layout using VS Code’s code editor, or open the Form Builder and edit the form using its visual display.
You can add more form files from the Forms folder's context menu:

Video: Projects Creation and Management
To see projects creation in dynamic, refer to the video below:
See next: Add