Layout and Interface of Lycia VS Code Extension
Creating a New Workspace and Saving It
Adding Folders to Existing Workspace
Accessing LVSCE-Specific Actions from the Workspace
FGL Project Explorer's Quick Actions
Explorers Layout Customization
Moving Views Up and Down the Explorer Area’s Sidebar
Lycia VS Code Extension utilizes the standard VS Code interface, adding the parts necessary for 4GL developer’s work.
Get familiar with VS Code’s interface before proceeding: Visual Studio Code Interface
Workspace View
The Workspace view is located in the Primary Sidebar, inside the Explorer area. Workspace view displays the files and folders trees of your projects, including the output files. From there, you can access and open any supported file type:
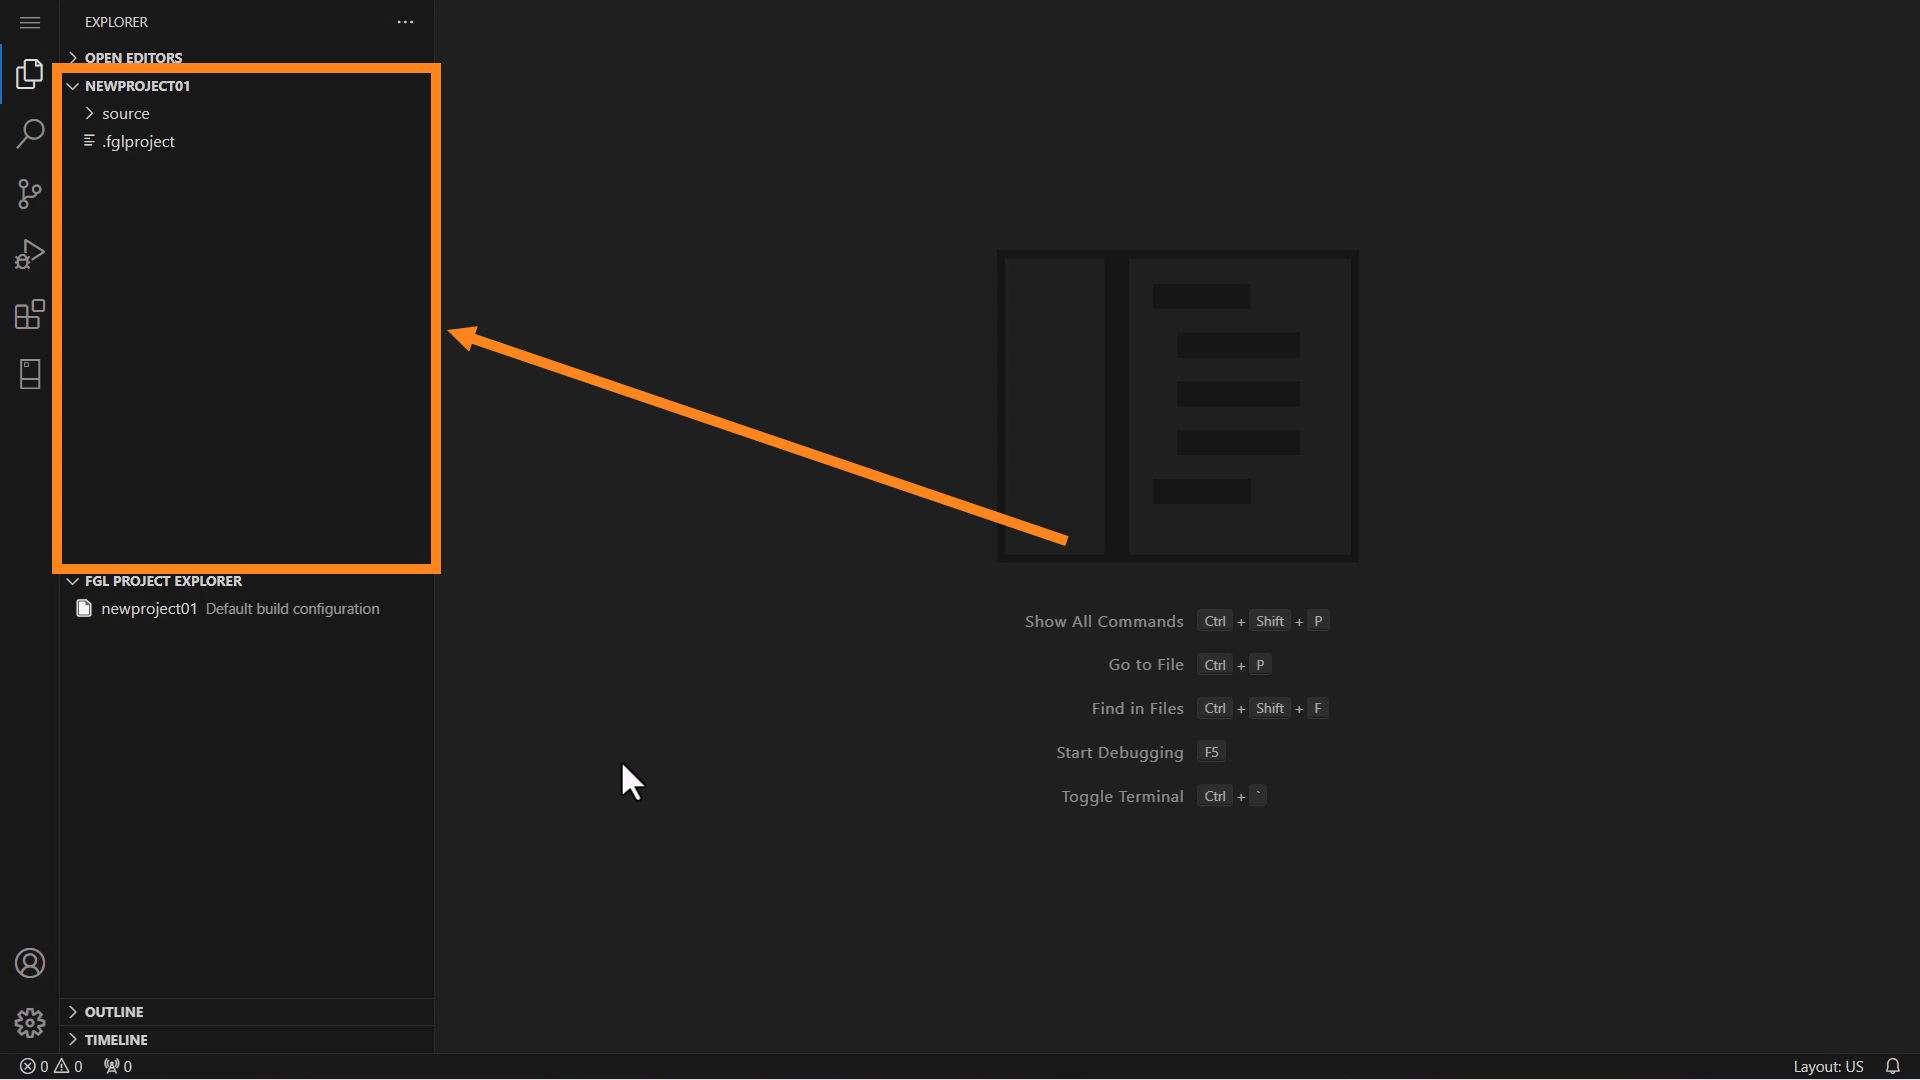
The header text in the top of Workspace view depends on the contents:
- <folder_name>: this type of header is displayed when you open a folder;
- Untitled (Workspace): this header is displayed after you have added at least one more folder to your Workspace view;
- <custom_workspace_name> (Workspace): this header is displayed after you have “saved” a Workspace (after saving a Workspace, you will have a <custom_workspace_name>.code-workspace.json file that stores the settings for your Workspace).
See the Creating a New Workspace section below for details on managing your Workspaces.
Additionally, learn advanced Workspaces management on the following pages: What is a VS Code "workspace"? and Multi-root workspaces.
Creating a New Workspace
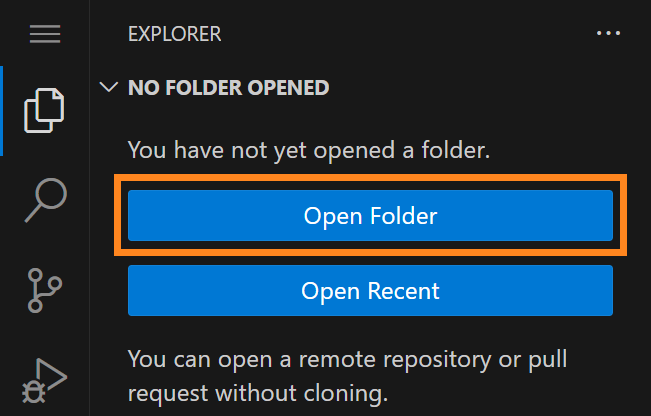
Step 1. In the Explorer area’s Primary Sidebar, find the Open Folder button:
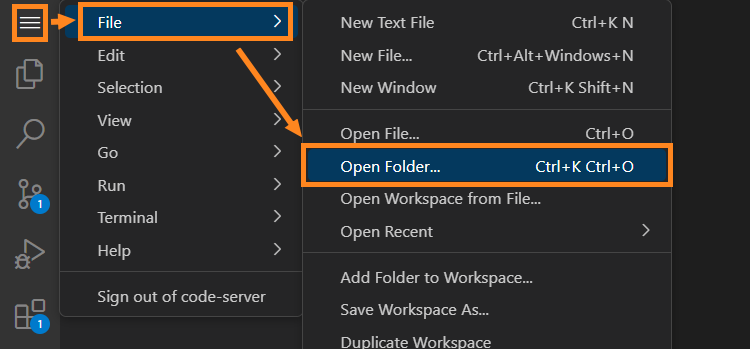
Alternatively, find VS Code’s main menu; in web-version of VS Code it will be under the “hamburger“ Menu button in the Activity Bar by default (go to View → Appearance → Menu Bar if you want to toggle Menu Bar on). Click the Menu button, then select File → Open Folder options:
In local instance of VS Code, you can find the needed option after clicking File on the Menu Bar:

Step 2. Remote VS Code instance will open the dialog for the folder choice. Pick a folder or create a new one, and click the OK button:

Local VS Code instance will open your OS File Explorer. Pick a folder or create a new one, and click the Select Folder button:
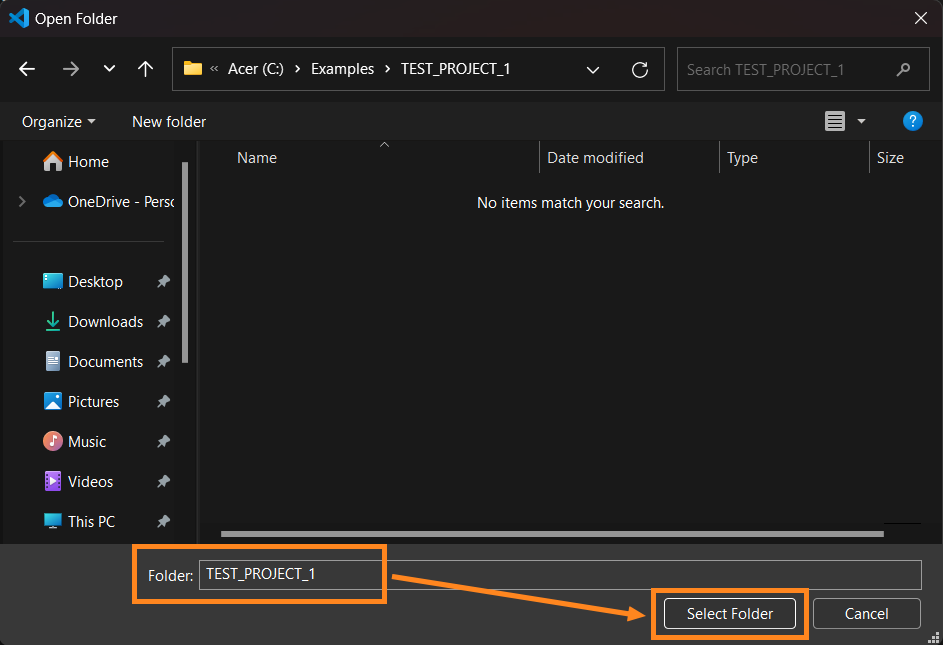
This action will open your folder as single-folder Workspace:

Step 3. Go to File → Save Workspace As:

Step 4. Remote instance of VS Code will open a dialog in the top of VS Code’s main window for you to pick a folder to store the Workspace JSON file in and assign a file name:

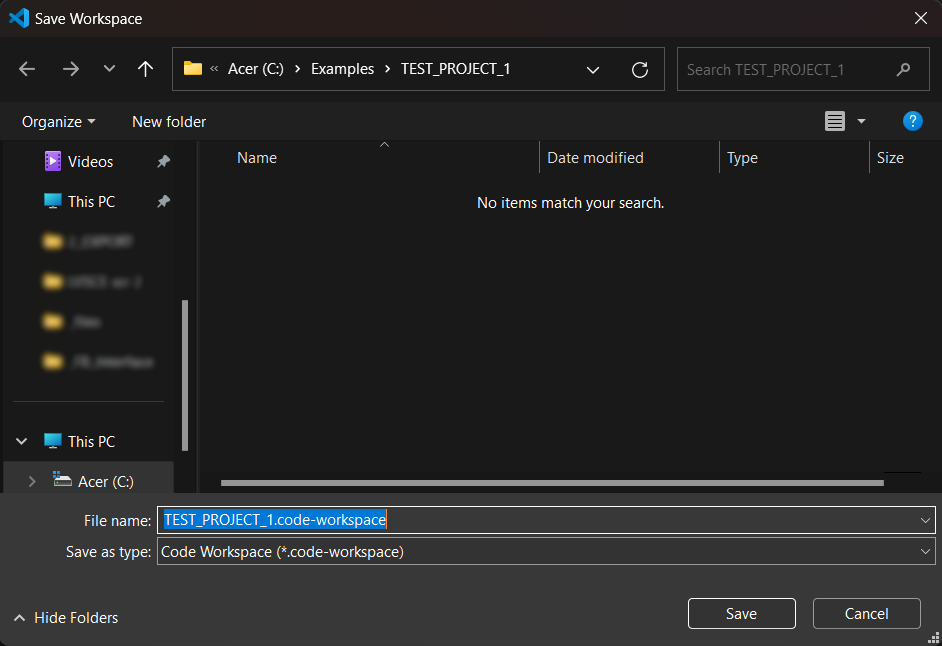
Local instance of VS Code will open your OS File Explorer. Pick a folder and assign a name for the file:
Step 5. For remote VS Code instance, click OK:

For local VS Code instance, click the Save button:
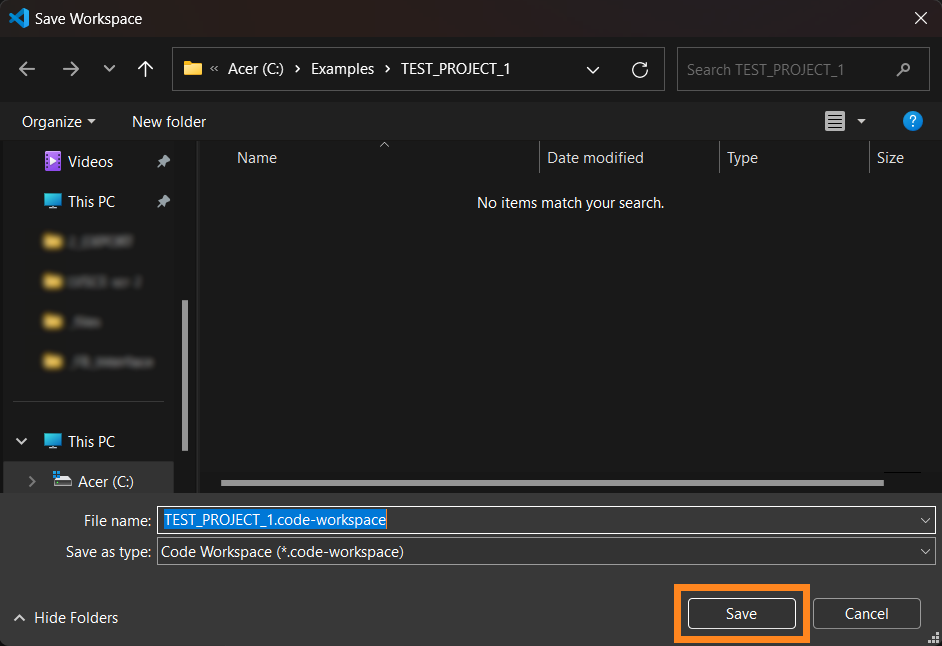
After that, you will be able to open your Workspace from file. Also, a workspace JSON file (file format: <custom_workspace_name>.code-workspace.json) stores part of the settings you will need while working with LVSCE. By default, the name of the file will be the same as the Workspace was called prior to you manually saving it.
Opening a Workspace From File
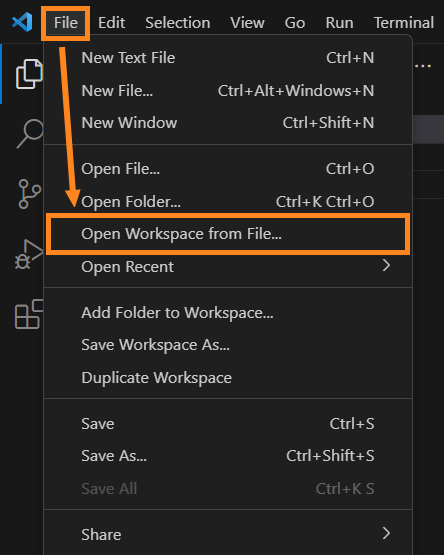
Step 1. In VS Code’s main menu, find the File → Open Workspace From File option:
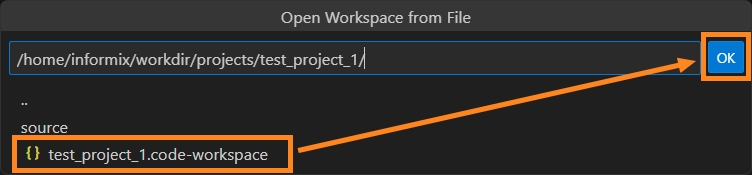
Step 2. In remote VS Code instance, LVSCE will show a dialog in the top of VS Code’s main window. Find the .code-workspace.json file of the Workspace you need, and click OK:
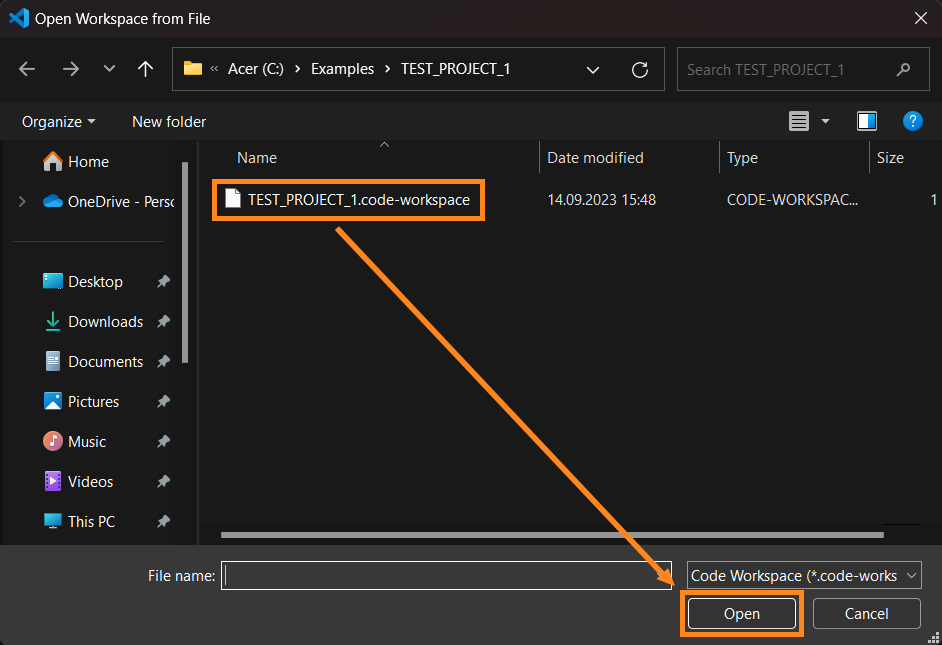
In local VS Code instance, LVSCE will open your OS File Explorer. Find the .code-workspace.json file and click the Open button:
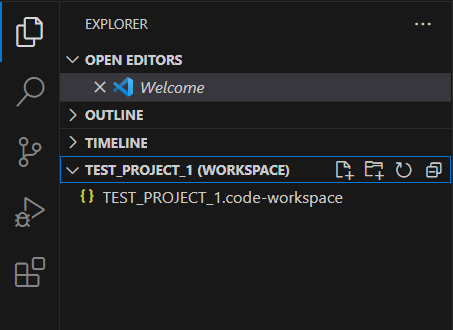
As the result, your saved Workspace will be opened:
Adding Folders to Existing Workspace
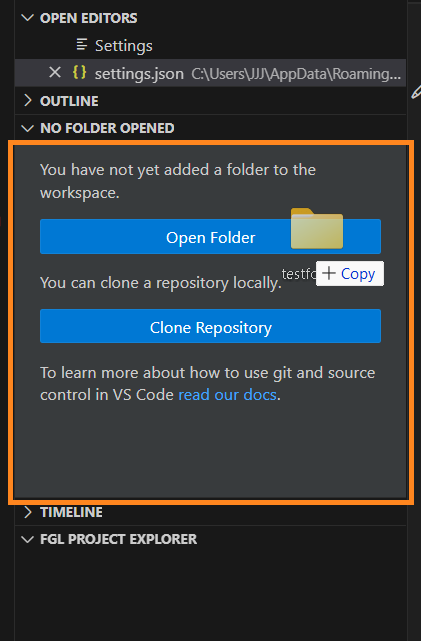
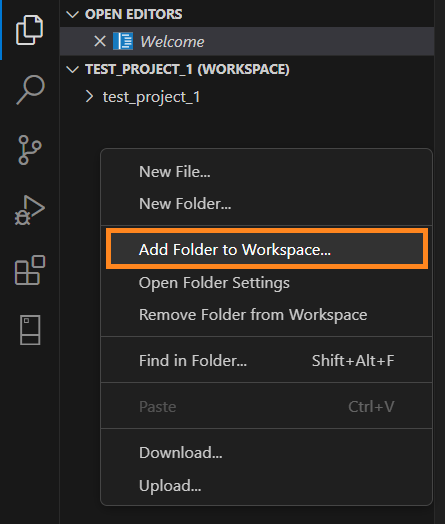
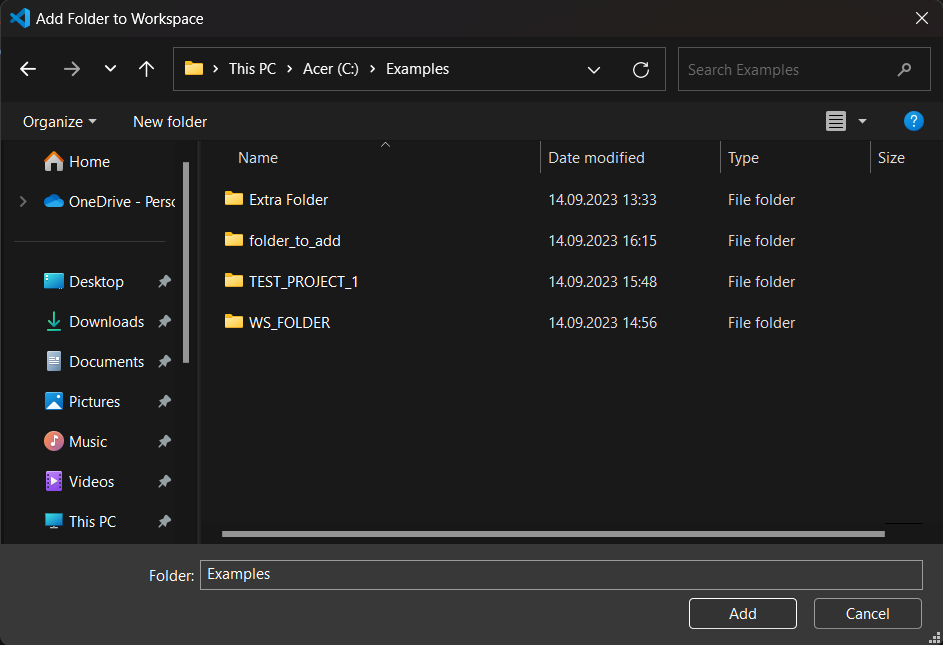
Step 1. Right-click blank space within the Workspace and select Add Folder to Workspace:
Remote VS Code instance will open a dialog in the top of VS Code’s main window for you to pick a folder:

Local VS Code instance will open your OS File Explorer:
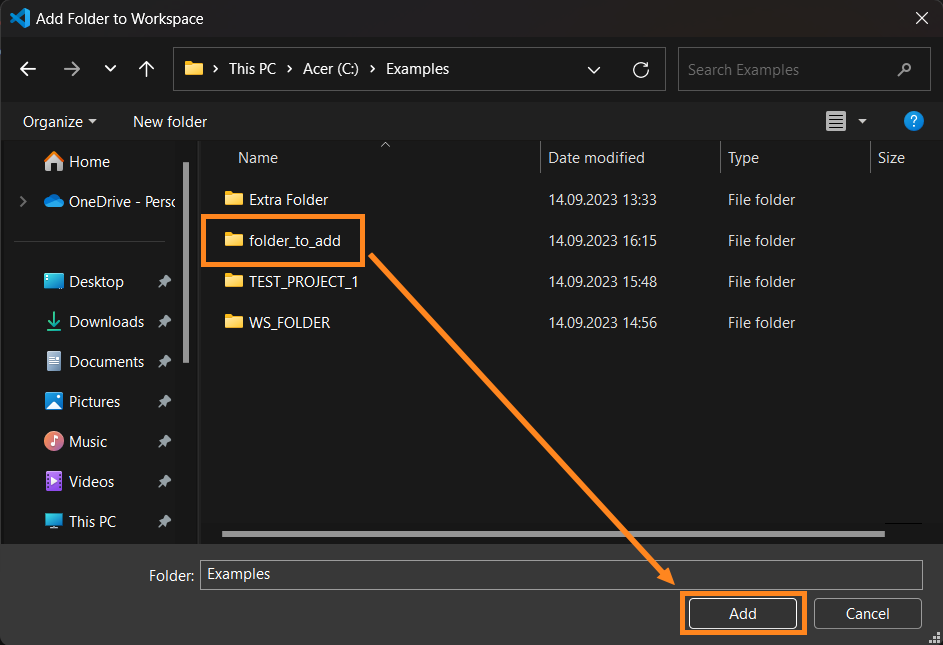
Step 2. In remote instance of VS Code, select the folder to add to your Workspace, and click OK

For local VS Code instance, select the folder and click Add:
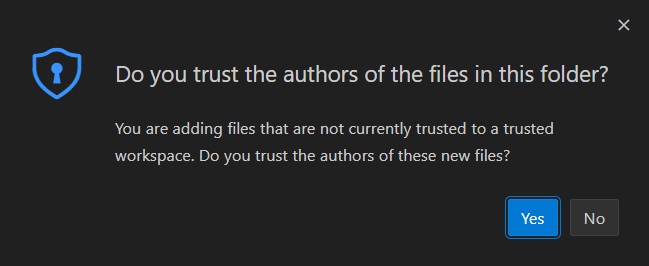
After that, you might get a safety warning. Click Yes to proceed:
Your chosen folder will be added to the Workspace:

Accessing LVSCE-Specific Actions from the Workspace
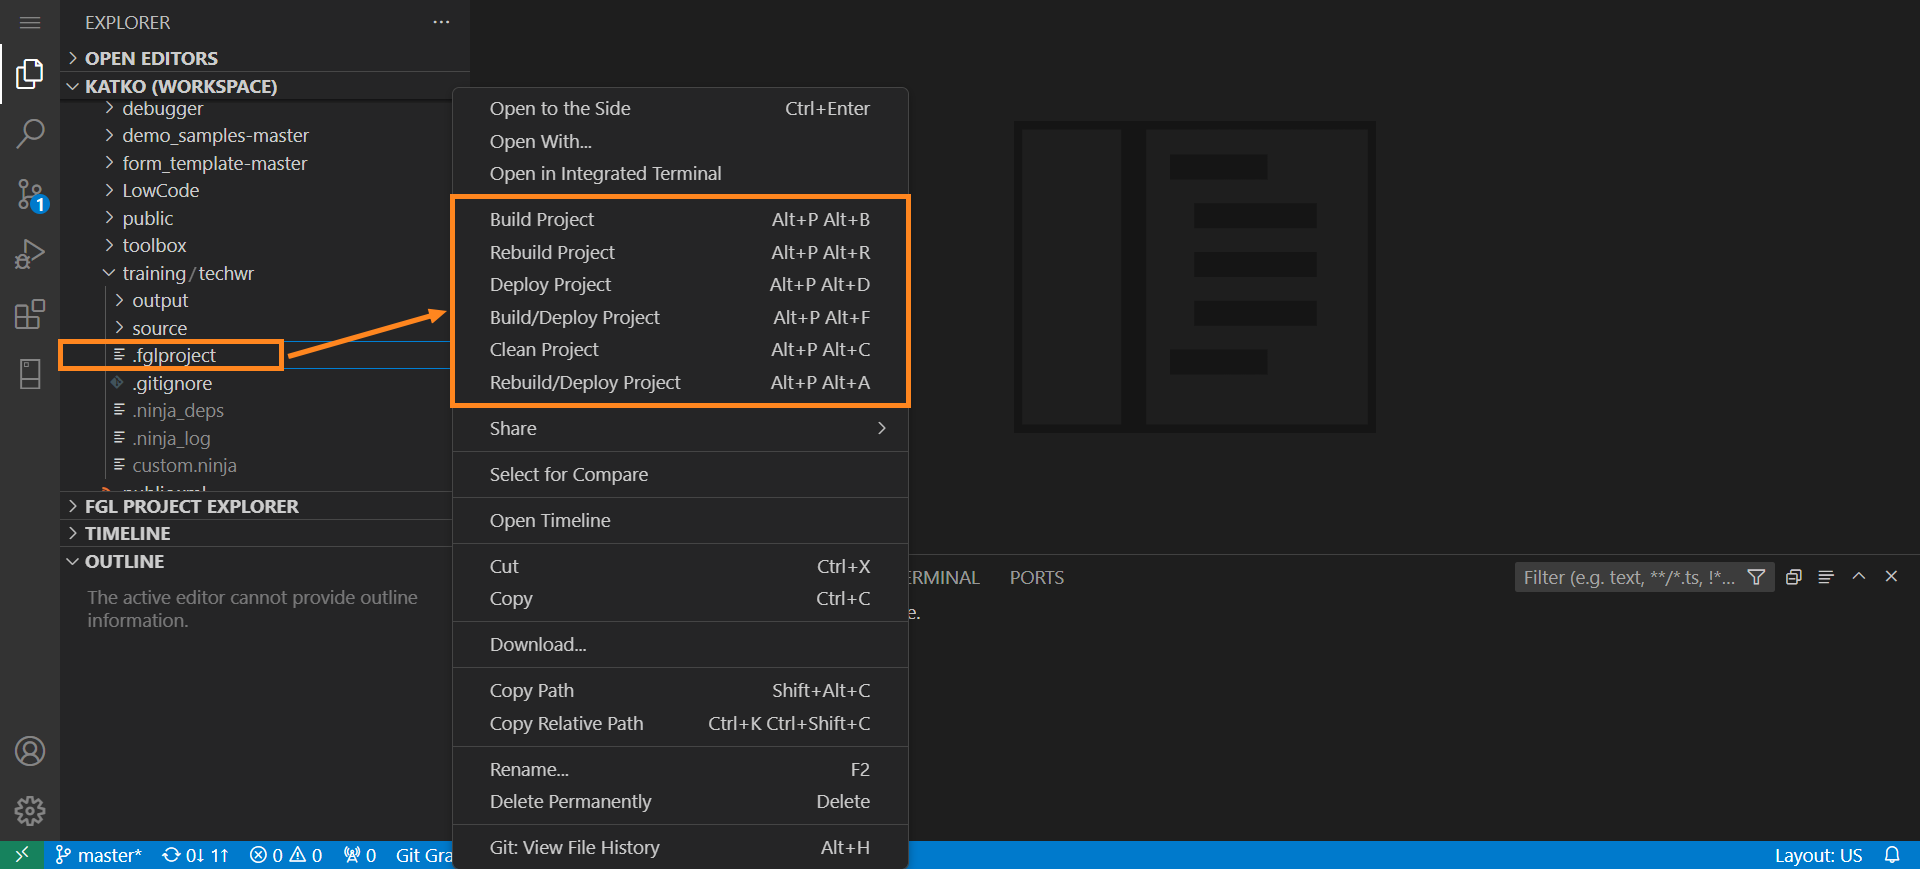
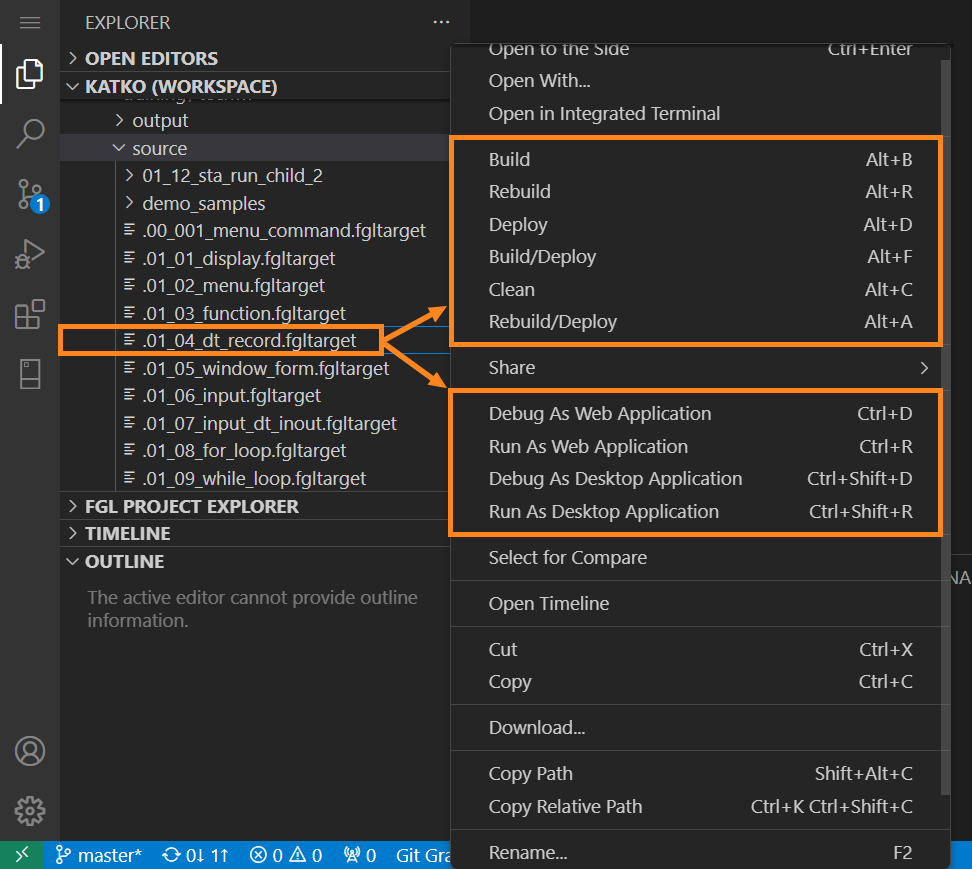
We have supplemented a list of default right-click menu options in the Workspace view with extra actions for .fgltarget and .fglproject files. Thus, you can perform several actions from the context menus of FGL Project Explorer right from the Workspace view.
The .fglproject file context menu offers the following options:
- Build Project
- Rebuild Project
- Deploy Project
- Build/Deploy Project
- Clean Project
- Rebuild/Deploy Project
The .fgltarget file context menu provides the access to the following actions for the program:
- Build
- Rebuild
- Deploy
- Build/Deploy
- Clean
- Rebuild/Deploy
- Debug as Web Application
- Run as Web Application
- Debug as Desktop Application
- Run as Desktop Application
FGL Project Explorer
The FGL Project Explorer is located inside the Explorer area:

This explorer was created specifically for the needs of 4GL developer. From it, you can:
- Create, rename, remove projects;
- Create, rename, remove programs, web services and source files;
- Add existing programs, libraries and resources to your projects;
- Import and export the files and entire projects;
- Clean, build, rebuild, deploy and run programs or entire project;
- Manage your build configurations;
- Convert your .per or .4fm forms.
To call up these actions, right-click your project or program.
The files of your program will be grouped into folders in FGL Project Explorer according to their types - FGL Sources, Forms, Media Files, etc.
FGL Project Explorer's Quick Actions
The header of FGL Project Explorer has three quick actions buttons, visible on hovering over the header line:

They represent the following actions (left to right):
- Create New Program or Library (can be used to create a FGL program, FGL library, C program, dynamic C library, static C library, or Web service);
- Update FGL Targets Cache (for example, after you manually edit the .fglproject or .fgltarget file);
- Create FGL Project;
- Collapse All: Collapse all the folders, programs, libraries, and the project.
Example Program Creation
Prerequisite: To create programs, you need to create or import a project first. Learn how to do it here: Create Projects, Program, Files in LVSCE and Importing Projects and Programs.
Step 1. Click the Create New Program or Library button (leftmost) in the FGL Project Explorer's header:

Step 2. In the dialog that will appear at the top of your VS Code window, select the type of the item you need to create:

Step 3. After you select the type, a naming dialog will appear. Enter the name for the item you create:

Step 4. Press Enter to confirm.
After that, there will be several changes:
- Your newly created item will appear in your project's contents;
- LVSCE will notify you about the successful item creation in the lower-right corner of the VS Code window;
- LVSCE will create the .fgltarget file and open it in the Editor view of VS Code:

When you create projects and programs using FGL Project Explorer, LVSCE will automatically generate the .fglproject and .fgltarget files, and put them in proper locations in your project directories in Workspace. When the file structure of the project changes, these files will be updated automatically as well. Read more about it here: The Structure of a Project in Lycia.
A successfully built program will have a green check mark on its sign in FGL Project Explorer. A faulty one - a red cross mark. If you edit the program that had been built before, the build status mark will disappear until you build that program once again:
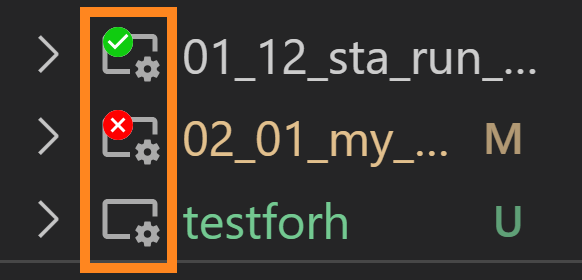
If you have a Source Control configured in you VS Code instance, LVSCE will display a status of the file in relation to the Source Control (Version Control System):
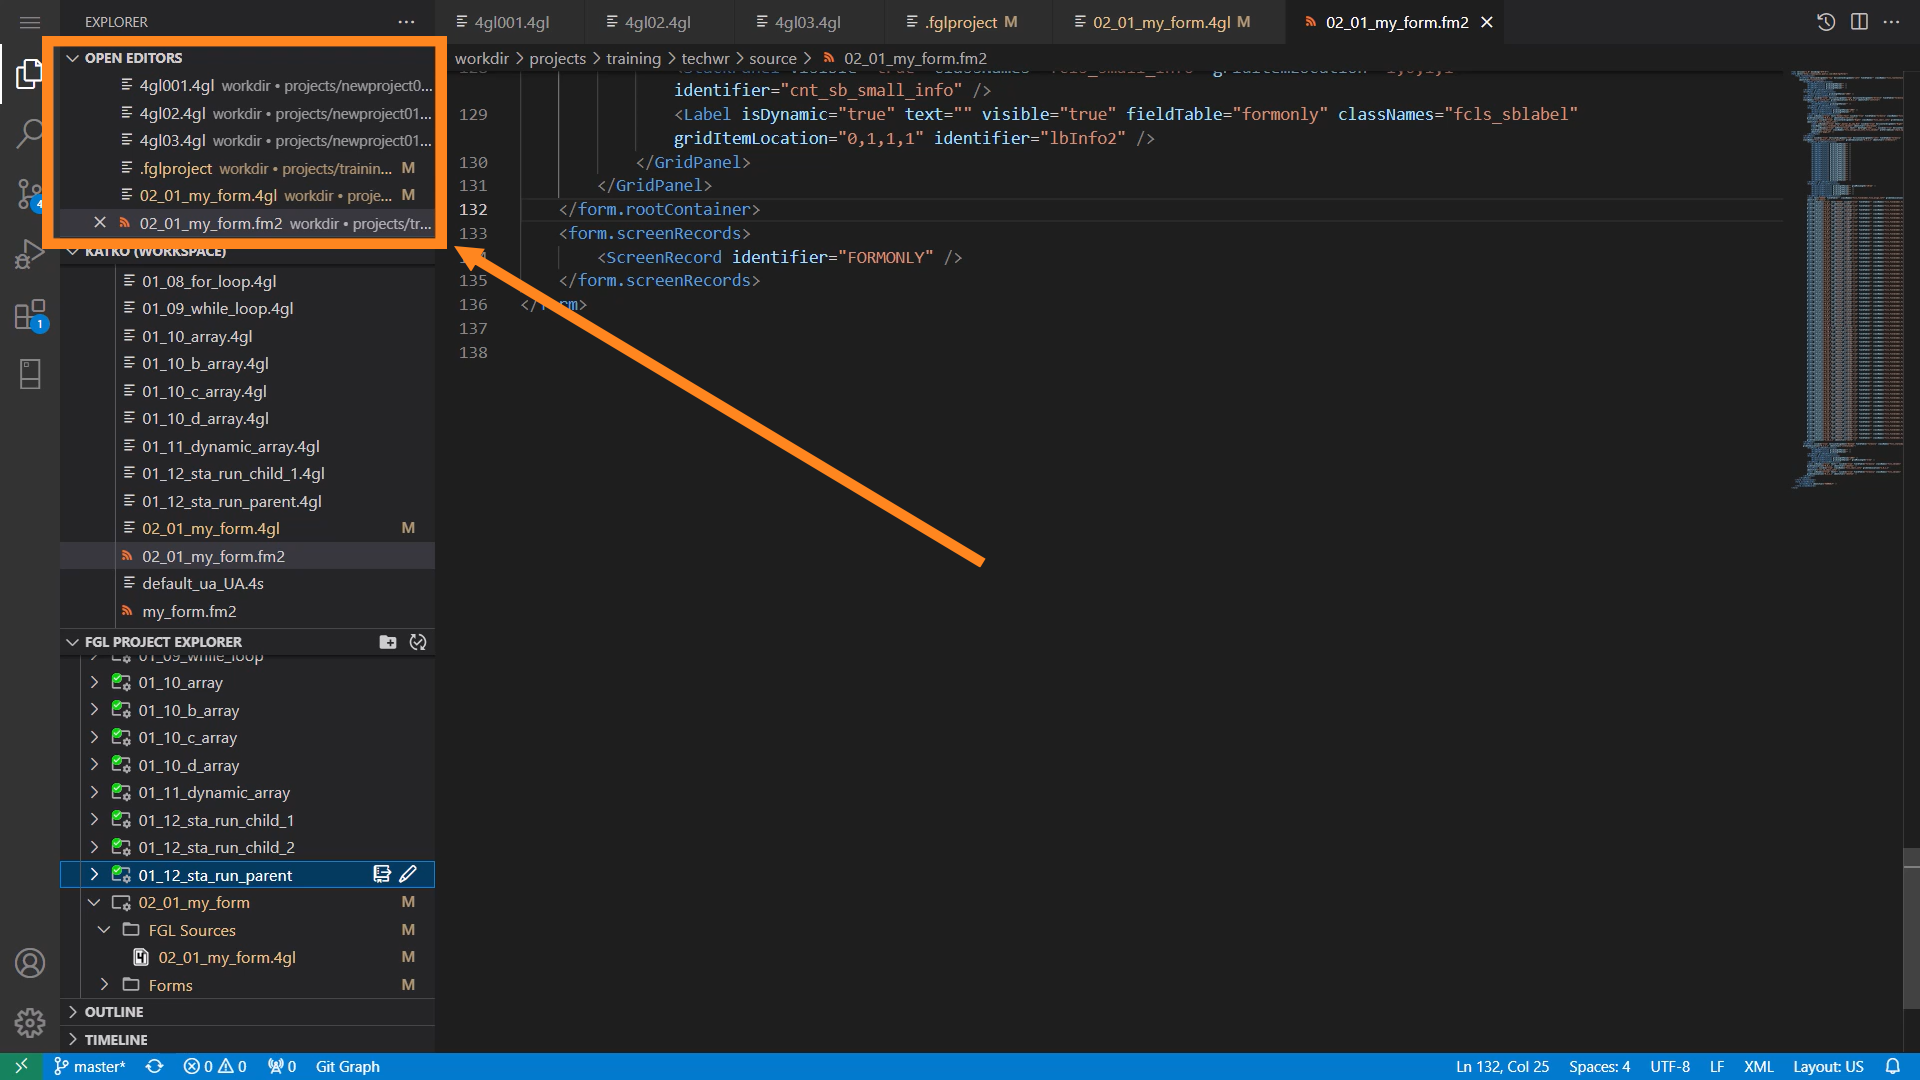
- At changes registered by Source Control, the file will have a letter M (for modified file) and U (for untracked file) in the Editor, in the FGL Project Explorer, in Workspace view and in the Open Editors view:
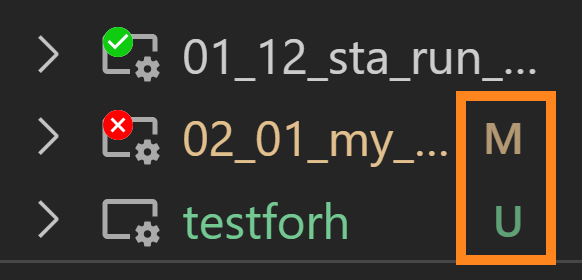
- The file will be coloured differently at change (for example, with the default VS Code color theme named Dark (Visual Studio), modified file is marked with the orange / beige colours, and the untracked file - with a green colour);
- The workspace folder containing the program will be marked with a dot sign in the Workspace and coloured differently as well.
Cross-Explorer File Display
When a project is open in FGL Project Explorer and you select any file from it, this file will also be focused in the Workspace view and opened in the Editor. If you select a program or a library, LVSCE will focus on its .fgltarget file in the Workspace view, and open the .fgltarget file in the Editor.
Selecting a file in the Editor will make LVSCE focus on it in the Workspace view. However, it won't be focused in the FGL Project Explorer until you switch the projects by clicking the .fglproject file. If the file open belongs to the currently open project, all three views will be focused on the same file when you select it in either of them.
Explorers Layout Customization
The Explorer and Editor areas in VS Code have customization features. While it’s not necessary that you’d want to drastically move all the views around VS Code’s window, this section might help in case of accidental layout changes.
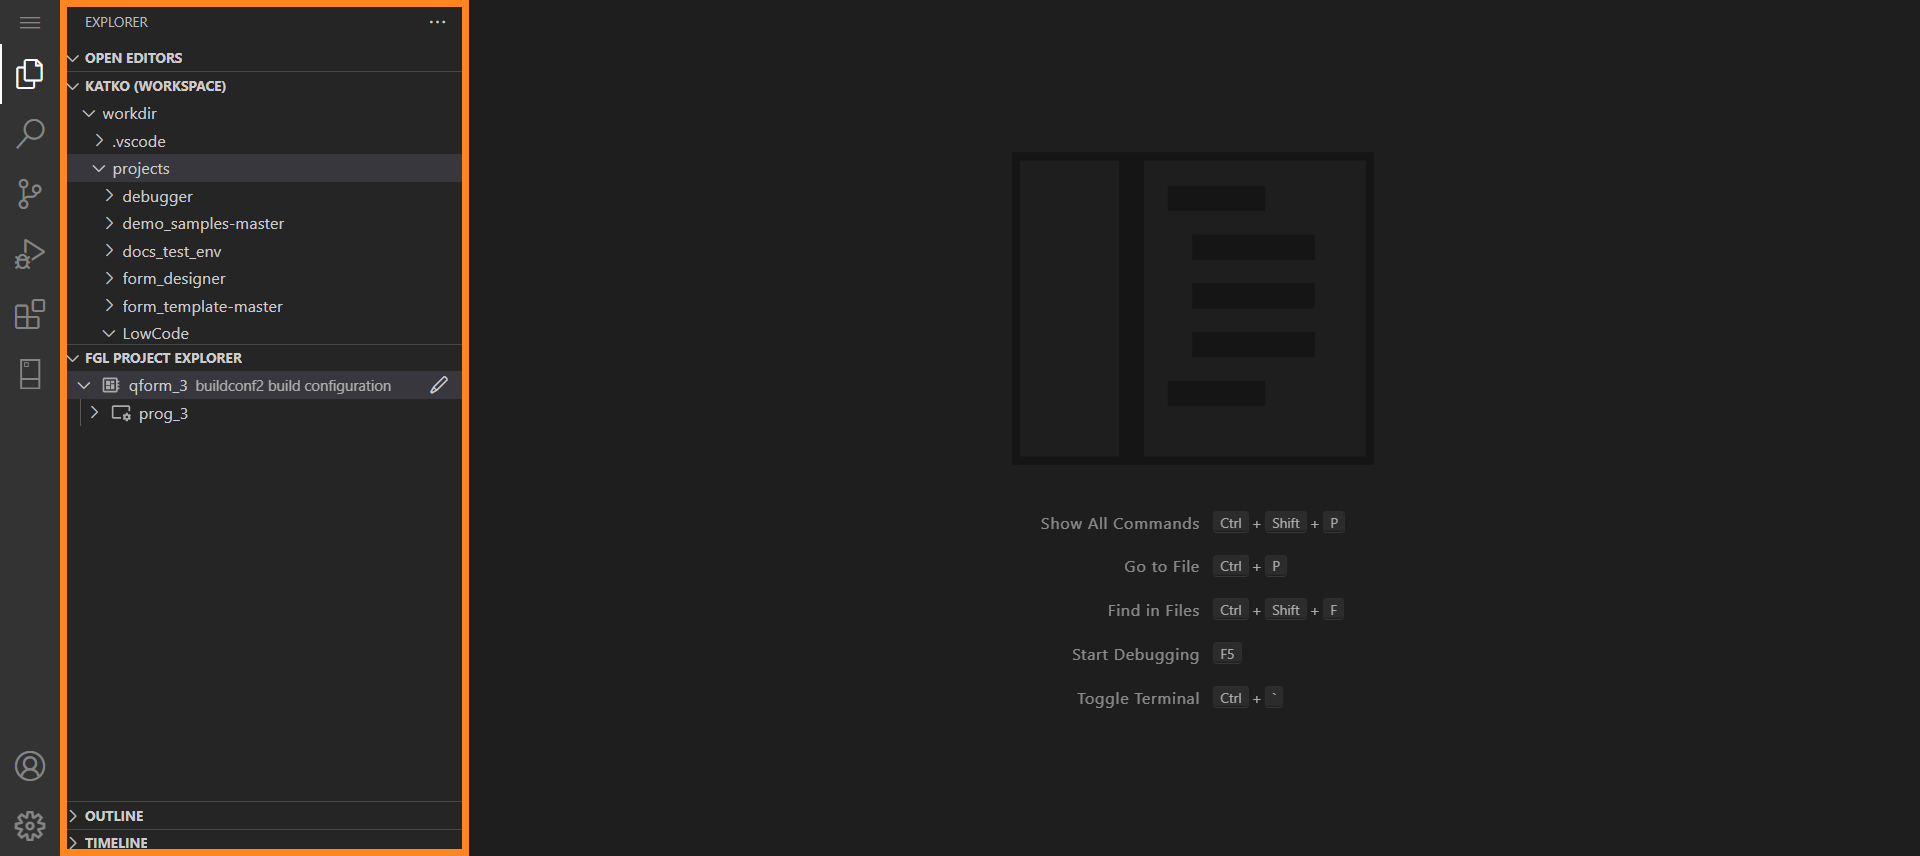
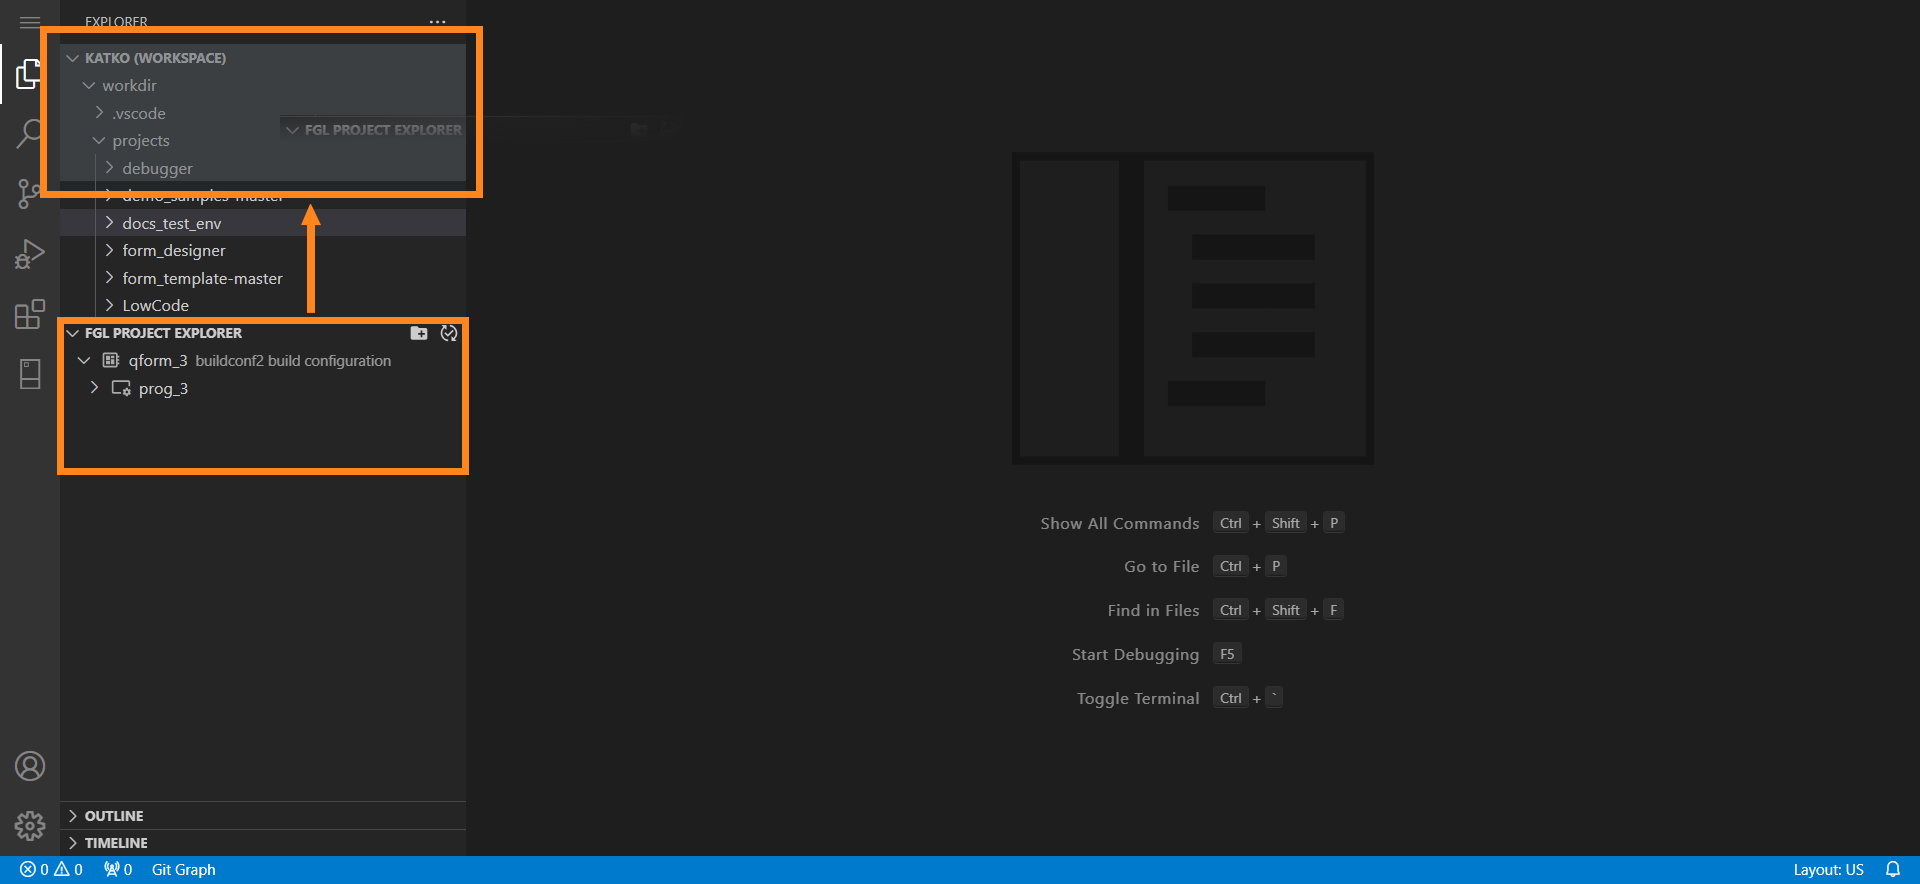
Primary Sidebar of Explorer area has different views: for example, in editing mode it has Open Editors, Workspace, FGL Project Explorer, Outline and Timeline views in default layout. You can move these views up and down the Explorer area by drag-and-dropping views into their desired places. Here’s the example of LVSCE instance with saved Workspace and existing projects in FGL Project Explorer. The initial layout for this instance looks like this:
Moving Views Up and Down the Explorer Area’s Sidebar
Let’s move FGL Project Explorer up in the Explorer area. To do that, we click FGL Project Explorer’s header and drag it up. VS Code will light up a part of the view you drag FGL Project Explorer into: highlighting of the upper half will mean that FGL Project Explorer will be placed to the top from another view (Workspace view in this example), and highlighting of the lower half will mean FGL Project Explorer will be placed after the Workspace view. Here, we’ll be moving FGL Project Explorer to the top:
After that, FGL Project Explorer will appear at the top of the Primary Sidebar:

To revert changes, do the same drag-and-drop actions with FGL Project Explorer view.
Moving Views to the Secondary Sidebar
To move any view to the Secondary Sidebar, which is located at the right edge of VS Code’s main window, drag-and-drop a view there.
In our example, we’ll be moving a Workspace view:
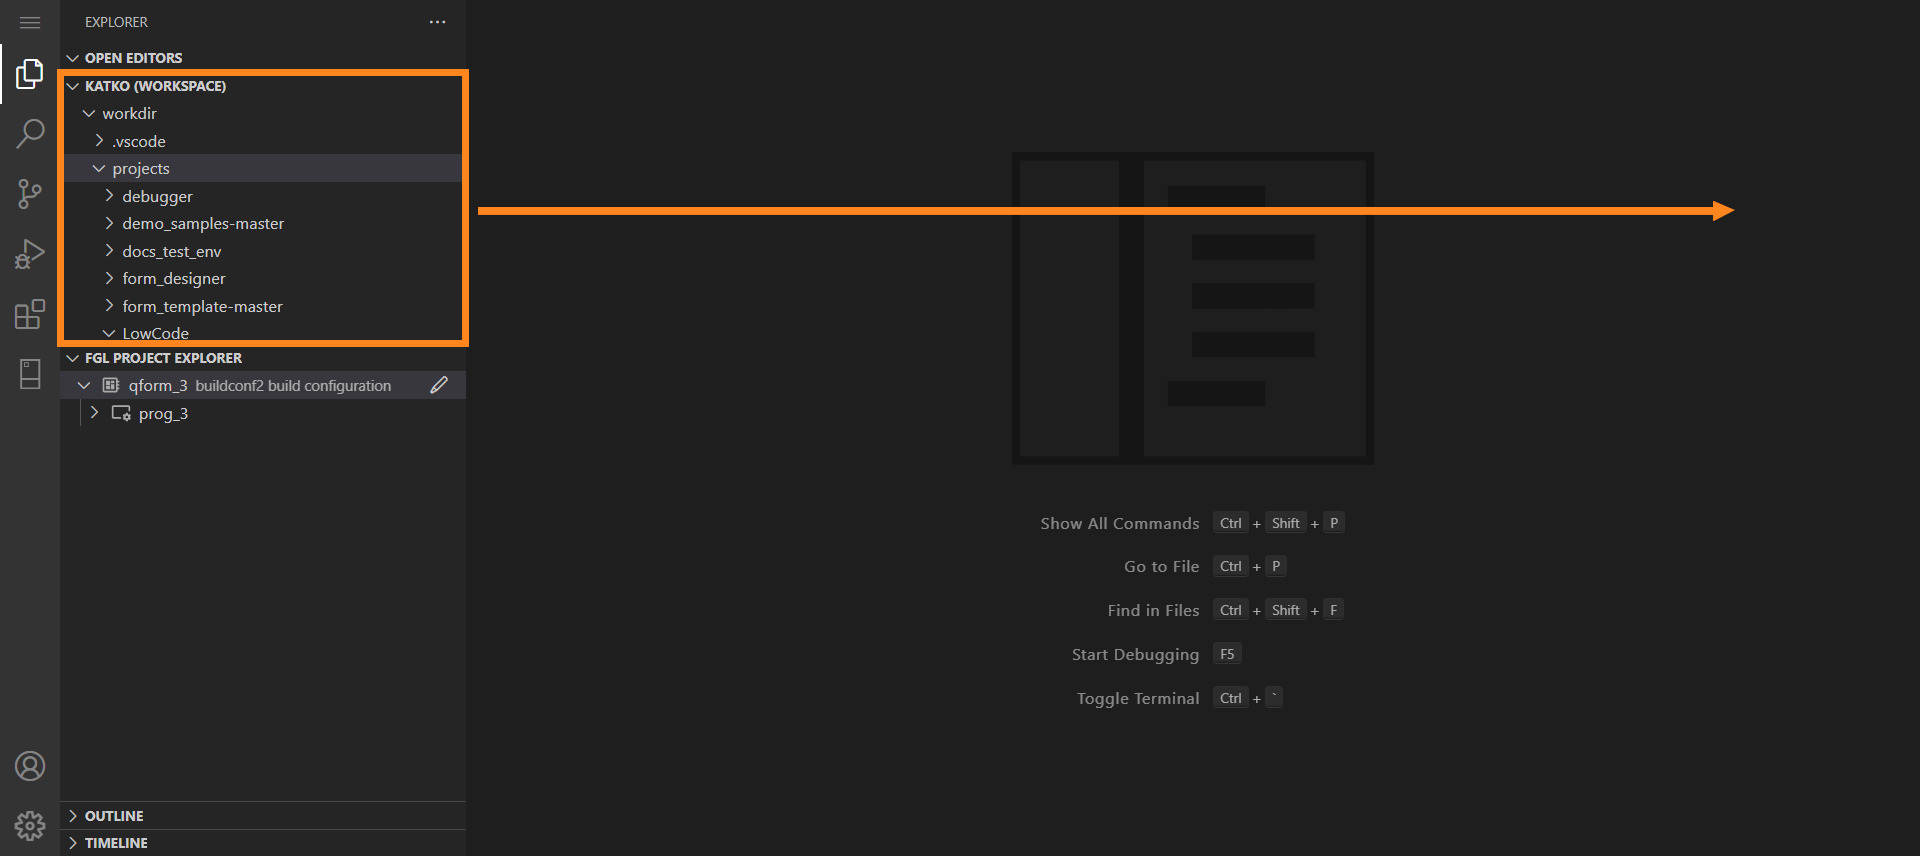
When we hold a view over that area, the Secondary Sidebar is highlighted:
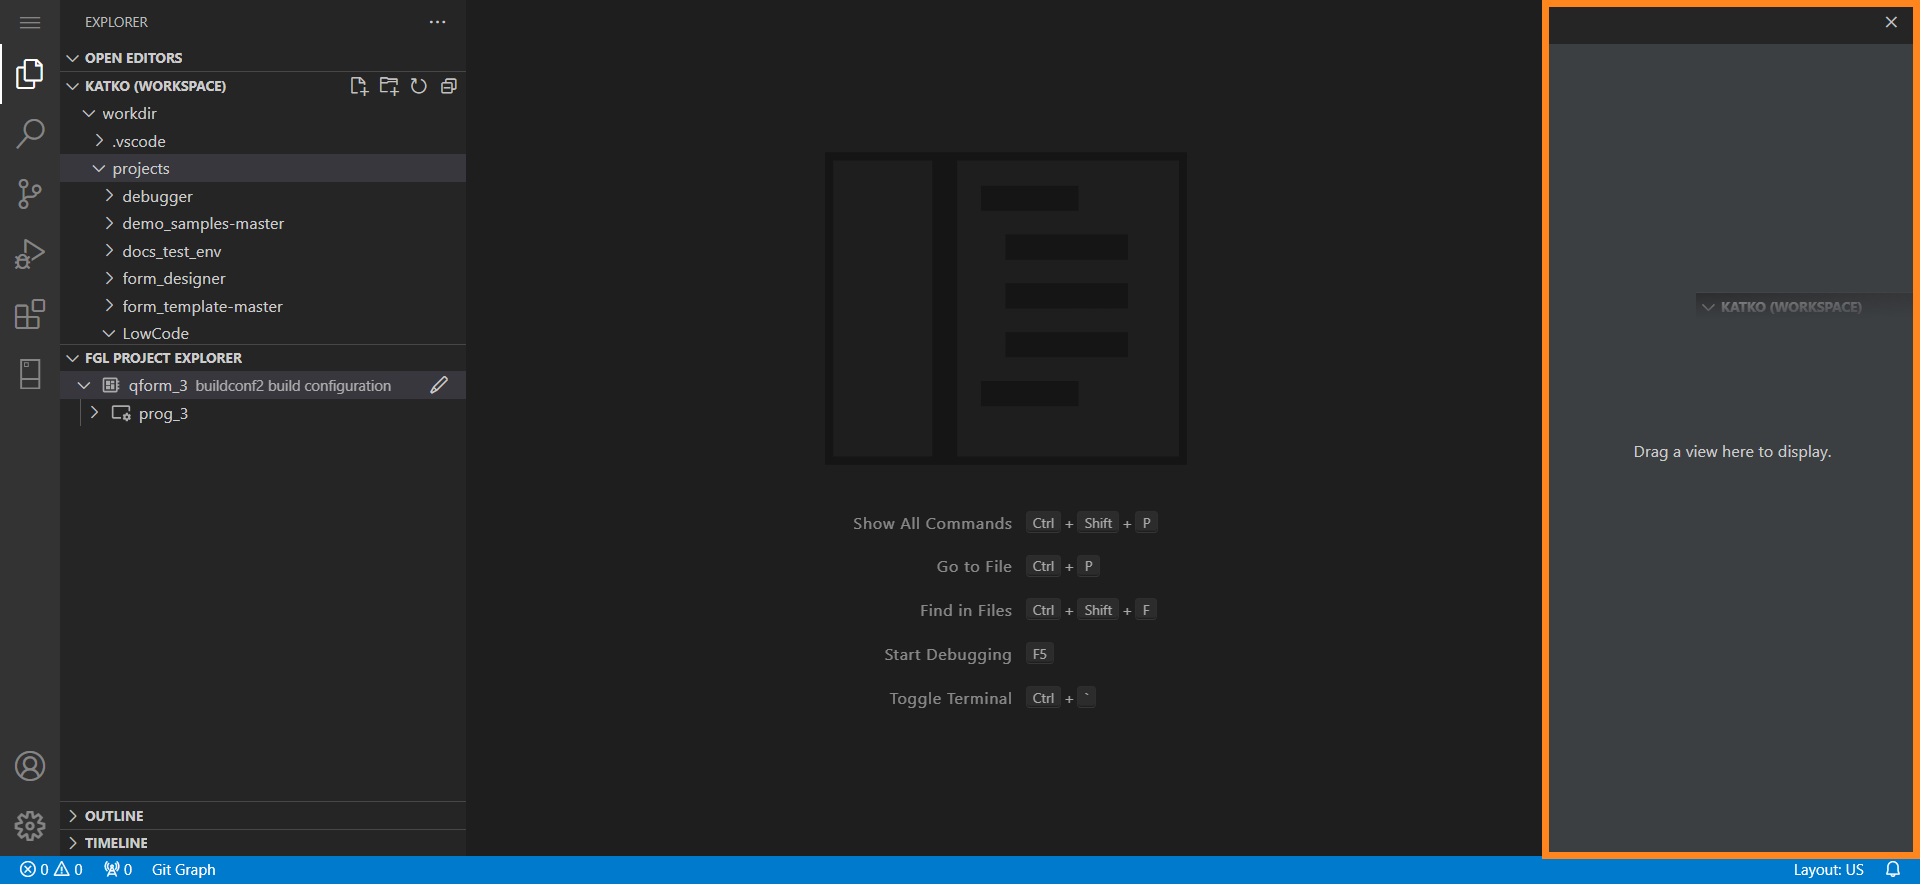
Releasing a view there toggles on the Secondary Sidebar:
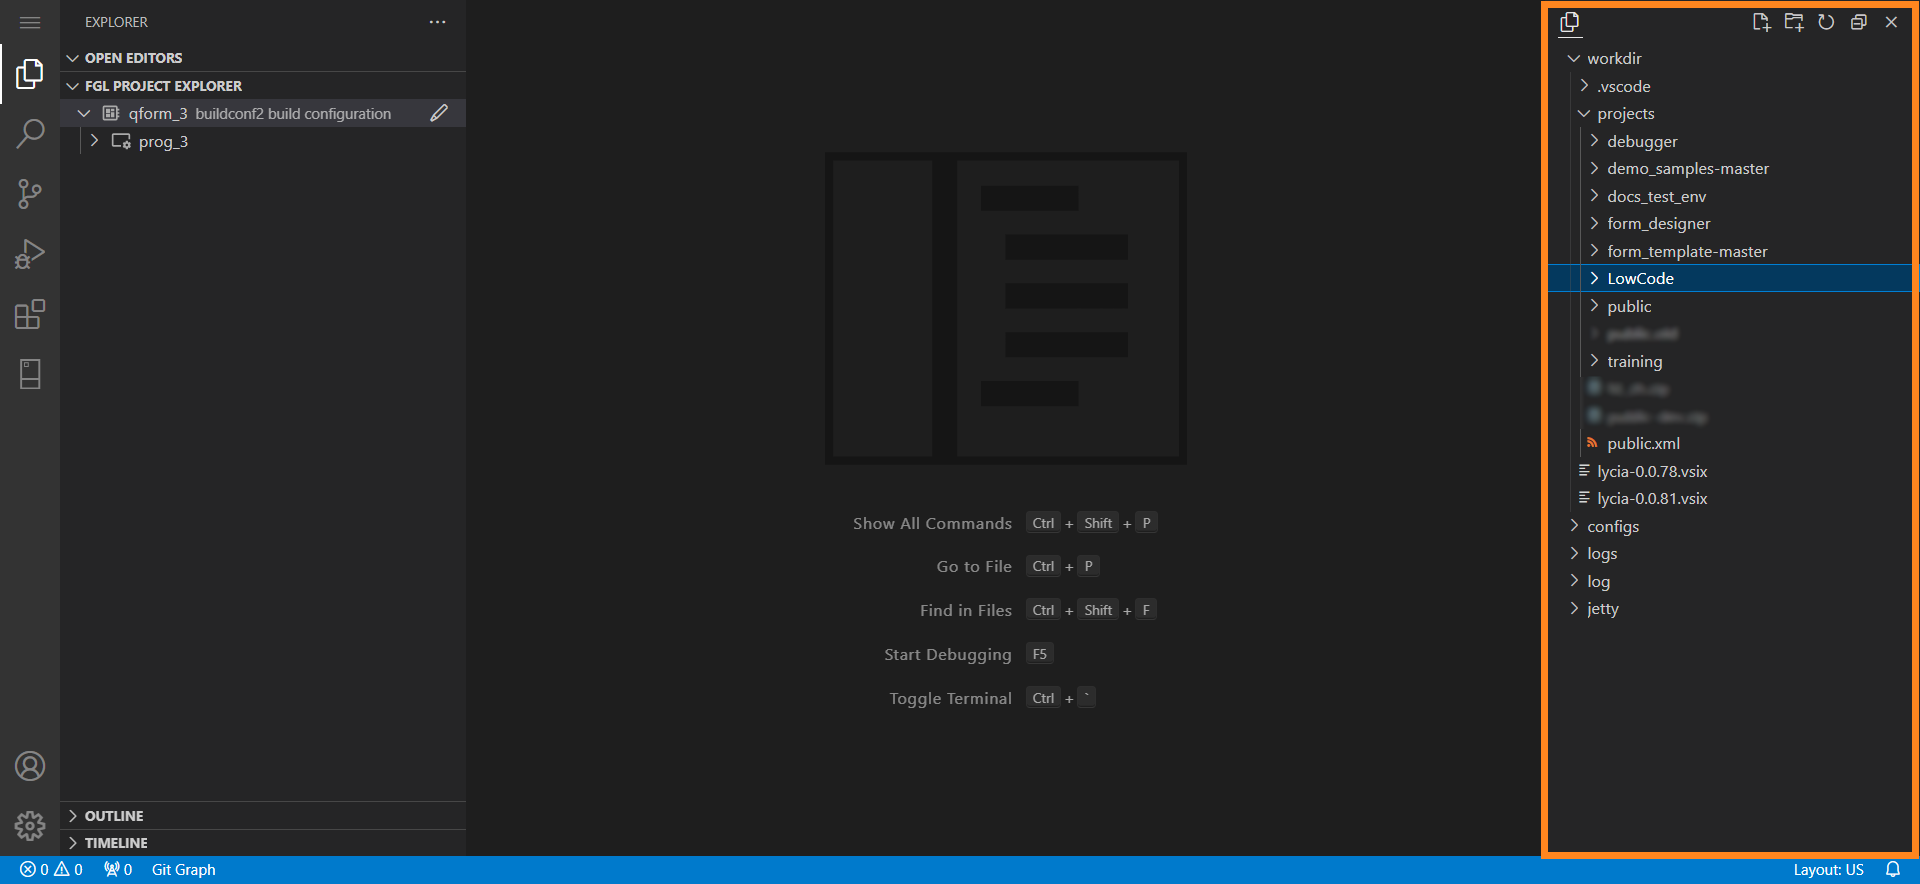
A single view will occupy the entire Secondary Sidebar when placed there, but should you drag-and-drop more views there, they will share the Sidebar’s space.
Creating a Separate Area
There’s also an option to move a view to the Activity Bar to make it a separate area. To do that, drag the view from its place to the Activity Bar until the horizontal line appears, indicating that view’s new location. In our example, we’re moving our Workspace view:
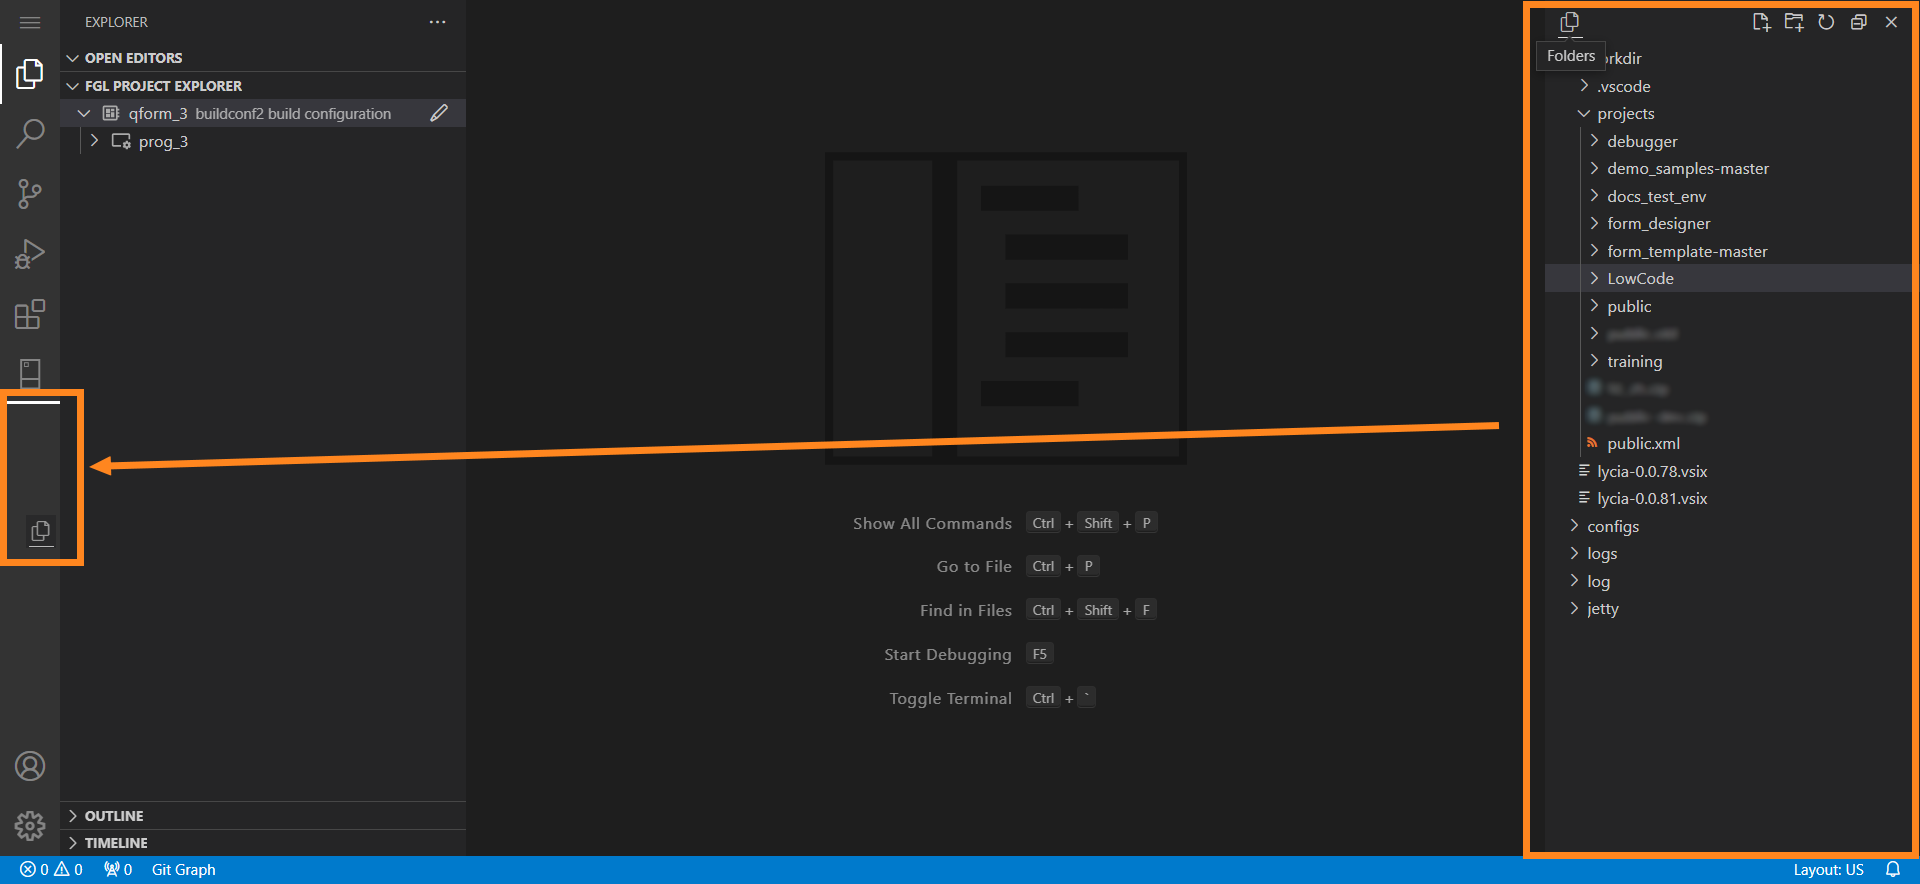
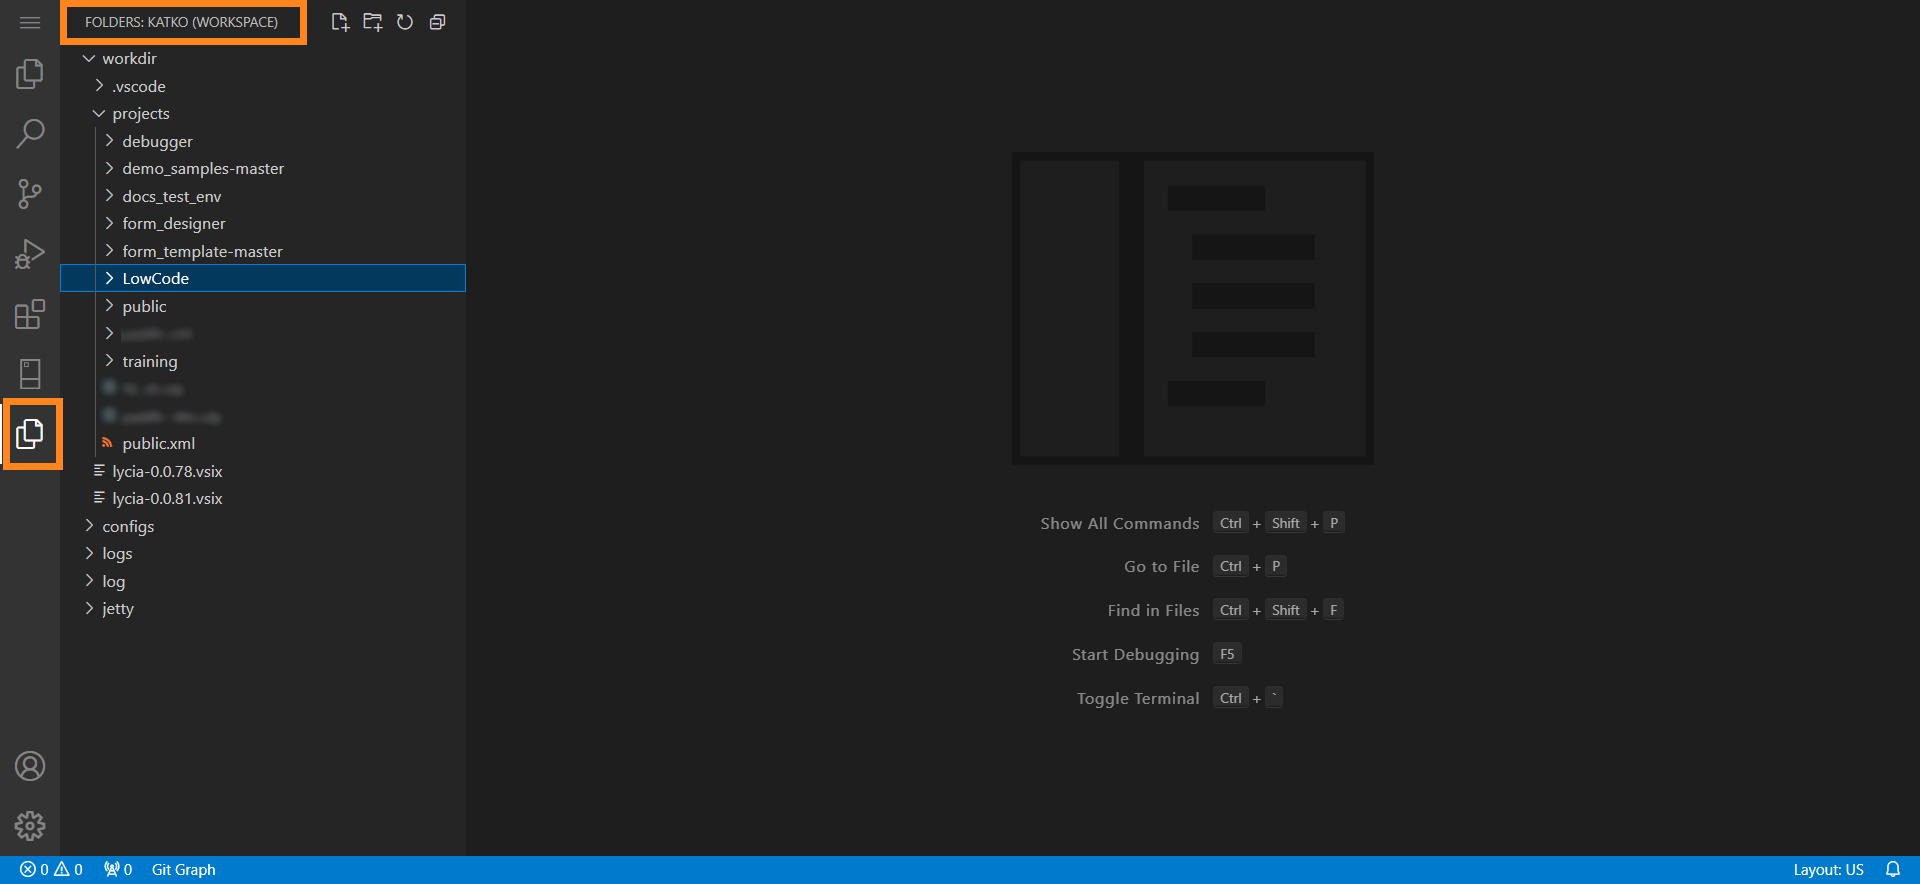
As the result, the Workspace view turns into a separate area called Folders:

If we select that area, it will toggle on a Primary Sidebar with the Workspace view inside it:
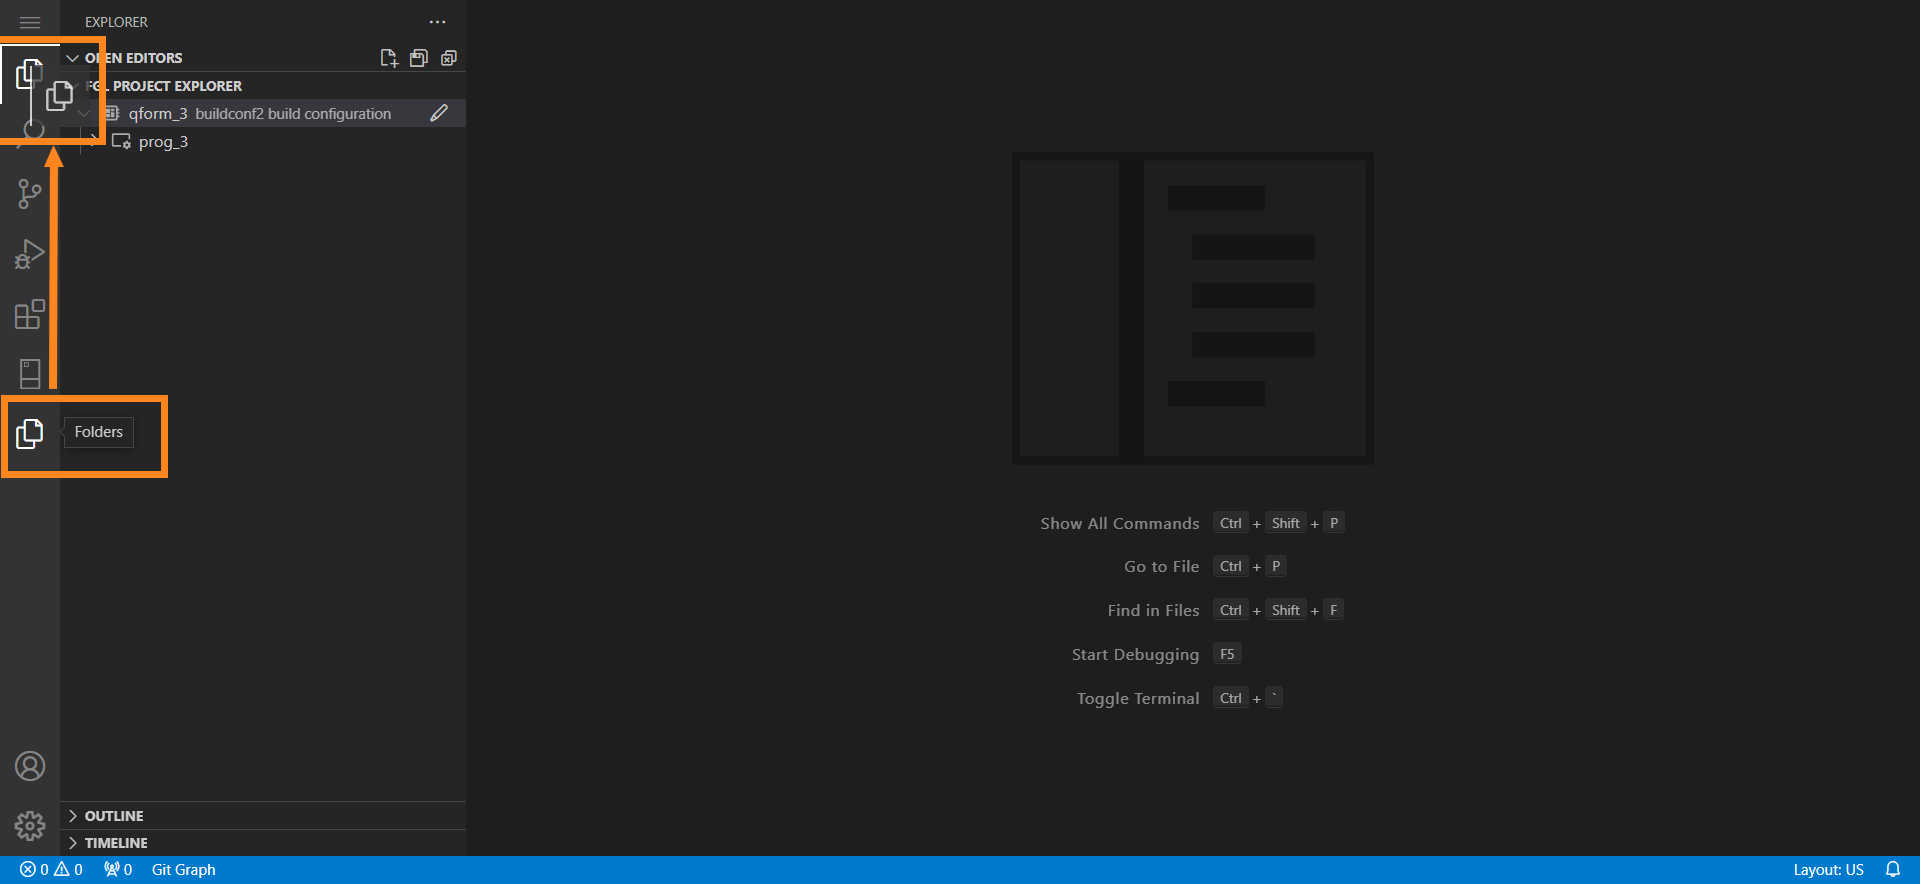
From that, we can move our new area up the Activity Bar by drag-and-dropping it into defined location:
Or, in case we’d want to move the Workspace view into the Explorer area again, we pick the Folders area, drag and hold it over the Explorer area icon until Explorer area opens, and then move the Folders area into a certain place of Explorer’s Primary Sidebar. Mind that highlighting of the upper or lower part of the view indicates whether your new element will be placed before or after the highlighted view:

Should we release the Folder area inside the highlighted zone in the top of FGL Project Explorer, the Workspace view will return to Explorer’s Primary Sidebar and settle to the top of FGL Project Explorer:

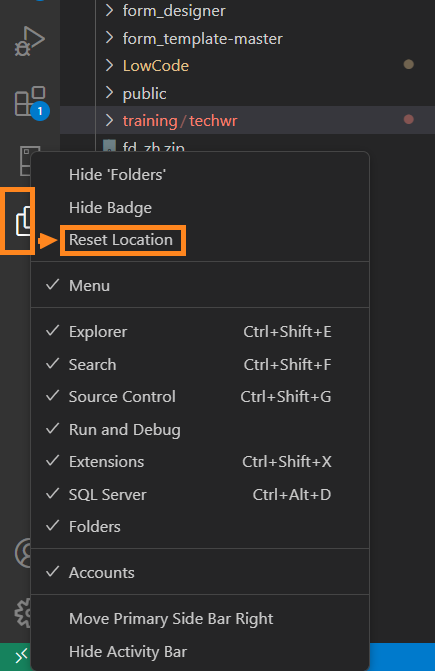
You also can restore the custom area’s original location by right-clicking the icon of an area and selecting the Reset Location option:

Video: Explorers of LVSCE
You can also learn about the explorers in LVSCE from the video below:
Editor
The Editor is an area in VS Code that displays the contents of your opened file.
You can open as many files as you need at the same time, and they will be displayed as tabs in the Editor:

The opened files will also be listed in the Open Editors view within your Explorer area:
Editor Layout Customization
To configure the Editor area with Split Editor features, refer to this section of VS Code documentation: Custom Layout: Editor
Video: Editor
You can also learn about the Editor area and its LVSCE-added functionality from the following video:
File System Access in LVSCE
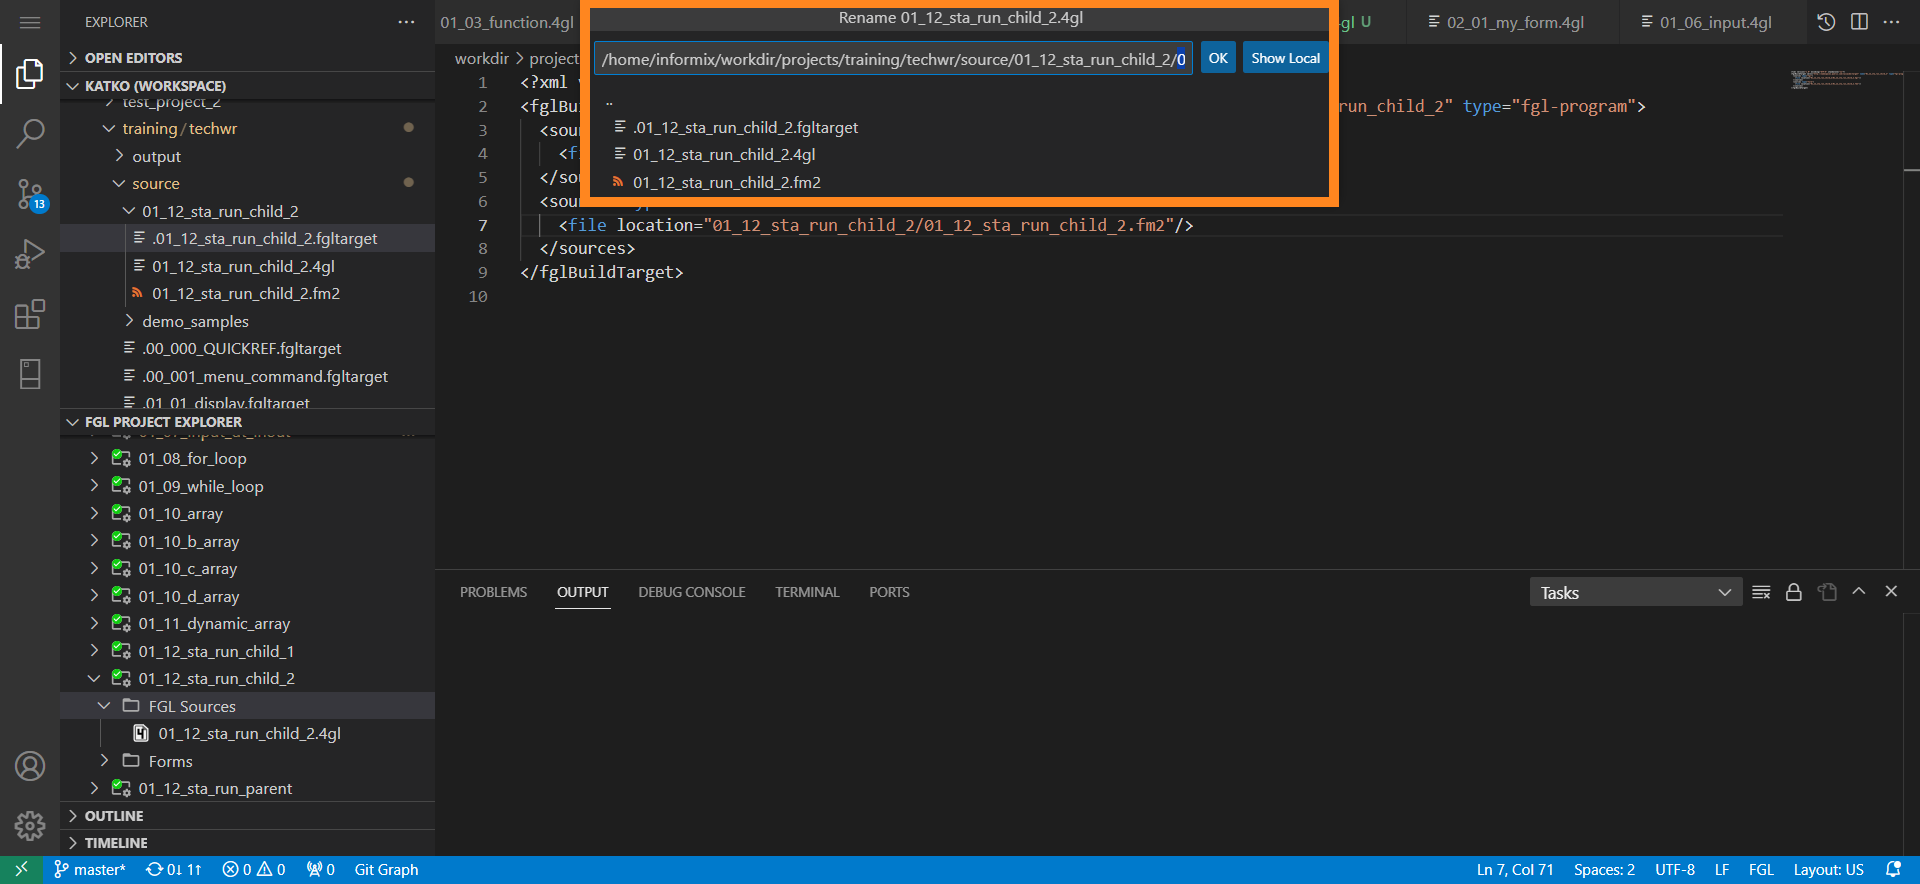
In operations with files (like Add, Create, Rename, Import) LVSCE will access the file system of your instance. For remote VS Code instances, that will open a dialog in the top of VS Code’s main window:
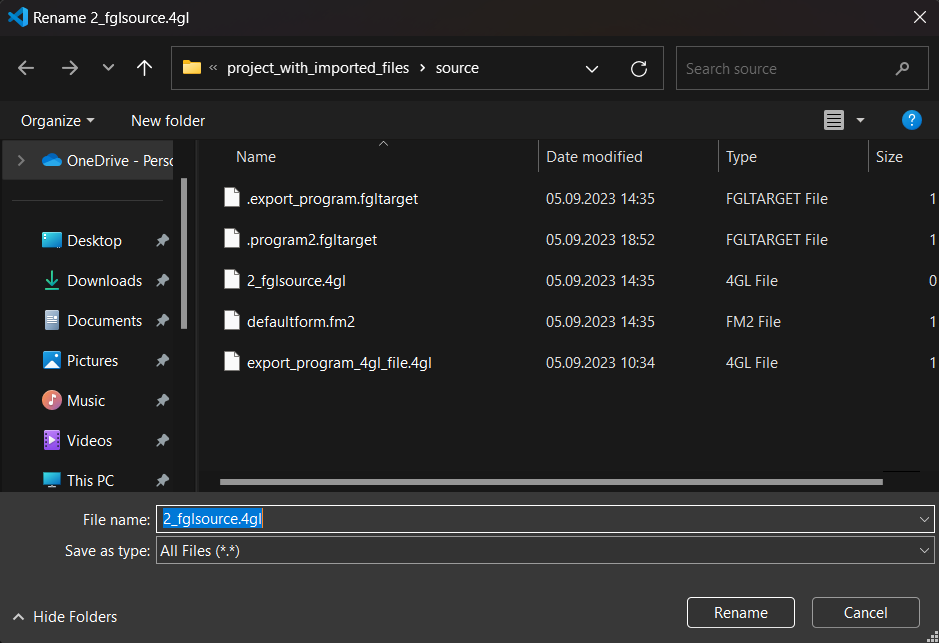
In local instances, LVSCE will open your OS File Explorer:
See next: LVSCE Configuration