![]()
PlaceHolder is used to open a new window to a form.
|
|
PlaceHolder is used to open a new window to a form. |
|
|
Form XML code:
<PlaceHolder visible="true" identifier="PlaceHolder1"/>
Theme element filter XML code:
<ElementFilter ElementName="PlaceHolder">
...
</ElementFilter>
CSS element selector code:
qx-aum-place-holder
Associated 4gl syntax:
OPEN WINDOW ... INTO ↓
OPEN WINDOW ... AT ↓
DISPLAY ... AT ↓
Most commonly used form properties:
collapsible
Most commonly used theme properties:
Target
Margin
Padding
Inheritance diagram:

Associated ui methods:
Create
ForName
Influence and behavior:
![]()
To add a PlaceHolder to your form,
|
Step 1 |
Choose a PlaceHolder widget from the widgets palette by left-clicking its icon:
|
|
Step 2 |
Select the place in the form where you want to put a PlaceHolder (in the screenshot below, we choose a cell in a Grid panel):
|
|
Step 3 |
Left-click the selected spot (cell or sector) to place the PlaceHolder there:
|
|
|
The PlaceHolder is now added to your form, and you can see it in the Structure view.
|
![]()
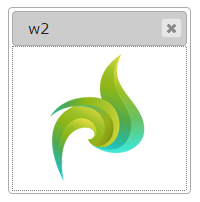
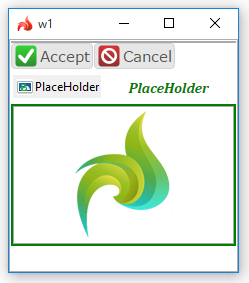
To open a new window to a form, you add a PlaceHolder to this form and open the window to it via OPEN WINDOW ... INTO:
OPEN WINDOW window_name INTO "placeholder_id" WITH FORM "form_name"
|
lycia theme designer |
|
|
|
4gl code |
MAIN DEFINE ph STRING OPEN WINDOW w1 WITH FORM "ph_01" ATTRIBUTE(BORDER) OPEN WINDOW w2 INTO "ph1" WITH FORM "ph_01_into" CALL apply_theme("ph_theme_01") CALL fgl_getkey() END MAIN
|
|
|
runtime appearance |
|
|
![]() Only flat windows can be opened to a PlaceHolder and, thus, to another form or window.
Only flat windows can be opened to a PlaceHolder and, thus, to another form or window.
The new window will be opened to the specified PlaceHolder regardless of whether this PlaceHolder is current or not:
|
4gl code |
MAIN DEFINE <placeholder's ids> STRING
OPEN WINDOW w1 WITH FORM "ph_02a" ATTRIBUTE(BORDER) OPEN WINDOW w4 INTO "placeholder_id" WITH FORM "ph_02a_into" CALL fgl_getkey()
OPEN WINDOW w2 WITH FORM "ph_02b" ATTRIBUTE(BORDER) OPEN WINDOW w5 INTO "placeholder_id" WITH FORM "ph_02b_into" CALL fgl_getkey()
OPEN WINDOW w3 WITH FORM "ph_02c" ATTRIBUTE(BORDER) OPEN WINDOW w6 INTO "placeholder_id" WITH FORM "ph_02c_into" CALL fgl_getkey()
OPEN WINDOW w7 INTO "placeholder_id" WITH FORM "ph_02d_into" CALL fgl_getkey() END MAIN
|
|
all windows are opened |
|
→ if several opened windows including the current one contain the PlaceHolder with the specified id, the new window will be opened to the current window's PlaceHolder:
|
a new window is opened to the PlaceHolder with the specified id |
|
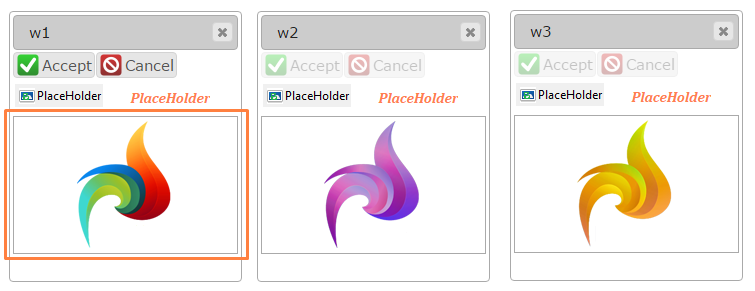
→ if only one opened window (not the current one) contains the placeholder with the specified id, the new window will be opened to this PlaceHolder (w1 in the screenshot below):
|
a new window is opened to the PlaceHolder with the specified id |
|
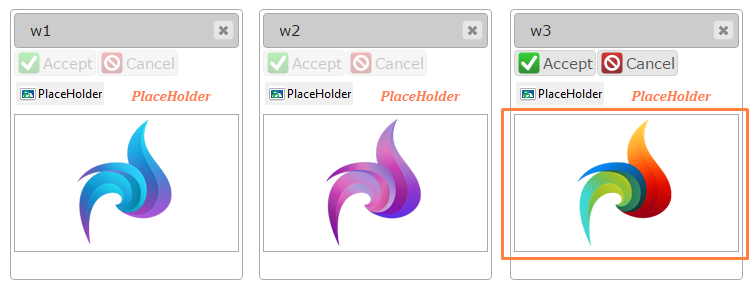
→ if several opened windows (w1 and w2 in the screenshot below) excluding the current one contain the PlaceHolder with the specified id, the new window will be opened to the PlaceHolder of the window which was the current one later then one windows with the same PlaceHolder id:
|
a new window is opened to the PlaceHolder with the specified id |
|
If several opened windows including the current one contain the PlaceHolder with the specified id, you can specify the very PlaceHolder by adding the window name to the PlaceHolder id:
OPEN WINDOW window_name INTO "window_name.placeholder_id" WITH FORM "form_name"
|
4gl code |
MAIN DEFINE ph STRING
OPEN WINDOW w1 WITH FORM "ph_03" ATTRIBUTE(BORDER) OPEN WINDOW w3 INTO "ph" WITH FORM "ph_03a_into" CALL fgl_getkey()
OPEN WINDOW w2 WITH FORM "ph_03" ATTRIBUTE(BORDER) OPEN WINDOW w4 INTO "ph" WITH FORM "ph_03b_into" CALL fgl_getkey()
OPEN WINDOW w5 INTO "w1.ph" WITH FORM "ph_03c_into" CALL fgl_getkey() END MAIN
|
|
all windows are opened |
|
|
a new window is opened to the PlaceHolder with the specified id |
|
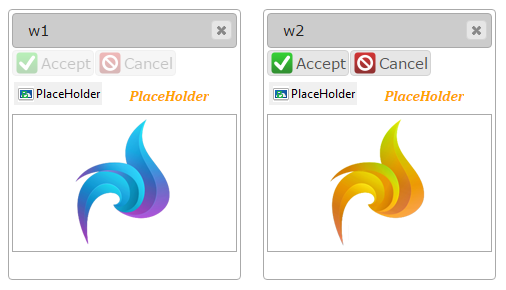
You can specify the PlaceHolder id in the user theme via the Target property (both with and without specifying the window). In this case, a new window will be opened to the PlaceHolder specified in the user theme but not in the source file:
OPEN WINDOW window_name INTO "window_name.placeholder_id" WITH FORM "form_name"
|
4gl code |
MAIN DEFINE ph STRING
OPEN WINDOW w1 WITH FORM "ph_03" ATTRIBUTE(BORDER) OPEN WINDOW w3 INTO "ph" WITH FORM "ph_03a_into" CALL fgl_getkey()
OPEN WINDOW w2 WITH FORM "ph_03" ATTRIBUTE(BORDER) OPEN WINDOW w4 INTO "ph" WITH FORM "ph_03b_into" CALL fgl_getkey()
OPEN WINDOW w5 INTO "w1.ph" WITH FORM "ph_03c_into" CALL fgl_getkey() END MAIN
|
|
PlaceHolder specified in the user theme |
|
|
runtime appearance (red for the code-specified PlaceHolder, green for the theme-specified PlaceHolder) |
|
![]() This feature will be especially useful in situations when changing the source code is difficult or troublesome.
This feature will be especially useful in situations when changing the source code is difficult or troublesome.
![]()
PlaceHolders can be used for easier guification of 4gl applications.
If the source code of the modernized program contain the statements OPEN WINDOW ... AT or DISPLAY ... AT, 4gl developer can simply create a new form and add a PlaceHolder to it with the identifier AT_n1_n2:
→ With OPEN WINDOW ... AT, the new window will be opened to the specified PlaceHolder:
|
4gl code |
MAIN OPEN WINDOW w1 WITH FORM "ph_05" ATTRIBUTE(BORDER) OPEN WINDOW w2 AT 2,2 WITH FORM "ph_05_into" CALL fgl_getkey() END MAIN
|
|
lycia form designer |
|
|
runtime appearance |
|
→ With DISPLAY ... AT, a label will be created at runtime to which the text will be displayed:
|
4gl code
|
MAIN OPEN WINDOW w1 WITH FORM "ph_06" ATTRIBUTE(BORDER) DISPLAY "DISPLAY to PlaceHolder" AT 2,2 CALL fgl_getkey() END MAIN
|
|
lycia form designer |
|
|
runtime appearance |
|
![]()
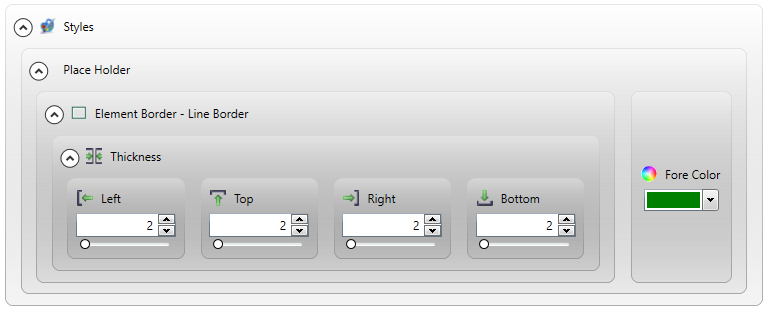
You can change PlaceHolder's properties in the form designer. However, we recommend applying appearance properties via user themes and css.
To apply a property to a PlaceHolder, set its value in the user theme, directly or using filters.
In the example below, we changed thickness and color of the PlaceHolder's border by applying the corresponding properties - Element Border and Fore Color - to the element (without additional filters).
|
property applied in the user theme |
|
|
theme XML code |
<StyleSheet xmlns="http://querix.com"> <ElementFilter ElementName="PlaceHolder"> <StyleSheet> <DoStyleAction> <SetProperty> <PropertyPath> <PropertyName>ElementBorder</PropertyName> </PropertyPath> <PropertyValue type="LineBorder"> <Thickness Left="2" Top="2" Right="2" Bottom="2" /> </PropertyValue> </SetProperty> </DoStyleAction> <DoStyleAction> <SetProperty> <PropertyPath> <PropertyName>ForeColor</PropertyName> </PropertyPath> <PropertyValue type="CustomizedColor" RedColor="0" GreenColor="128" BlueColor="0" Alpha="255" /> </SetProperty> </DoStyleAction> </StyleSheet> </ElementFilter> </StyleSheet>
|
|
runtime appearance |
|
Example programs:
CVS server: client.querix.com
CVS repository: /lycia_doc_examples
User: client
Project: user_interface/widgets
Program: placeholder