Creating new Java projects
Java projects are created by means of the New Project wizard in the following way:
|
Step 1
|
Start the New project wizard in one of the ways described here.
|
|
Step 2
|
Choose the necessary project type from the list or by direct typing:

After this, the New Java Project window will open:

|
|
Step 3
|
Enter the name of the new Java project:

|
|
Step 4
|
Specify its location:

By default, all new projects are created in your workspace. However, you can choose Browse... and specify any other folder:

|
|
Step 5
|
Choose the necessary version of the Java Runtime Environment:

The available options include:
use an execution environment JRE - the necessary environment can be selected from the provided list:

The new project will use the compiler compliance which fits the selected execution environment best.
use a project specific JRE - allows choosing the specific JRE for this very project (can be selected from the list of the installed ones). The new project will also use the compiler compliance which matches the selected JRE;
use the default JRE - the newly created Java project will use both the JRE and the compiler compliance default for your workspace.
You can add, edit, and remove JRE definitions in the Preference window by pressing Configure JREs... or going to Window → Preferences → Java → Installed JREs:

|
|
Step 6
|
Choose whether you want to have separate folders for source and class files or keep them together in the same folder:

You can change folder names and specify the build path entries in the Preference window by pressing Configure default... or going to Window → Preferences → Java → Build Path:

|
|
Step 7
|
Specify whether the newly created project must be included into one of your working sets (or create a new working set if necessary):


After this, you can press Finish to create your new Java project without defining build settings or press Next to set them manually (Step 8).
|
|
Step 8
(optional)
|
Define the build settings for the new Java project » (see details below ↓).
|
|
Step 9
|
When you press Finish, you new Java project is created (you can see it in the project explorer):

|
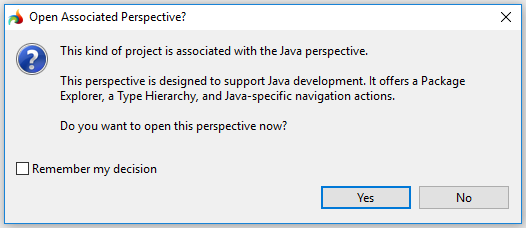
After your new Java project is created, the associated perspective -  Java - will or will not open in LyciaStudio depending on the Perspectives preferences. By default, you will get the corresponding message after clicking Finish:

Defining build setting for a new Java project
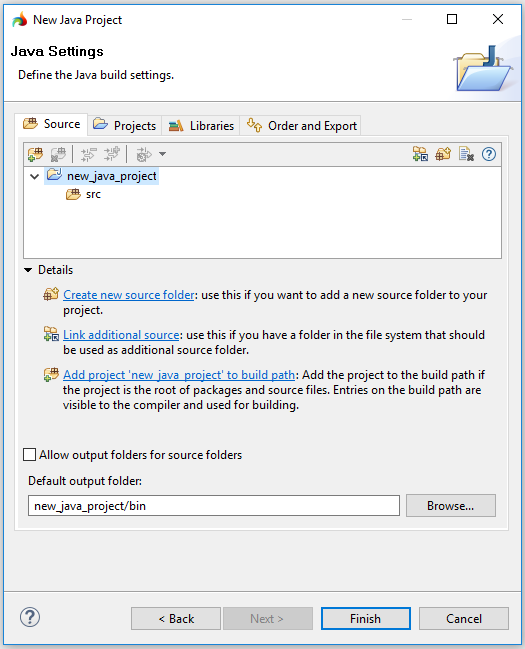
At Step 8 of the New Java Project wizard, you can define the Java build settings:

These settings can be reviewed and changed any time after the project was created. You can get to the necessary page by going to Properties → Java Build Path in the context menu of the project.
The page includes 4 tabs:
|
Source
|
allows adding and managing source folders of Java projects as well as their contents
|
|
Projects
|
allows adding and removing other Java projects to the configured one
|
|
Libraries
|
allows adding and managing libraries on the build path
|
|
Order and Export
|
allows managing the build class path order and selecting exported entries
|
Source
Source folders are the roots containing .java files. These files are translated by the compiler into the .class files which are written to the output (= class) folder:

With source files, you can easily structure your project by adding separate packages and including them to several source folders.
You can define the exclusion filter for a definite source folder, and this filter will specify which files are visible for the compiler, and which are not.
Usually, a Java project has one general output (= class) folder. However, you specify a separate output folder for the definite source one by checking the corresponding checkbox:

In the tab, you can perform the following actions (the list below is the general one, the number of the available options depends on the selected item):
|

|
Use as source folder
|
adds the project to the build path in case when this project is the root for packages and source files
|
|

|
Remove from build path
|
removes the folder from the build path: This means that its children become invisible for the compiler and they will not be built with the project
|
|

|
Exclude
|
adds the resources to the exclusion filter of it parent source folder
|
|

|
Include
|
includes the previously excluded resources, i.e. removes them from the corresponding exclusion filter
|
|

|
Configure
|
allows configuring exclusion filters and output folders:

Configure Inclusion/Exclusion Filters allows defining string patterns in order to customize the exclusion and inclusion filters:

Configure Output Folder allows changing the output folder for the specified source folder (is enabled only when you enable Allow output folders for source folders ↑
|
|

|
Link additional source
|
takes a folder in your file system and makes it the source folder of the project
|
|

|
Create new source folder
|
adds a new source folder to the project
|
|

|
Clear all changes
|
withdraws all the changes introduced to the project and brings the project back to its original state
|
Projects
In the tab, you can add and remove other Java projects to the one you configure (the new project in our case):

You can add only those projects which already exist in workspace.
The project added gets two attributes presented as its child nodes:
|
Native library location
|
specifies the location where you can find the native library required for the project to work properly
|
|
Access rules
|
specifies the rules by which the project is accessed (this allows one to hide the project's content)
|
These attributes can be edited by pressing the Edit... button.
Libraries
In the tab, you can add libraries, classes, and variables to the build path as well as edit and remove them:

By default, the list of libraries includes the Java runtime library. This library points to the Java Runtime Environment set for the project.
Every library added to the build path (as well as the JAR files comprising it) has a number of basic attributes that specify the location of certain library resources. These attributes are presented as the child nodes of a library or a JAR file:

|
Source attachment
|
specifies the location of the library's source
|
|
Javadoc location
|
specifies the location of the library's Javadoc documentation
If specified, you can open this documentation by selecting the file and pressing Shift + F2
|
|
External annotations
|
specifies the location of the library's external annotations
|
|
Native library location
|
specifies the location where you can find the native library required for the selected library or the JAR file to work properly
|
|
Access rules
|
specifies the rules by which the library resources are accessed (this allows one to hide the library content)
|
The following options are available:
|
Add JARs...
|
allows populating (= adding to) the build path with the new JAR files stored in your workspace
|
|
Add External JARs...
|
allows populating (= adding to) the build path with the new JAR files stored in your file system
|
|
Add Variable...
|
allows adding the classpath variables (e.g., ECLIPSE_HOME) to the build path. Classpaths are used to define the location of the JAR file that is not included in the workspace
|
|
Add Library...
|
allows adding new libraries to the build path
|
|
Add Class Folder...
|
allows adding new class folders to the build path as well as creating the new ones.
With this option, you can select a class folder among those which are stored in your workspace
|
|
Add External Class Folder...
|
allows adding new class folders to the build path as well as creating the new ones.
With this option, you can select a class folder among those which are stored in your file system
|
|
Edit...
|
allows modifying the selected library, its attribute, or the selected attribute of a JAR file.
The window opened after you press Edit... depends on what you are editing, e.g.,


Some entries - e.g., access rules for JAR files - cannot be modified: For them, the Edit... button is disabled.
|
|
Remove
|
removes the selected entry - library or a Javadoc location - from the build path (the resource itself is not deleted)
|
|
Migrate JAR File...
|
allows migrating (= updating) the JAR file already added to the build path to the newer version.
If this newer version includes certain refactoring scripts, these scripts are executed
|
Order and Export
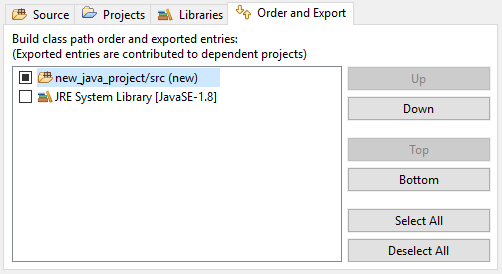
In the tab, you can specify the order by which the project component are built and choose which of them will be exported:

Build order effects the how the project inner dependencies are established.
To change the order in which the project components (= entries) are built, you have to select the corresponding entry and press:
Up - to move it one level up in the build path,
Down - to move it one level down in the build path,
Top - to make it the first entry in the build path,
Bottom - to make it the last entry in the build path.
In case that you have only two entries in the list, you get the same build path by pressing Up/Top and Down/Bottom.
The exported entry become visible from the other projects which are connected (= require) the project you configure (the new project in our case). Source folders are always exported.
To make the project entry exported, you have to check in the Order and Export tab. You can use Select All or Deselect All to make all the entries exported or not-exported. As the source folders are always exported, you cannot deselect them.
Related articles:
Creating 4gl projects
Creating C/C++ projects
Creating JavaScript projects


