Creating new JavaScript projects
JavaScript projects are created by means of the New Project wizard in the following way:
|
Step 1
|
Start the New project wizard in one of the ways described here.
|
|
Step 2
|
Choose the necessary project type from the list or by direct typing:

After this, the New JavaScript Project window will open:

|
|
Step 3
|
Enter the name of the new JavaScript project:

|
|
Step 4
|
Specify its location:

By default, all new projects are created in your workspace. However, you can choose Browse... and specify any other folder:

|
|
Step 5
|
Configure the support of web pages:

|
|
Step 6
|
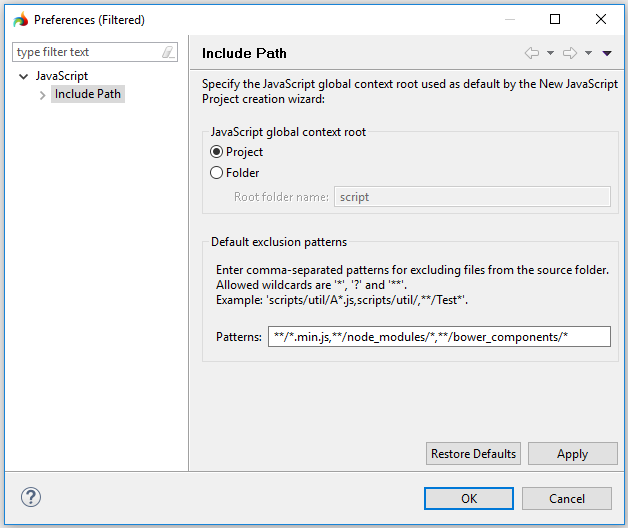
Choose whether you want to use the project folder to root the JavaScript global context or prefer getting a separate root folder:

You can change specify the JS global context root and add or remove the necessary exclusion patterns in the Preference window by pressing Configure default... or going to Window → Preferences → JavaScript → Include Path:

|
|
Step 7
|
Specify whether the newly created project must be included into one of your working sets (or create a new working set if necessary):


After this, you can press Finish to create your new JavaScript project without defining its include path or press Next to do it manually (Step 8).
|
|
Step 8
(optional)
|
Define the include path for the new JavaScript project » (see details below ↓).
|
|
Step 9
|
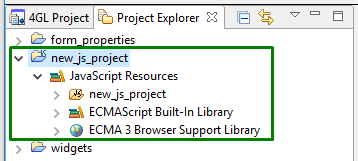
When you press Finish, you new JavaScript project is created (you can see it in the project explorer):

|
After your new Java project is created, the associated perspective -  JavaScript - will or will not open in LyciaStudio depending on the Perspectives preferences. By default, you will get the corresponding message after clicking Finish:

Defining the include path for a new JavaScript project
At Step 8 of the New JavaScript Project wizard, you can define the project's include path:

These settings can be reviewed and changed any time after the project was created. You can get to the necessary page by going to Properties → JavaScript → Include Path in the context menu of the project.
The page includes 4 tabs:
|
Libraries
|
allows adding and managing JavaScript libraries and their folders on the include path
|
|
Source
|
allows adding and managing source folders of JavaScript projects as well as their contents
|
|
Projects
|
allows adding and removing other JavaScript projects to the configured one
|
|
Global SuperType
|
allows managing the JSDT Global Scope Resolution order and selecting exported entries
|
Libraries
In the tab, you can add libraries and their to the include path as well as edit and remove them:

By default, the list of libraries includes the ECMAScript Built-In Library and ECMA 3 Browser Support Library.
Every library added to the include path (as well as the JAR files comprising it) has some basic attributes:

|
JSDoc location
|
specifies the location of the library's JS documentation
|
|
Access rules
|
specifies the rules by which the library resources are accessed (this allows one to hide the library content)
|
The following options are available:
|
Add JavaScript Library...
|
allows adding new libraries to the include path
|
|
Add a Library Folder...
|
allows adding new library folders to the project context as well as creating the new ones:

|
|
Edit...
|
allows modifying the selected library and its access rules or the selected attribute of a .js file.
The window opened after you press Edit... depends on what you are editing, e.g.,


Some entries - e.g., .js files - cannot be modified: For them, the Edit... button is disabled.
|
|
Remove
|
removes the selected entry - library or a JSDoc location - from the include path
|
Source
Source folders are the roots containing .js files:

With source files, you can easily structure your project by adding separate packages and including them to several source folders.
You can define the exclusion filter for a definite source folder, and this filter will specify which files are visible for the compiler, and which are not.
In the tab, you can perform the following actions (the list below is the general one, the number of the available options depends on the selected item):
|

|
Use as source folder
|
adds the project to the include path in case when this project is the root for packages and source files
|
|

|
Remove from include path
|
removes the folder from the include path: This means that its children will not be included when building the project
|
|

|
Exclude
|
adds the resources to the exclusion filter of it parent source folder
|
|

|
Include
|
includes the previously excluded resources, i.e. removes them from the corresponding exclusion filter
|
|

|
Configure
|
allows configuring exclusion filters:

Configure Inclusion/Exclusion Filters allows defining string patterns in order to customize the exclusion and inclusion filters:

|
|

|
Link additional source
|
takes a folder in your file system and makes it an additional source folder of the project
|
|

|
Create new source folder
|
adds a new source folder to the project
|
|

|
Clear all changes
|
withdraws all the changes introduced to the project and brings the project back to its original state
|
Projects
In the tab, you can add and remove other JavaScript projects to the one you configure (the new project in our case):

You can add only those projects which already exist in workspace.
The project added gets the only attribute - Access rules - presented as its child nodes that specifies the rules by which the project is accessed (this allows one to hide the project's content). Access rules can be edited by pressing the Edit... button.
Global SuperType
In the tab, you can specify the order of the JSDT Global Scope Resolution and choose which project components are exported:

To change the JSDT Global Scope Resolution order, you have to select the corresponding entry and press:
Up - to move it one level up in the list,
Down - to move it one level down in the list,
Top - to make it the first entry in the list,
Bottom - to make it the last entry in the list.
In case that you have only two entries in the list, you get the same build path by pressing Up/Top and Down/Bottom.
In case that you have only one entry in the list, all four buttons are disabled.
In the tab, you can also view and change (by clicking Browse...) the default SuperType from which fields and methods are inherited:


Related articles:
Creating 4gl projects
Creating C/C++ projects
Creating Java projects


