BlobViewer
Overview
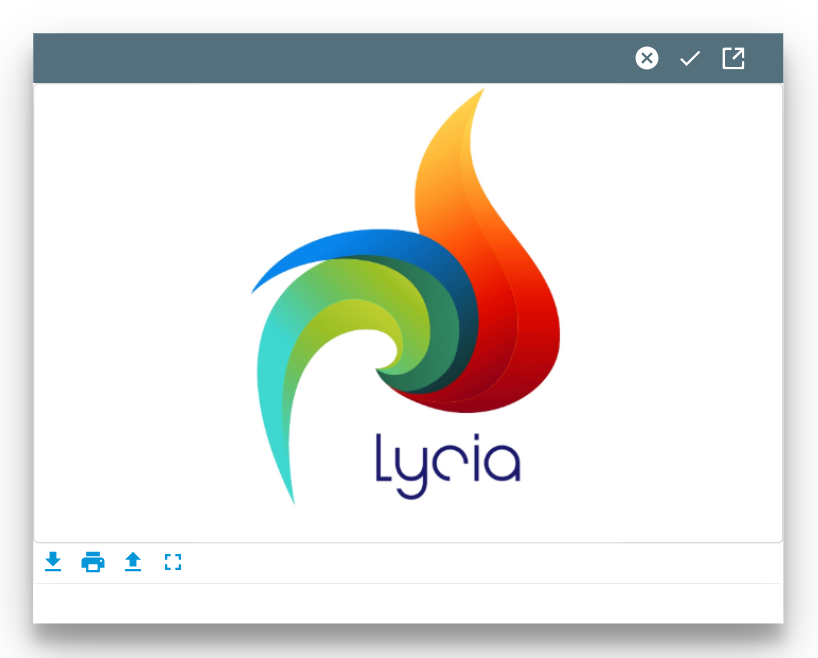
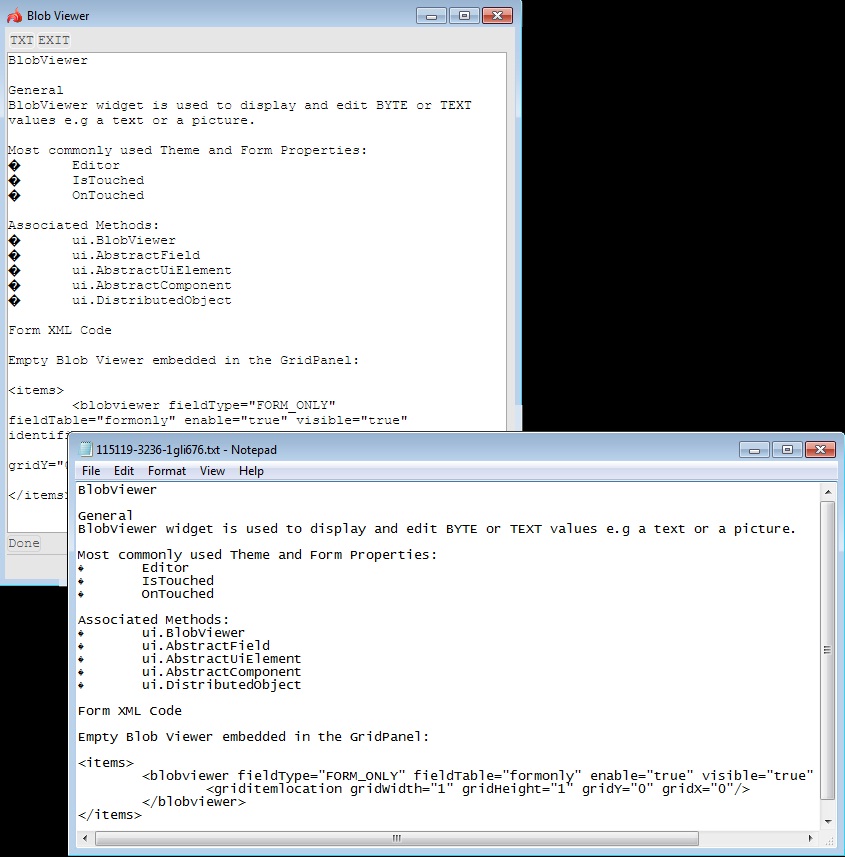
BlobViewer is used to display and edit BYTE or TEXT values e.g. a text or a picture.
![]()
Form XML code:
<BlobViewer dataType="Byte,,,," visible="true" identifier="bl1" gridItemLocation="0,0,1,1"/>
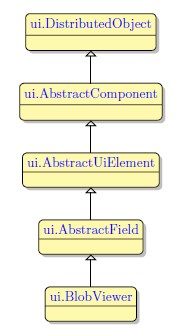
Inheritance diagram:
Most commonly used form properties:
Influence and Behaviour
To add a BlobViewer to your form, do the following:
Step 1. Decide on a place in your form for the BlobViewer widget. Mind that the form must have at least one container (a Root Container) to be able to contain widgets.
Step 2. In the Form Builder's Palette, find the BlobViewer widget.
Step 3. Select the BlobViewer, then drag-and-drop it into the defined place in your form.
After that, the BlobViewer will be added to your form. You will also see it appear in the Form Structure view.
To find an Identifier for referencing that BlobViewer in your .4gl file, select the BlobViewer in the Design Area or in the Form Structure (on that, the Properties view will be activated). Next, find that BlobViewer's Identifier in the list of its properties.
When you specify a file name, be careful with its case.
UNIX is case-sensitive, so it will treat files which names come in different cases as separate files.
#1
Manipulating the BlobViewer contents via DISPLAY <> TO statement:
MAIN
DEFINE bl1 BYTE
OPEN WINDOW test WITH FORM "test_blobviewer"
MENU "m1"
COMMAND "IMG"
LOCATE bl1 IN FILE "lycia.jpg"
DISPLAY bl1 TO bl1
COMMAND "EXIT"
EXIT MENU
END MENU
END MAIN
#2
Manipulating the BlobViewer contents via DISPLAY BY NAME statement
MAIN
DEFINE bl1 BYTE
OPEN WINDOW test WITH FORM "test_blobviewer"
MENU "m1"
COMMAND "IMG"
LOCATE bl1 IN FILE "lycia.jpg"
DISPLAY BY NAME bl1
COMMAND "EXIT"
EXIT MENU
END MENU
END MAIN
Runtime Appearance
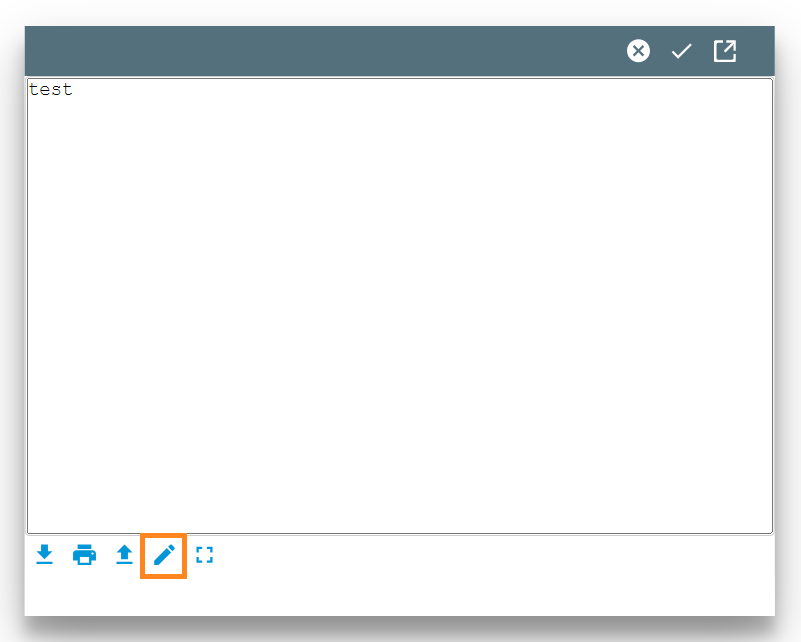
BlobViewer can hold any file, but at runtime it will display and allow editing only those file types (content types) which can be processed by your operation system (for LyciaDesktop) or the browser you use (for LyciaWeb). If the file cannot be displayed due to its format, the placeholder image will display.
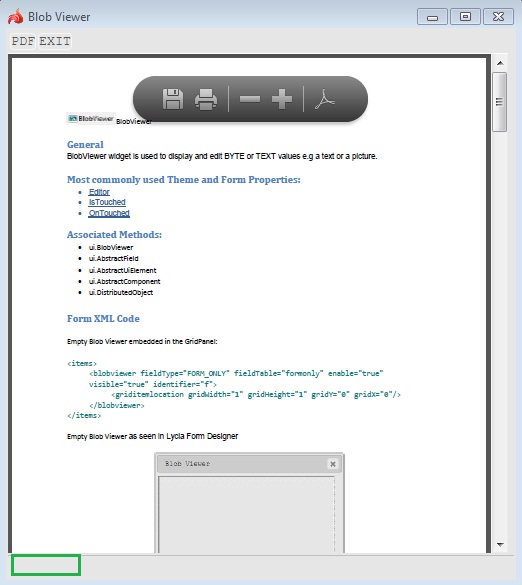
The editing in the browser is possible for the TEXT data only (txt, csv, xls files). For the editable file, the Edit button will be available in the toolbar in the bottom of the window:
In LyciaDesktop, the BlobViewer content can be edited. The editing capabilities depend on the file type and the program set as default for processing that file type.
After you left-click the Edit button, the file displayed by the BlobViewer will be opened in the corresponding editor:
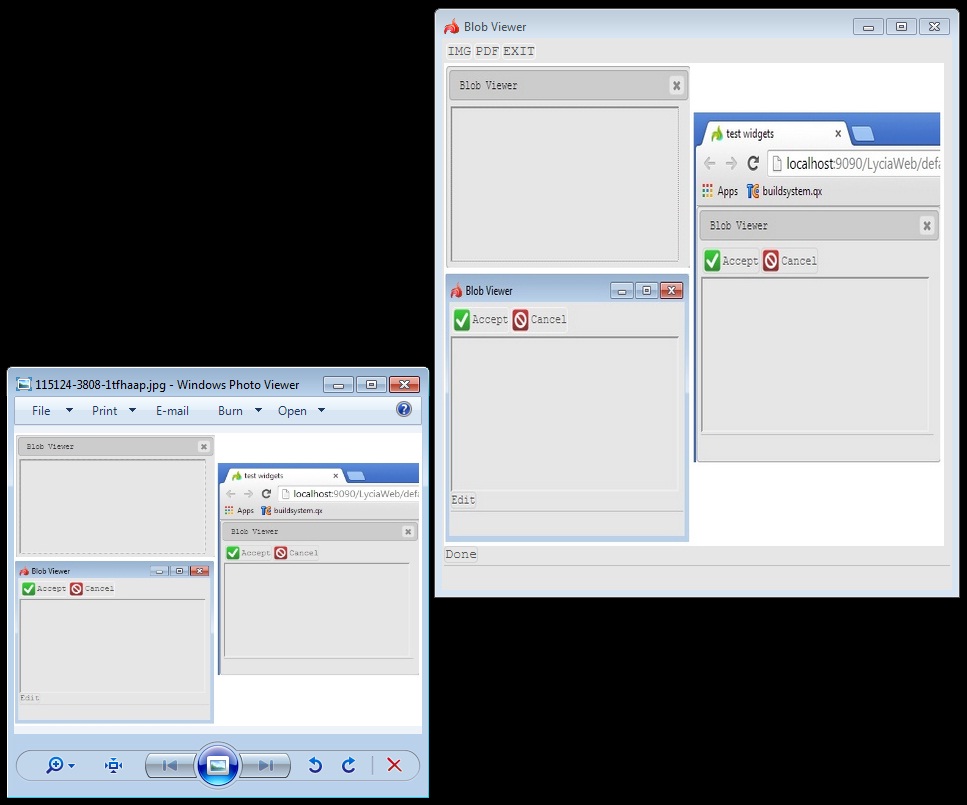
Windows Photo Viewer is the default program for opening image files:
Paint is the default program for opening image files.
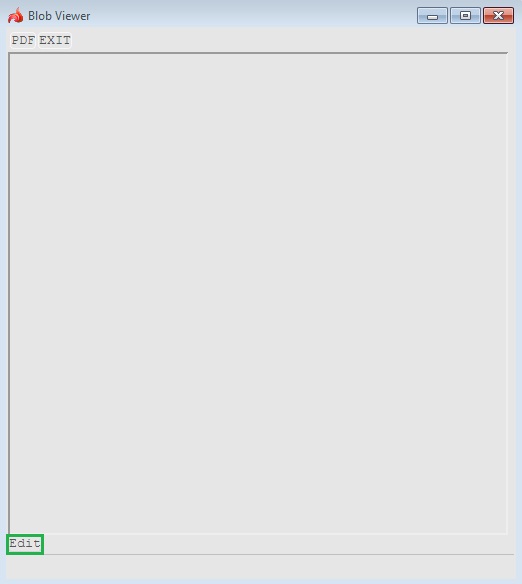
If the file displayed by the BlobViewer cannot be edited, the Edit button will be hidden:
|
|
|
|
Blob Images and Aspect Ratio
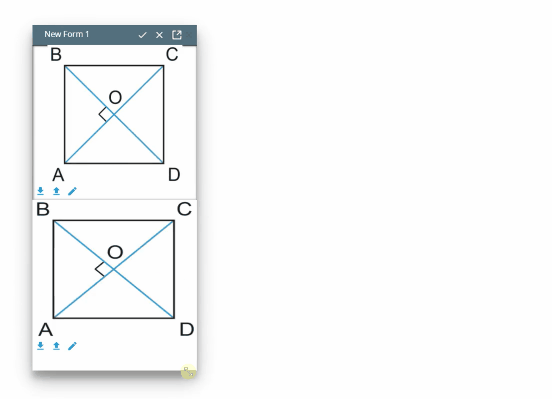
By default, your blob image will keep aspect ratio at the window resizing. To override that behaviour, add image-ignore-aspect-ratio as the value for classNames parameter in the BlobViewer widget properties in the form.
Please see the examples of images behaviour at window resizing with aspect ratio preserved (upper figure) and aspect ratio ignored (lower figure):
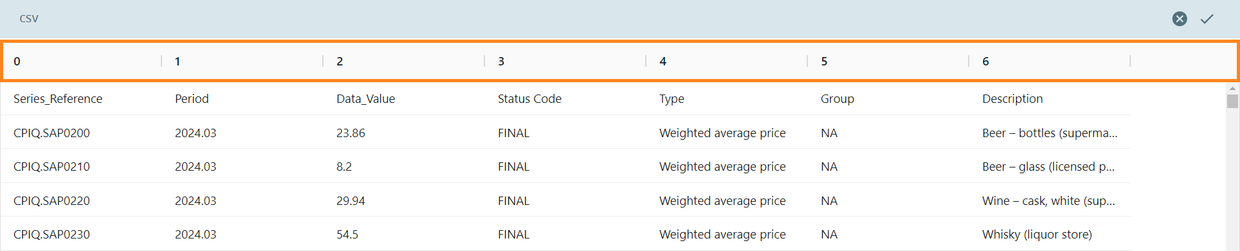
CSV Editor in BlobViewer
The BlobViewer widget has an editor that can display CSV files. You can use a separate form for the CSV spreadsheet, or integrate the spreadsheet with an existing form.
With this Editor, you can:
- Edit the spreadsheet data, save changes, and send them to the server
- Toggle on the spreadsheet header if it has been specified in the first row of the spreadsheet;
- Resize the columns by dragging at their divider;
- Move the columns using drag-and-drop;
- Sort the data in the column;
- Resize the window by dragging a window corner (in case the contents of the form obtain a bigger space than the form window size is, the BlobViewer will add appropriate ScrollBars);
- Download the spreadsheet;
- Print the spreadsheet (it gets converted into PDF format);
- Upload another spreadsheet;
- Open the spreadsheet in the fullscreen mode.
Invoking the CSV Editor
Prerequisites: Before doing the steps described below, prepare the following:
- a .csv spreadsheet
- a blank .fm2 form file
- a .4gl file with a MAIN block
Step 1. Within the MAIN block of your .4gl file, define a variable with the TEXT data type:
Step 2. Assign a window to open with your form:
Step 3. Use the LOCATE clause to make bl2 store the spreadsheet data:
Step 4. Add an INPUT BY NAME clause followed by the WITHOUT DEFAULTS clause to reference and display the spreadsheet data:
Step 5. Add a call for the fgl_getkey() function:
Next, you must adjust your form layout to display the CSV data. To do that, open your .fm2 form file in VS Code's Editor, and fill it in with the following code:
<?xml version="1.0" encoding="UTF-8"?>
<form xmlns="http://namespaces.querix.com/2015/fglForms">
<form.rootContainer>
<GridPanel visible="true" enable="true" fieldTable="formonly" preferredSize="500,500" identifier="rootContainer">
<GridPanel.gridRowDefinitions>
<GridRowDefinition gridLengthValue="100%" />
</GridPanel.gridRowDefinitions>
<GridPanel.gridColumnDefinitions>
<GridColumnDefinition gridLengthValue="100%" />
</GridPanel.gridColumnDefinitions>
<BlobViewer Editor="csv" visible="true" enable="true" verticalAlignment="Stretch" horizontalAlignment="Stretch" fieldTable="formonly" gridItemLocation="0,0,1,1" identifier="bl2" />
</GridPanel>
</form.rootContainer>
<form.screenRecords>
<ScreenRecord identifier="FormOnly" />
</form.screenRecords>
</form>
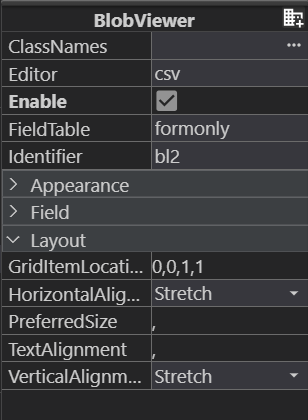
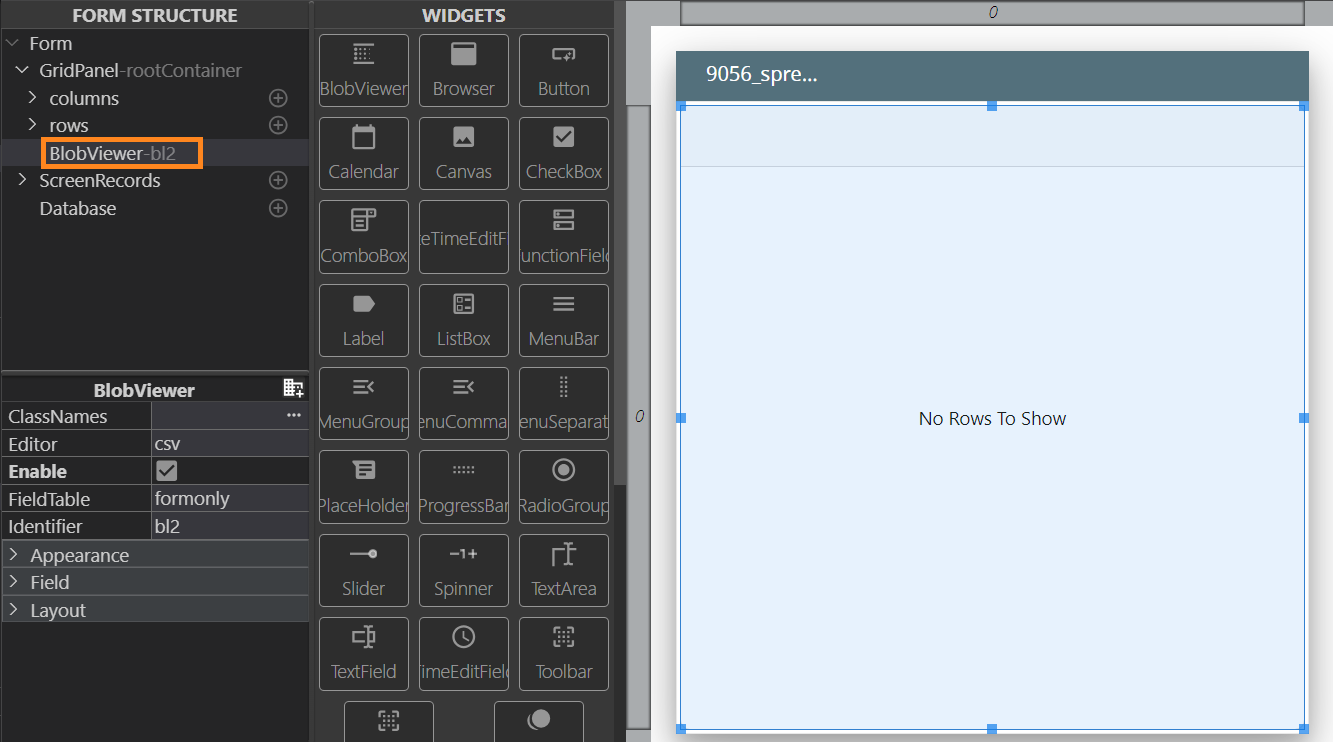
If you open the Form Builder after that and select the BlobViewer widget in the Design Area or in the Form Structure, in the Properties view you should see the following:
CSV Editor Options
The options are located in the lower-left corner of the CSV Editor. Those are the following:
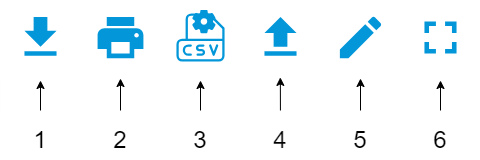
1. Download: By pressing this button, you will invoke the file downloading dialog.
2. Print: This button triggers the CSV file printing dialog:
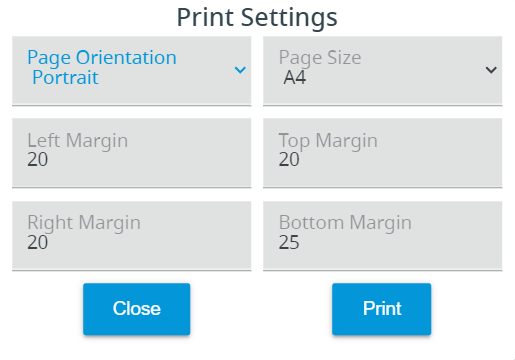
After you configure the parameters you need and click Print, the Viewer will convert the CSV file into a PDF file, and invoke a printing dialog.
3. CSV Parser Settings: This button offers different options for the spreadsheet display:
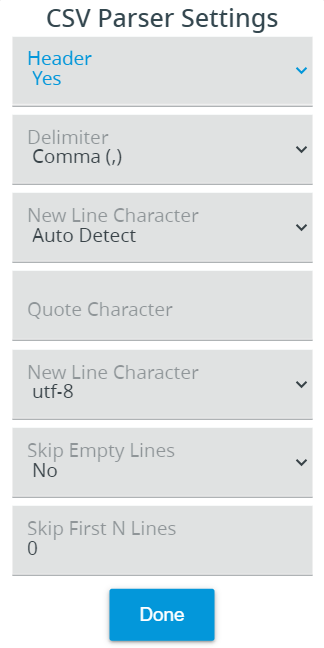
The settings for you to configure are:
- Header: This setting controls displaying the first row of spreadsheet values as a header. If you set this to Yes, the values from the first row of the spreadsheet will be rendered as headers:

If you set this to No, the columns will be assigned with nominal column identifiers (numbers starting from 0):
This is useful when there is no header row in the spreadsheet.
- Delimiter: Controls the parsing of the data into columns. The delimiters that Editor accepts are: Comma (,), Tab (\t), Pipe (|), Semicolon (;) , record_sep (ASCII30), and unit_sep (ASCII31).
- New Line Character: Auto-Detect, Line Feed (\n), Carriage Return (\r), Carriage Return + Line Feed (\r\n).
- Quote Character: Specify the quote character if you need the CSV Editor to remove it from the file display.
- Encoding: Specify the encoding of your CSV file. The default is UTF-8.
- Skip Empty Lines: Set this to Yes to remove empty lines from the file display in CSV Editor.
- Skip First N Lines: In case your CSV file has several lines of data that have to be omitted in the CSV Editor view, type in the amount of those lines to skip them.
Click DONE after configuring the CSV spreadsheet display to exit the configuration dialog.
4. Upload: Using this button, you can upload another CSV file’s contents into the current view and to the server. Mind that this new data will replace the contents of the initially opened file, so at the next program run the BlobViewer’s CSV Editor will display the latest data.
5. Edit: Clicking this button invokes the editing mode so you can edit separate values in the spreadsheet. To edit a value, click Edit, double-click the value you need to edit, and input the new value. Double-click another cell to edit that cell. After all the editing is done, return to the CSV Parser Settings pane in the lower-left corner of the Editor, and select the Done button:

6. Full Screen: Invokes the fullscreen display (if the program is run as a web application, the spreadsheet will occupy the whole tab space).
Predefining the Parser Settings
You can define the parser settings during the form creation for the CSV Editor to open the file(s) with a certain configuration.
There are two ways to do it:
- add the settings code to the .fm2 form file;
- use the Properties view in the Form Builder to add settings/
Parser Settings in the Form File Code
The parser settings can be stored within the tag <BlobViewer> as values of the editorConfig property. For example:
<BlobViewer editor="csv" editorConfig="header=yes delimiter=tab skipEmptyLines=true skipFirstNLines=3" />
Parser Settings at Visual Form Editing
To configure the parser using the Form Builder, do the following:
Step 1. Open the .fm2 form file in the Form Builder, find the BlobViewer in the Form Structure, and select it:
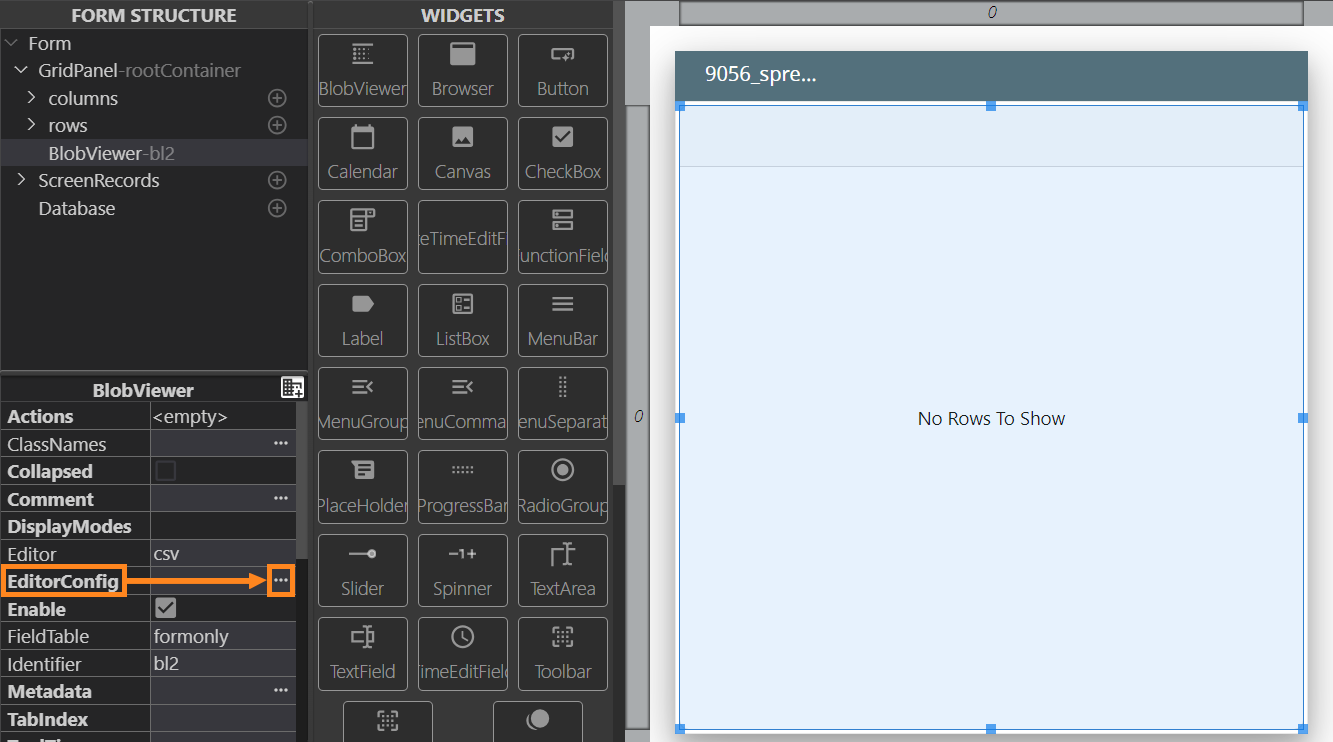
Step 2. In the Properties view, click the Advanced Properties Mode button:

Step 3. In the expanded list of properties, find a property called EditorConfig, and click an ellipsis More button:
A dialog for values input will open:
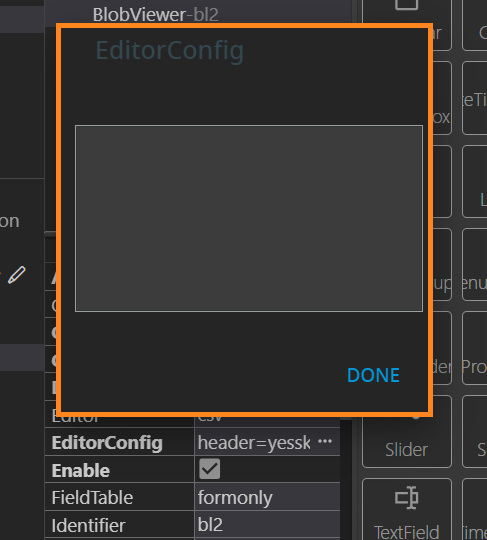
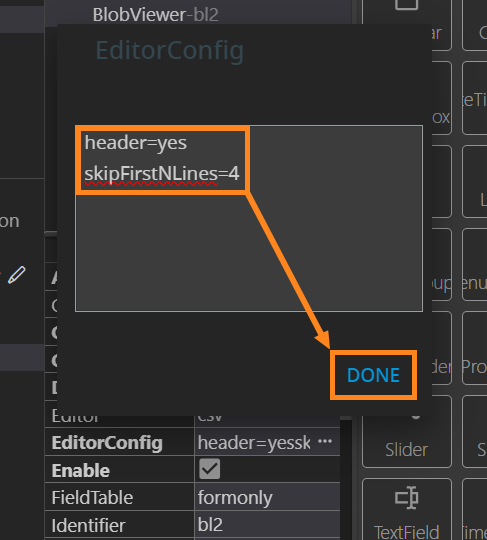
Step 4. In the dialog, add the values in the following format, one setting per line:
header=yes
delimiter=tab
The possible values are the following:
| Setting | Possible Values |
| header | {yes, no} |
| delimiter | {comma, tab, pipe, semicolon, record_sep, unit_sep} |
| newLineCharacter | {auto, lf, cr, crlf} |
| quoteCharacter | {any character, empty field means auto-detection for the ", ', ` characters} |
| encoding | {any encoding} |
| skipEmptyLines |
{false, 0, no, n, off} - for no skipping {true or any other value} - for skipping |
| skipFirstNLines | {0, any positive integer} |
Step 5. After the values have been added, click the DONE button:
The values will be added to the .fm2 form file's code.
Additional Settings
These settings can be used in the EditorConfig property for additional functionality:
| Setting | Purpose | Possible Values |
| spreadsheet-headerwrap=<value>
or spreadsheet-wrapheaders=<value> |
Wraps the header contents | {true, false}. If this is set to false or not set, the headers are clipped. |
| spreadsheet-cellwrap=<value>
or spreadsheet-wrapcells=<value> |
Wraps the cell contents | {true, false}. If this is set to false or not set, the cell contents are clipped. |
| spreadsheet-footerrows=<value> |
Excludes the row(s) from sorting, pinning them to the bottom of the table to serve as a footer. This is useful in cases when there's a Totals row in the table. Example: spreadsheet-footerrows=-1 |
Comma-separated list of negative values to mark the rows to be set as footer. Negative values are counted from the end of the CSV table. For example, -1 means the last row of the table. The format for setting multiple lines as footer: spreadsheet-footerrows=-1,-2,-3 |
| spreadsheet-footer.<index>=<value> |
Can be used to:
Note: The column index starts from 0. Examples: spreadsheet-footer.1=”Sum of something” spreadsheet-footer.2=sum |
{sum, avg, <string>} |