MenuCommand
Form and theme XML code and CSS element selector
Most commonly used form and theme properties
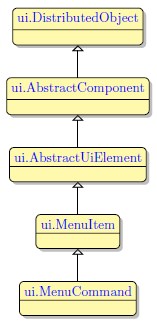
MenuCommand is the actual menu option that can be invoked by the user.
<MenuCommand text="Menu command" visible="true" identifier="mc1">
<MenuCommand.onInvoke>
<ActionEventHandler type="actioneventhandler" actionName="actButtonClick"/>
</MenuCommand.onInvoke>
</MenuCommand>
Theme element filter XML code:
<ElementFilter ElementName="MenuCommand">
...
</ElementFilter>
CSS element selector code:
Most commonly used form properties:
Most commonly used theme properties:
Size
Font:
Image Id ↓
Associated ui methods:
Create ↓
ForName
SetText ↓
GetText
SetImageId ↓
GetImageId
SetShortCut ↓
GetShortCut
SetOnInvoke
GetOnInvoke
SetIsChecked
GetIsChecked
Menus have a reserved place in a window. You cannot place a MenuCommand anywhere you want - you can only insert it to a MenuGroup.
To add a MenuCommand to your form, drag-and-drop it from the Palette to the form in the Design Area.
You can add MenuCommands to MenuGroups or directly to a MenuBar. Once you've added those, you can move the menu commands between menu groups or change their order in a menu group.
Most commonly used form properties of a menu command are text, classnames, identifier, and onInvoke.
To edit the text that will be displayed to the MenuCommand, select that MenuCommand in the Form Structure, and find the text property in the Properties view:

Here you can find out how to change the widget text at runtime using ui methods.
To allow user communication with your menu commands, you must set actions to them using ON ACTION or COMMAND clauses:
MENU
ON ACTION "act1"
DISPLAY "This action was triggered by the menu command 'One'."
...
END MENU
Try the example programs - menucommand and menu - to learn more about working with menu commands.
At runtime, you create and manipulate menu commands with ui methods.
 Step 1. Define a variable of the ui.MenuCommand datatype.
DEFINE menucommand ui.MenuCommand
Step 2. Create a menu command by the ui.MenuCommand.create() method.
LET menucommand= ui.MenuCommand.create("MyMenuCommand")
Step 3. Add this new menu command to an existing menu group by the <ui.MenuCommand>.SetMenuItems() method.
CALL menugroup.setMenuItems([menucommand])
You can also use ui methods to change properties of a menu command:
CALL menucommand.setText("My new command")
CALL menucommand.SetImageId("qx://application/bookmark.svg")
CALL menucommand.SetShortCut("F2")
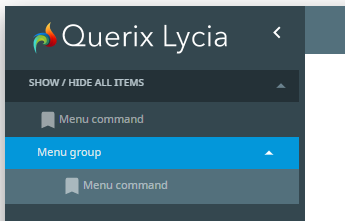
Try the example programs - menucommand_ui and menu_ui - to learn how to create dynamic menus at runtime.
You can change the appearance of a menu command master and user themes and/or css styles.
property applied in the user theme:
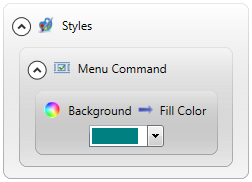
theme XML code:
<?xml version="1.0" encoding="utf-8"?>
<StyleSheet xmlns="http://querix.com">
<ElementFilter ElementName="MenuCommand">
<StyleSheet>
<DoStyleAction>
<SetProperty>
<PropertyPath>
<PropertyName>Background</PropertyName>
<PropertyName>FillColor</PropertyName>
</PropertyPath>
<PropertyValue type="CustomizedColor" RedColor="0" GreenColor="128" BlueColor="128" Alpha="255" />
</SetProperty>
</DoStyleAction>
</StyleSheet>
</ElementFilter>
</StyleSheet>
or
.qx-aum-menu-command {
background-color: teal;
}
runtime appearance:
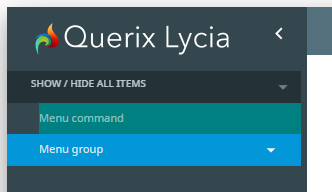
You can turn one of the MenuCommands into a clickable avatar to produce a user account menu, or the Avatar Portal:
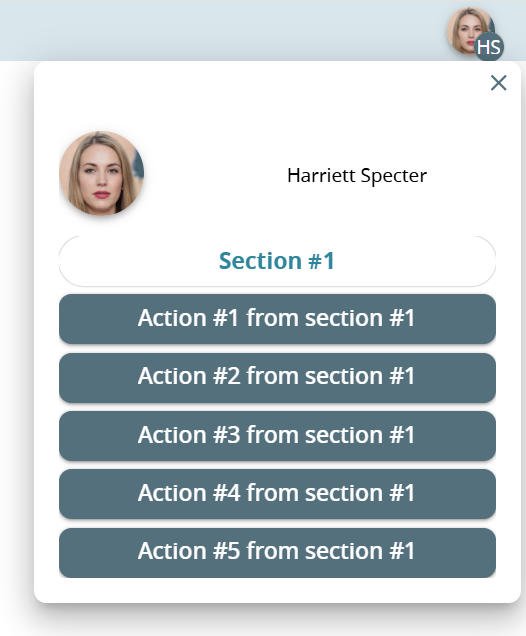
There are several specific conditions:
-
The Avatar Portal can only be displayed on the full screen page;
-
The Avatar Portal can only be displayed for the first application that has been started (meaning that application requests logging in on start, and if it is successful, a first application user starts working with is the app to embed the Avatar Portal in);
-
The avatar can be embedded into a header that is at least 48px tall.
To add the Avatar Portal to your application, proceed as follows:
Step 1. Provide a StartMenu to serve as a seat for your Avatar Portal, with the identifier layout-avatar.
Step 1A. Create a StartMenu file for your program with the means of 4GL Project Explorer.
Step 1B. Open your StartMenu file in Form Builder and add the MenuBar and MenuCommand consequently.
Step 1C. Provide the identifier layout-avatar (important!).
Step 1D. Go to Events in the Properties view, double-click the value field of the OnInvoke event. In the popup window that opens, click the Event Handler field, select ActionEventHandler in the drop-down menu, and provide the Action Name in the next field (here, we will use the name avatar_portal).
If you open your form file in the editor now, the code for the MenuCommand should look as follows:
	<MenuCommand visible="true" identifier="layout-avatar">
            <MenuCommand.onInvoke>
                <ActionEventHandler actionName="avatar_portal" />
            </MenuCommand.onInvoke>
        </MenuCommand>
Step 2. In the program's 4GL code, set image and texts to the layout avatar.
DEFINE avatarMenuCommand ui.MenuCommand
LET avatarMenuCommand = ui.MenuCommand.forName("layout-avatar")
  IF (avatarMenuCommand is not NULL) THEN
    CALL avatarMenuCommand.setImageId("qx://application/image/avatar/ava_12_s.png")
    CALL avatarMenuCommand.setText("Harriett Specter")
    CALL avatarMenuCommand.setToolTip("HS")
  END IF
The setTooltip() method can accept HTML entities.
Step 3. Create a form file for the popup window that will be displayed on clicking the avatar.
Step 3A. To edit the form, open it in the Form Builder and add the necessary items of the Portal.
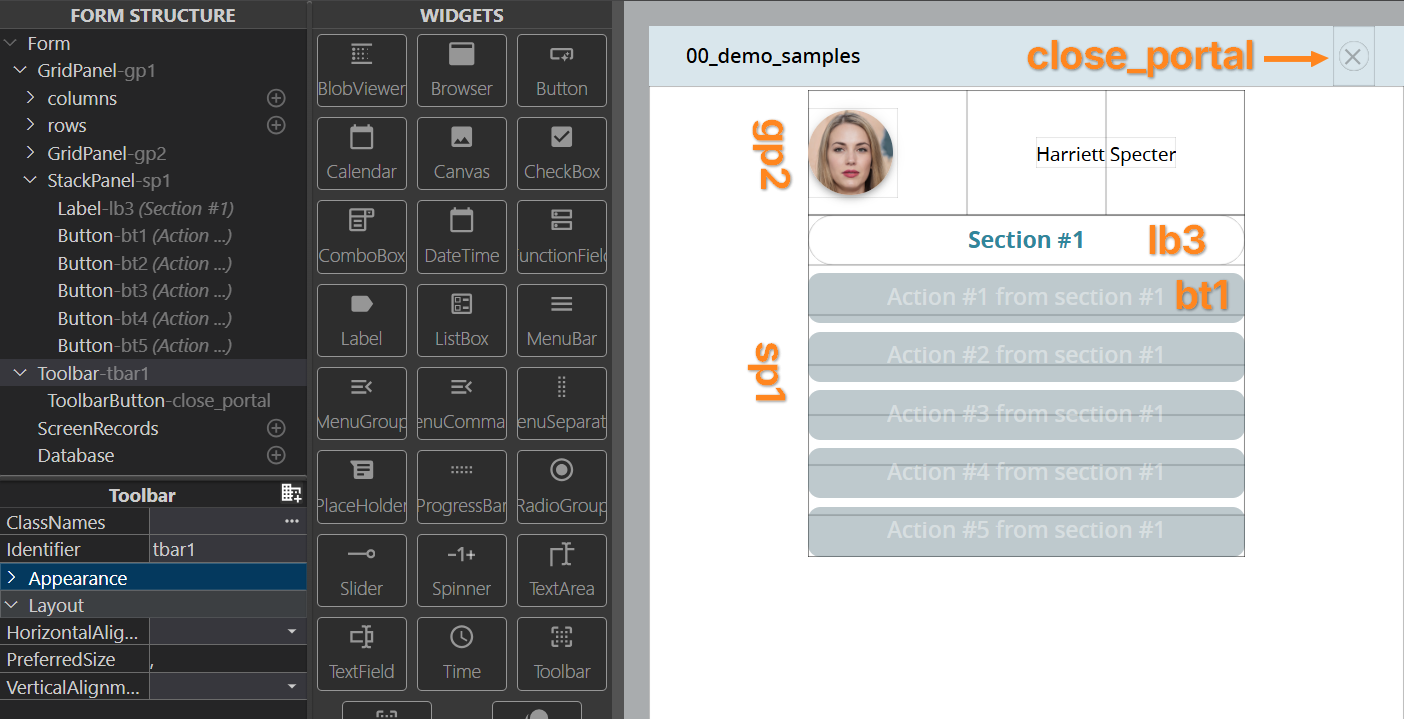
Step 3B. Add a toolbar for the popup window, and a button for the window closing. The form should look as follows:
<?xml version="1.0" encoding="UTF-8"?>
<form xmlns="http://namespaces.querix.com/2015/fglForms">
    <Toolbar visible="true" identifier="tbar1">
        <ToolbarGroup visible="true" identifier="tbar1_tbgroup1">
            <ToolbarButton visible="true" identifier="close_portal">
                <ToolbarButton.image>
                    <Image imageUrl="qx://embedded/close.svg" />
                </ToolbarButton.image>
                <ToolbarButton.onInvoke>
                    <ActionEventHandler actionName="close_portal" />
                </ToolbarButton.onInvoke>
            </ToolbarButton>
        </ToolbarGroup>
    </Toolbar>
    <form.rootContainer>
        <GridPanel identifier="gp1">
            <GridPanel.gridColumnDefinitions>
                <GridColumnDefinition />
            </GridPanel.gridColumnDefinitions>
            <GridPanel.gridRowDefinitions>
                <GridRowDefinition />
            </GridPanel.gridRowDefinitions>
<!-- OTHER FORM WIDGETS SKIPPED -->
        </GridPanel>
    </form.rootContainer>
</form>
The example layout:
Step 4. In the 4GL code, provide actions for the popup window.
MENU
   ON ACTION avatar_portal
      OPEN WINDOW avatarPortal WITH FORM "avatar_portal" attribute(BORDER, style="portal-anchor-layout-avatar")
      MENU
        ON ACTION 'some_action'
          DISPLAY "some action"
        ON ACTION 'close_portal'
          EXIT MENU
      END MENU
      CLOSE WINDOW avatarPortal
Here, the specifics are:
- style is mapped to the CSS class name;
- The style name should be exactly portal-anchor-layout-avatar (the portal-anchor part makes the portal window positioned relative to the widget.