Creating Triggers for Application Actions
Every application action must have a trigger so that users are able to perform it.
There are 5 ways to create a trigger for an action:
- automatically;
- via Form Builder widgets;
- with the UI methods;
- in an .fm2 form directly;
- in a Master or User Action Defaults file.
Note: From the point of visual representation and user interaction, all triggers are the same – regardless of the way they were created by.
What is different is how they are processed and their data is stored by Lycia.
This means that even though end users of your application will see no difference, you will use different methods to manipulate different triggers.
Attention: We do not recommend mixing different ways of creating triggers for one application.
You work on the application will be quicker and easier if you choose one way and use it to create all triggers.
Creating a Trigger for an Action Automatically
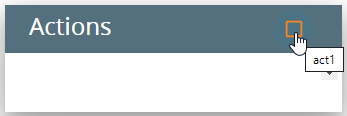
If an action is not associated with any trigger, Lycia will create it automatically in the form of a toolbar button:
...
ON ACTION act1
DISPLAY "one"
...
At runtime, this will look as follows:
You can manipulate the automatically created triggers using these functions:
- fgl_setactionlabel()
- fgl_setkeylabel()
- fgl_dialog_setactionlabel()
- fgl_dialog_setkeylabel()
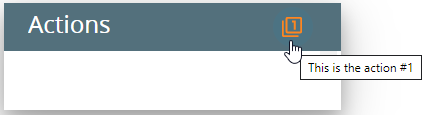
For example,
CALL fgl_setactionlabel("act1", "one", "qx://application/filter_1.svg", 1, FALSE, "This is a toolbar button #1", "top")
...
ON ACTION act1
DISPLAY "one"
...
Creating a Trigger for an Action as a Widget
The usual way to create a trigger for an action is to add a corresponding widget to an .fm2 form.
Most often, actions are triggered by these widgets:
You can also use these widgets to trigger an action:
To use a widget as a trigger for the action, you must follow these steps:
- Think about the actions you need to perform and invent their names (=identifiers).
-
 Define the actions with these names in your 4GL code.
...
ON ACTION act1
DISPLAY "one"
...
- Choose what widget you want to use to trigger this action.
-
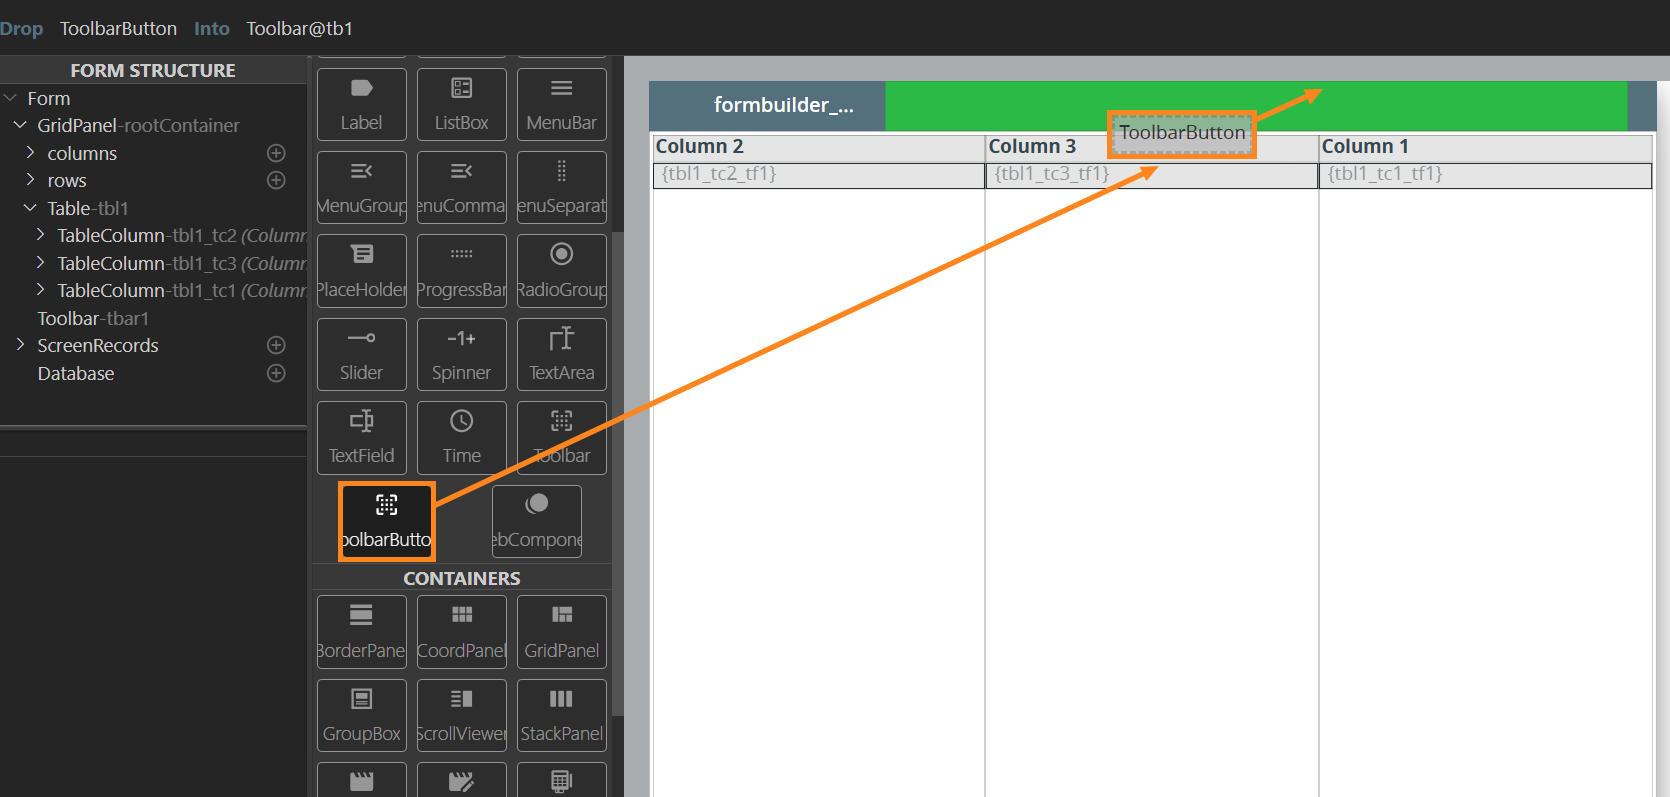
Add this widget to your .fm2 form:
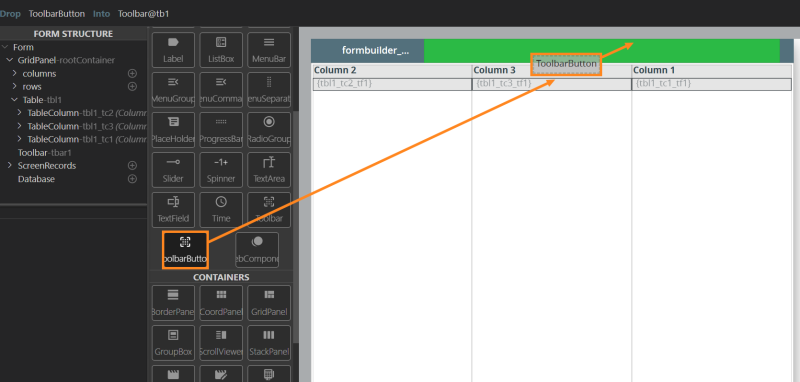
You can read about adding widgets to the form in the Form Builder's documentation.
-
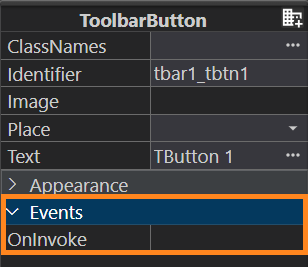
Choose the type of the event and specify its Action Name.
To associate the trigger with a definite property, you must use the same name as in the 4GL code:
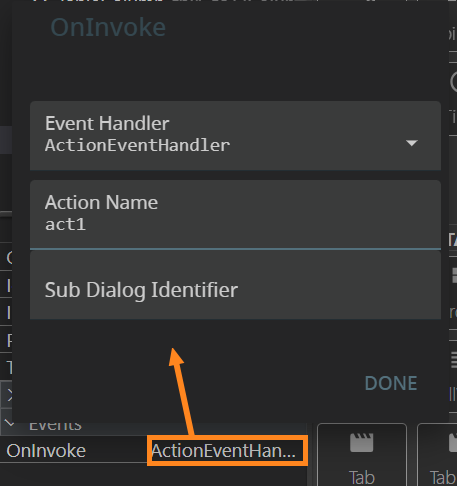
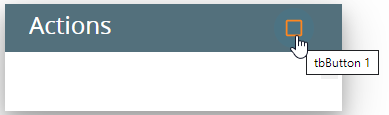
Now the trigger is added to the form and action can be performed at runtime:
You can manipulate these widget triggers by their properties (as shown above) or via the corresponding UI methods.
Creating a Trigger for an Action With the UI Methods
This way is close to the previous one but requires a certain level of 4gl expertise.
To be able to create triggers in this way, you must know how to create and manipulate the elements of the ui.<Widget> data type and how to use different ui methods.
You can read about ui methods and elements in the page of the corresponding widget. For example, ui.Button or ui.MenuCommand.
To create a trigger for the action by ui methods, you must follow these steps:
- Think about the actions you need to perform and invent their names (=identifiers).
-
Define the actions with these names in your 4gl code.
...
ON ACTION act1
DISPLAY "one"
...
- Choose what widget you want to use to trigger this action.
-
Define the variable of this ui.<Widget> data type.
DEFINE tb_button ui.ToolbarButton
-
Define a variable of ui.BackgroundServerEventHandler data type to set an event for this widget.
DEFINE buttonEvent ui.BackgroundServerEventHandler
-
Create this widget and add it to your form.
Please remember that some widgets – like Button, MenuBar, or ToolbarButton – can be created with UI methods at runtime and other widgets – like Toolbar – cannot be created with UI methods at runtime and must be added to the form in Lycia Form Builder.
Here is an example of creating a toolbar button with UI methods at runtime:
DEFINE tb_group ui.ToolbarGroup
DEFINE tb_button ui.ToolbarButton
...
LET tb_group = ui.ToolbarGroup.Create("tbg","toolbar")
LET tb_button = ui.ToolbarButton.Create("bt1","tbg")
CALL tb_button.SetText("form button")
-
Specify an event for this widget by these UI methods – ui.BackgroundServerEventHandler.Create(), setCallBackAction(), and setOnInvoke().
LET buttonEvent = ui.BackgroundServerEventHandler.Create()
CALL buttonEvent.SetCallBackAction("display")
CALL tb_button.SetOnInvoke(buttonEvent)
Do not forget to use the correct names of the actions.
4GL developers can manipulate these triggers by the corresponding UI methods (e.g., setText(), setImage(), setTooltip(), etc).
Creating a Trigger for an Action Directly in an .fm2 Form
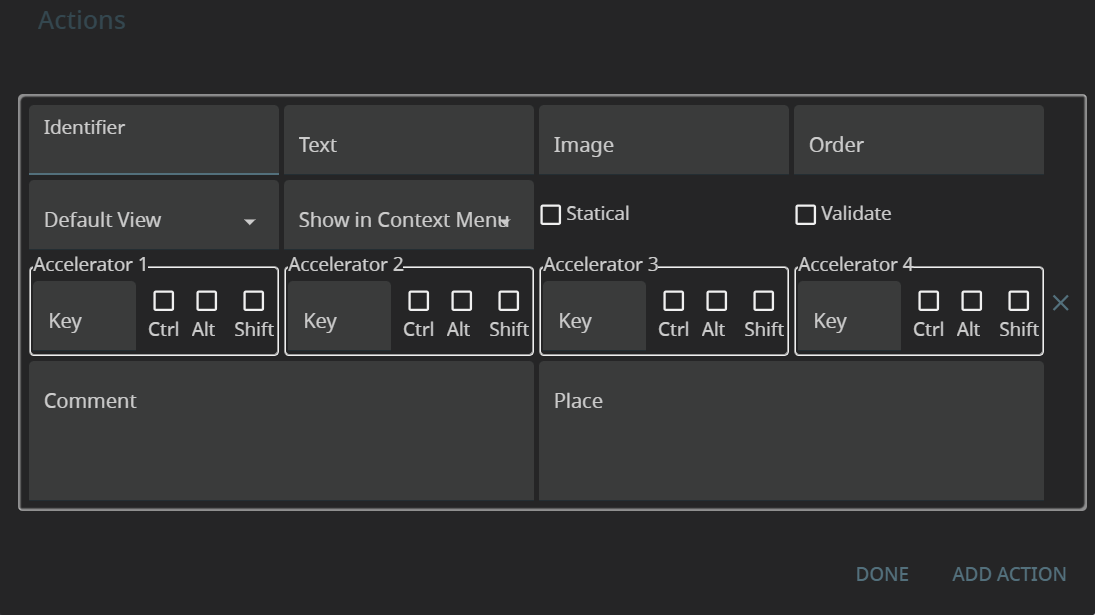
Every form element of a .fm2 form file has a property, Actions, that allows creating triggers for application actions:
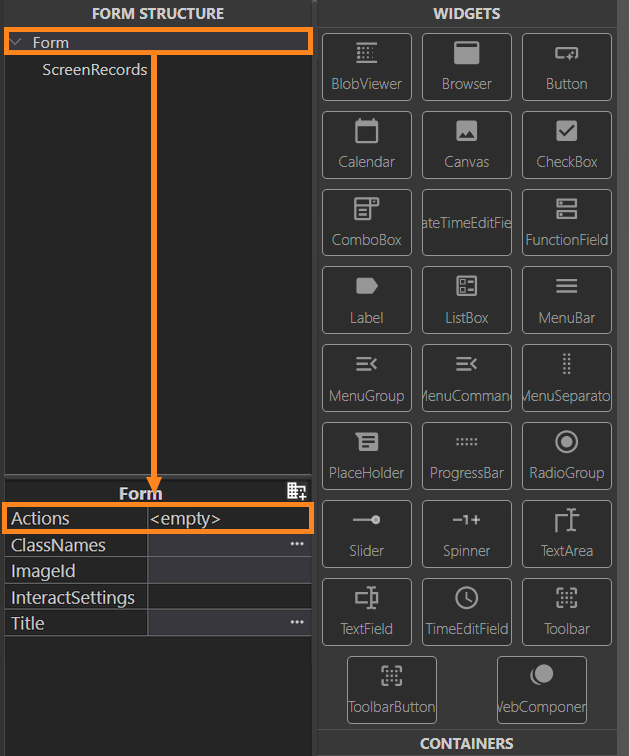
This property has all the attributes of the trigger:
To create a trigger for the action in a .fm2 form directly, follow these steps:
- Think about the actions you need to perform and invent their names (=identifiers).
-
Define the actions with these names in your 4GL code.
...
ON ACTION act1
DISPLAY "one"
...
-
In the .fm2 file, add an action in the Actions property of the Form element.
-
Specify its identifier: to associate the trigger with a definite property, you must use the same name as in the 4GL code.
More details about the Actions property is specified in the Actions page.
Creating a Trigger for an Action in System, Master, and User Action Defaults Files
SystemActionDefaults.fm2 is a global configuration file containing the predefined application actions, i.e. the application actions applied to all Lycia-based 4GL applications. However, if you need to customize action defaults, configure the Master action defaults file or User action defaults file: they override the System action defaults file. The System action defaults file can be overwritten at Lycia updates, so please refrain from editing it.
Master Action Defaults file is an Action Defaults file that contains default attributes for actions that can be performed in the 4GL application. Master Action Defaults files have the name of the program, are stored together with it, and are loaded automatically when the application is run.
User Action Defaults file is a user-defined configuration file with extension .ad2 or .fm2 that contains default attributes for actions that can be performed in several different 4GL applications in order to secure their common runtime behavior or change it according to current tasks and purposes. It has a higher priority than the Master Action Defaults file.
All these files have the same basic structure as any .fm2 form including the property, Actions, that is used to create triggers for the application actions.
The algorithm of creating a trigger for an application action in an Action Defaults file is almost the same as in the .fm2 form directly. The difference is in the scope to which this action will be applied:
- If the action trigger is added to a User Action Defaults file, the corresponding action will be available for all the Lycia-based 4GL applications in which this user Action Defaults file is called.
- If the action trigger is added to a Master Action Defaults file, the corresponding action will be available for the current 4GL application.
- If the action trigger is added to an .fm2 form directly, the corresponding action will be available only while this form is open.
To create a trigger for the action in an Action Defaults file, follow these steps:
- Think about the actions you need to perform and invent their names (=identifiers).
-
Define the actions with these names in your 4GL code.
...
ON ACTION act1
DISPLAY "one"
...
- Open the Action Defaults file with the administrator privileges or create the necessary Action Defaults file.
- In the Action Defaults file, add an action in the Actions property of the Form element.
-
Specify its identifier – to associate the trigger with a definite property, you must use the same name as in the 4GL code.
- Save the Action Defaults file.
- Rebuild the affected programs.